
8 Important Tips to Get Started with Your New AirPods Pro
 Credit: Apple
Apple’s AirPods Pro have begun arriving in Apple Stores and even showing up on the doorsteps of those who were quick to order them after they were announced on Monday.
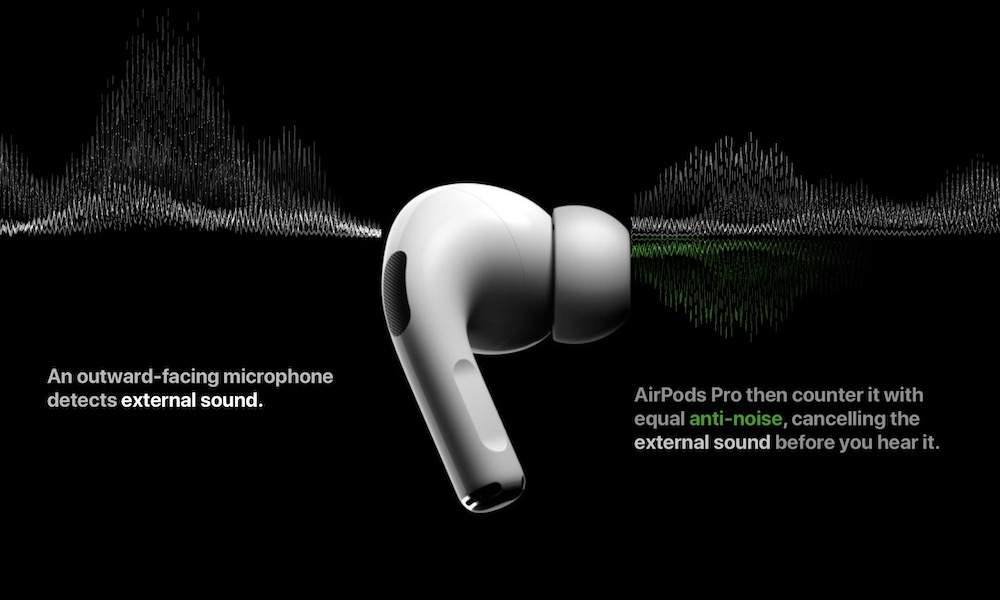
Delivering Active Noise Cancellation, a new in-ear design, and Adaptive EQ, Apple’s newer high-end AirPods promise to live up to their “Pro” moniker, as well as addressing some of the problems of Apple’s earlier original AirPods design, which as popular as they have been, understandably weren’t for everyone.
Read on to learn 8 things you'll want to know if you’re just getting started with Apple’s newest premium AirPods, or even just considering picking up a pair for yourself.
Pairing Them Up
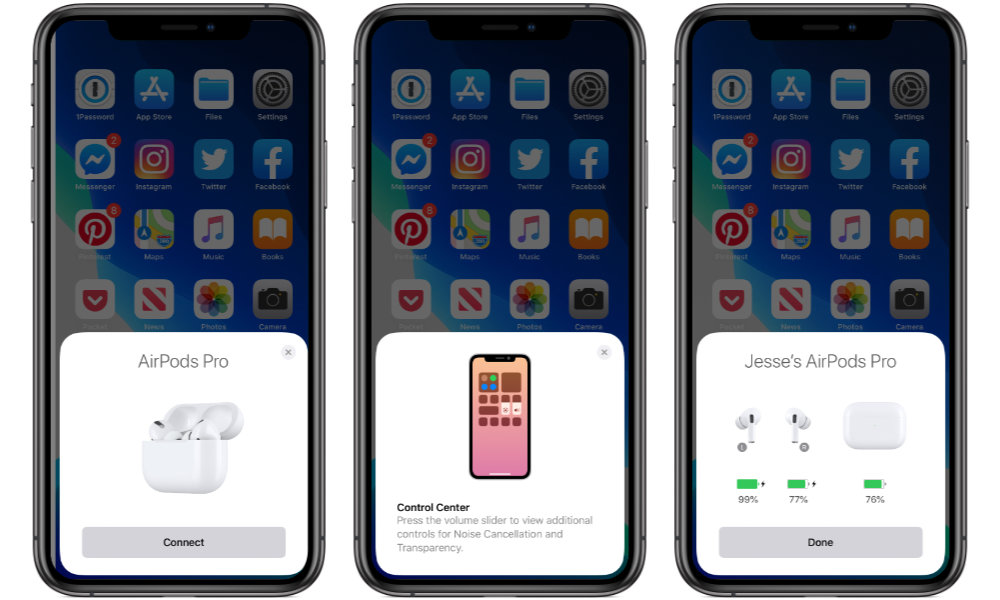
If you’ve used any of Apple’s or Beats’ W1/H1-equipped headphones before, setting and pairing up the new AirPods Pro will be no surprise. They come with enough of a charge in the box to get going right away, so simply opening the cover is enough to trigger the pairing process.
Apple provides a couple of more steps to demonstrate the new features, but otherwise you’ll be good to go as soon as you step through it, and just like the rest of Apple’s wireless headphones, the pairing will sync between all of your Apple devices that share the same iCloud account, from your Apple Watch to your iPad and your Mac.
The only catch is that you’ll have to make sure you’ve updated to the latest versions of Apple’s operating systems that were released earlier this week — that’s iOS (and iPadOS) 13.2, watchOS 6.1, macOS Catalina 10.15.1, and tvOS 13.2.
A Much Better Fit
With its original AirPods, Apple aimed for a “one-size fits all” design, but sadly there were those of us for whom they just didn’t work. For example, as much as I really wanted to like the standard AirPods — I bought them not once, but twice — they just never properly fit my cavernous ears, making even passive noise isolation a non-starter. After walking down the street and pushing them back into my ears every 30 seconds, I had no choice but to give up and return them both times.
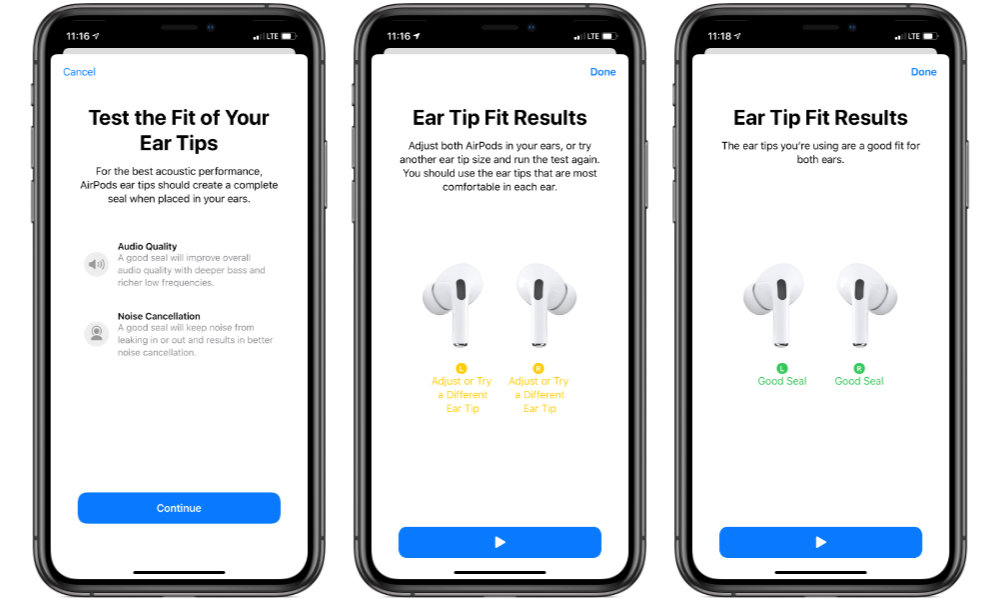
The good news is that Apple’s AirPods Pro are the answer to this problem. Not only is there a new in-ear design with proper silicone ear tips, but Apple includes three different sizes in the package and even goes so far as to offer a new “Ear Tip Fit Test” feature that promises to tell you if you’re wearing the optimal size of ear tips.
The AirPods Pro come with the “medium” size of tips pre-attached, which I actually found provided a pretty reasonable fit — already significantly better for me than Apple’s standard AirPods. After running Apple’s Ear Tip Fit Test, however, it suggested that I try the larger size. This turned out to be even better — the in-ear seal was more snug and provided improved sound and noise isolation overall.
While I probably could have identified this by trial-and-error, it was nice to have the extra confirmation that I was wearing the right ear tips. If you’re the sort of person who struggles with this kind of a decision, Apple’s fit test is an especially great feature.
Apple doesn’t offer up the Ear Tip Fit Test automatically, so you’ll have to go and find it — it’s in the settings for the AirPods Pro which can be accessed by going into Settings->Bluetooth and tapping the “i” beside your AirPods once they’ve been paired.
Announce Messages with Siri
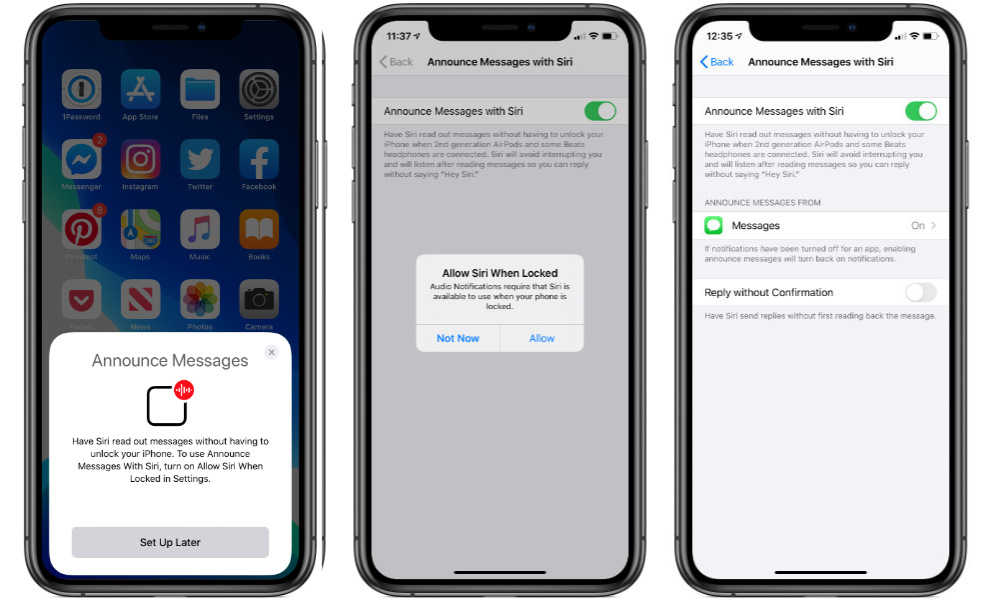
One of the new features that iOS 13.2 brings not only to the new AirPods Pro, but to Apple’s other H1-equipped wireless headphones — which includes the second-generation AirPods, Powerbeats Pro, and recently-released Beats Solo Pro — is the ability to have Siri automatically announce incoming messages whenever you’re wearing them.
There is one catch with this feature, however — not only will you need to be running iOS 13.2, of course, but you also need to make sure that Siri can be used from the lock screen of your iPhone. If you’ve disabled this for security reasons, the AirPods Pro setup process will let you know this, and advise you to turn it back on. This will also happen if you try to toggle the feature on from where it appears in the main Siri & Search settings.
It’s a little bit disappointing that you have to give up a bit of lock screen security in order to use this feature, but it’s sort of understandable. Ideally, however, we’d prefer to see a separate setting just for the AirPods, allowing users to have their messages announced while still preventing just anybody from picking up their iPhone and making a Siri request.
In the Announce Messages with Siri settings, found under Settings->Siri & Search, you also have the ability to choose who to receive announcements from — Favorites, Recents, Contacts, or Everyone — as well as toggling on whether you want to have Siri read back your replies for confirmation or not. What’s also interesting here is that the settings have a modular design, with Messages listed as only one possible option, which suggests that Apple will be allowing third-party developers to plug their own messaging apps in here too. Of course, this isn’t all that surprising considering that we’ve heard that Apple will soon even allow Siri to default to other messaging apps.
New Options in Control Center
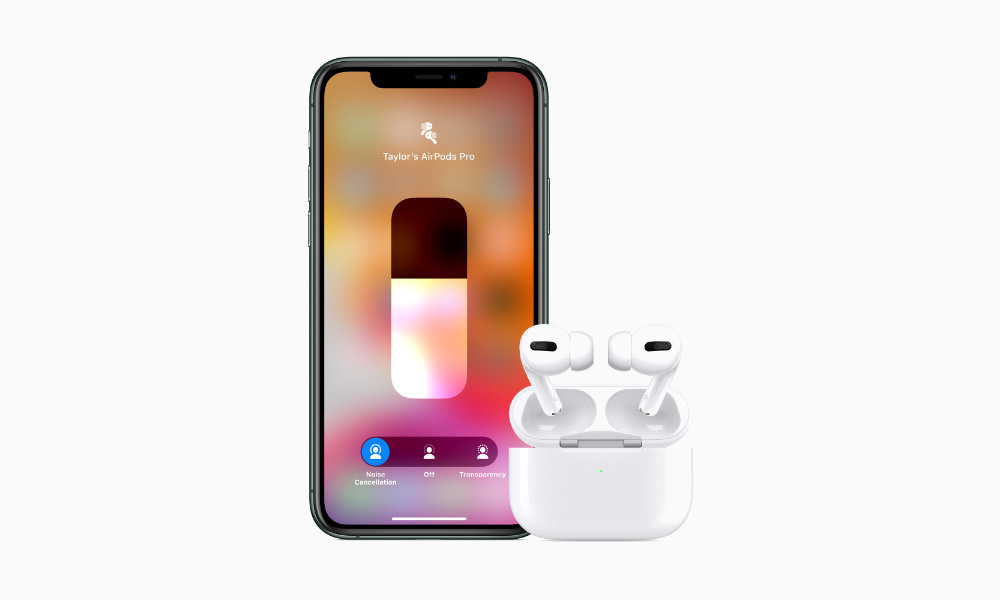
Since Apple’s new AirPods Pro also sport Active Noise Cancellation and audio Transparency features, Apple has added new options to the iOS 13.2 Control Center to let you easily switch these settings.
Once the AirPods Pro are paired up, your volume slider in control center will change to show the logo for the AirPods Pro, and pressing and holding on it will not only bring up the enlarged volume control slider, but three buttons at the bottom to choose between Noise Cancellation, Transparency, or neither.
You’ll feel haptic feedback when switching modes, and Apple also provides distinct tones for each mode so you’ll know which mode you’re switching to. You can also press and hold on the stem of either earbud to switch between modes, with the same audible chime used to identify which mode you’re switching to. The Noise Control settings can also be found in the AIrPods Pro settings screen.
Force Touch Stems
As noted earlier, the stem of each AirPod now provides the ability to switch noise cancellation and transparency modes by pressing firmly and holding with a “force touch” gesture. This can also be customized in your AirPods Pro settings on the iPhone (found under Settings->Bluetooth) to either switch one of the modes on or off, cycle between all three settings, or to active Siri. The settings are independent for each AirPod too, so you could use the left stem to trigger Siri and the right to switch noise cancellation and transparency modes, or even set one AirPod to toggle noise cancellation on and off and the other to toggle transparency on and off.
The stem of each AirPod also now provides standard playback and call controls via a short force touch press, similar to other Apple headphones. A single short press pauses or resumes your music. If your iPhone is ringing, it will also answer a call, or end a call in progress. A double-press will skip to the next track, and a triple-press will skip back to the beginning of the current track or the previous track.
Audio Sharing
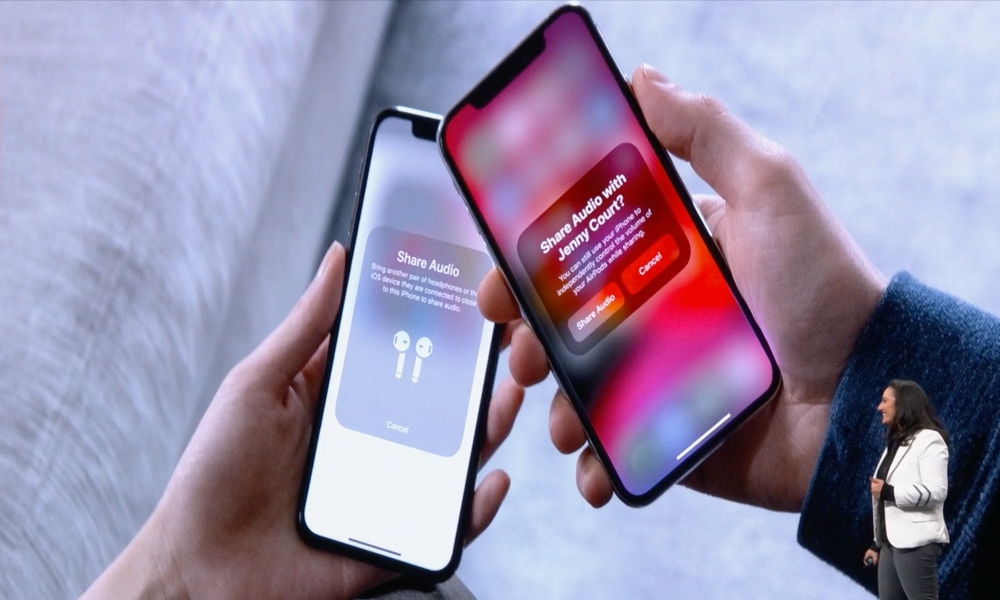
While it’s not a feature unique to the new AirPods Pro, the newest AirPods also take advantage of the new Audio Sharing capabilities introduced in iOS 13.1, allowing you to listen together with somebody else who is using any of Apple’s W1 or H1-equipped earphones or headphones. This not only includes older AirPods, but also any of Beats’ Powerbeats, Solo, or Studio wireless headphones.
Audio Sharing can be triggered by bringing up the normal playback destination controls, which now include a “Share Audio” option shown below your AirPods. Tap on this and then either bring a friends’ headphones or the iPhone or iPad they’re connected close to your iPhone, and Audio Sharing should just start working. It’s seamless and magical.
Charging your AirPods Pro
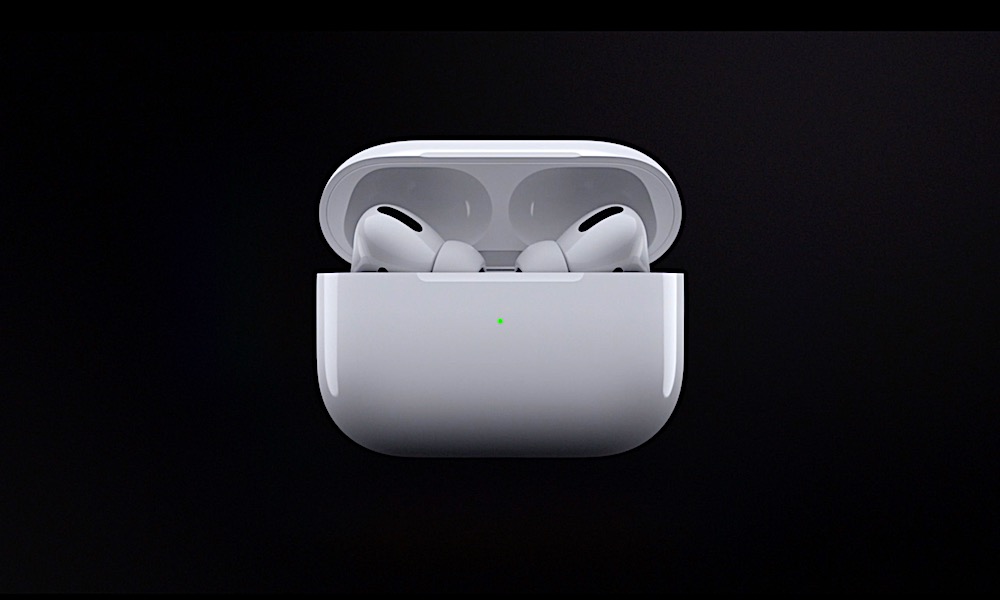
Unlike Apple’s standard AirPods, the AirPods Pro only come with a Wireless Charging Case, so you can easily charge them from any Qi-enabled wireless charging pad, which we suspect is how most users will want to go.
That said, Apple does include a Lightning port on the bottom, and interestingly, a USB-C to Lightning cable in the box. This seems to suggest that Apple is targeting the AirPods Pro more heavily at iPhone 11 Pro users, which also include a USB-C power adapter, but it also suggests that we’ll be seeing a more wholesale move to USB-C in the future.
If you don’t have a USB-C charging adapter, you can still charge it up from the USB-C ports on newer MacBook Pro models, but of course you can also just use any other Lightning cable with it as well should wireless charging not be an option.
Pairing with Other Devices
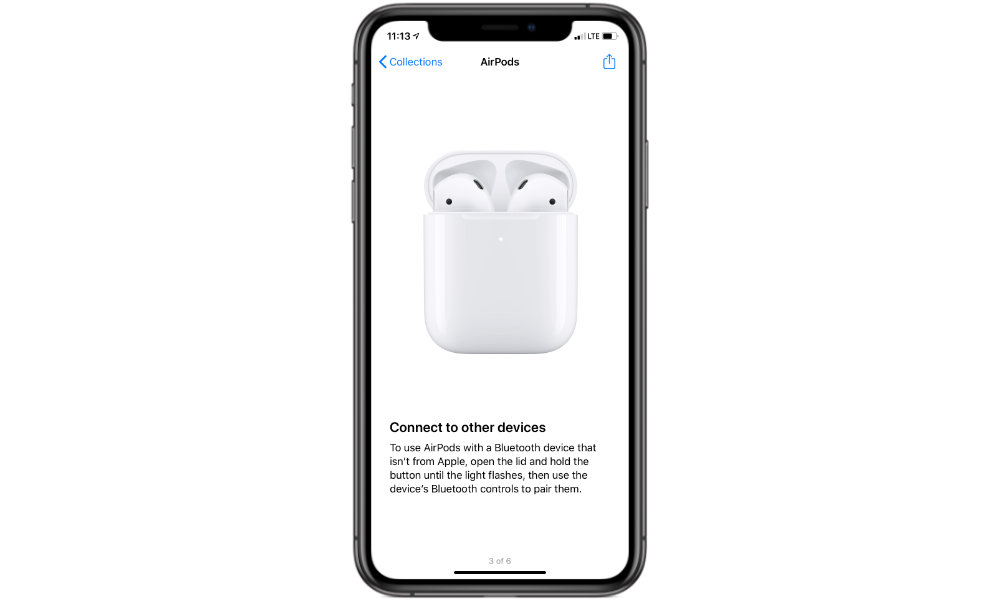
While Apple’s AirPods Pro work best with Apple devices, they’re still Bluetooth headphones, and can therefore be paired with any other Bluetooth device. This works just like it did with the original AirPods — there's a button on the wireless charging case that can be used to put them into Blueototh pairing mode — while the AirPods Pro are in the case — and once you’ve done this, they pair up just like any other modern Bluetooth headphones would.