Unlock Your Mac’s Potential with These 7 Hidden Features
 Credit: Africa Studio / Shutterstock
With every new macOS or iOS software update, Apple introduces a trove of exciting and useful new features designed to make its operating system more efficient, intelligent and user friendly than ever. While macOS 10.14 is just around the corner, potentially boasting long-awaited enhancements like a dedicated Dark Mode and more, macOS at present is still brimming with neat features and useful tricks. Continue reading to learn about 7 hidden macOS features.
7 Insert Emojis
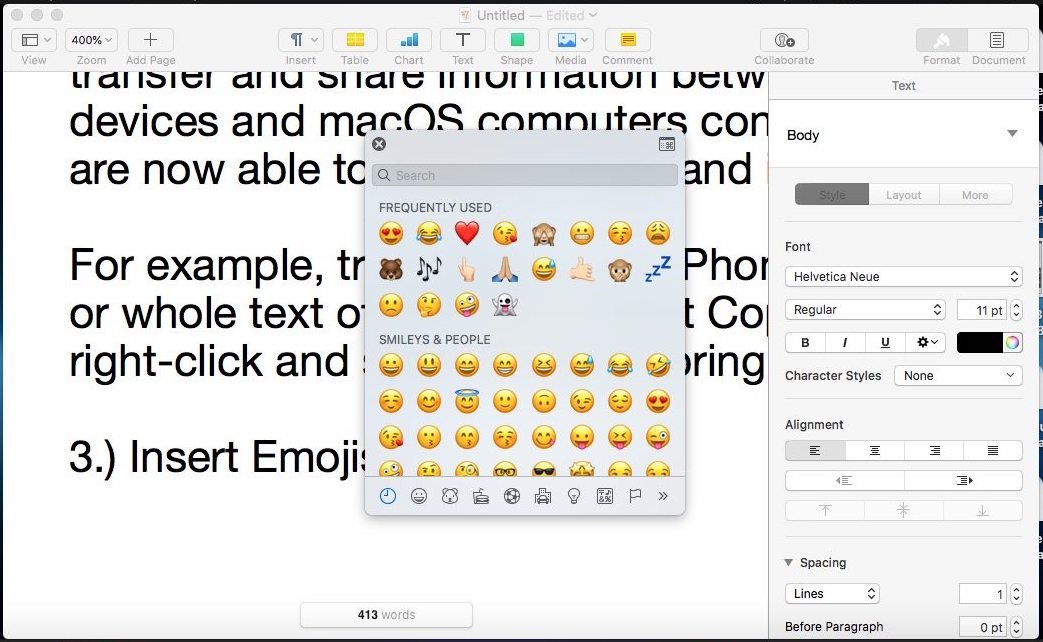
When typing in any document or application on macOS, quickly and easily enter emoji characters into your text by holding down the Control and Command keys on the keyboard while tapping on the Space Bar.
This action should reveal the macOS emoji menu interface shown above — from which you’re able to easily browse and select an emoji to insert into your document.
6 Universal Copy and Paste
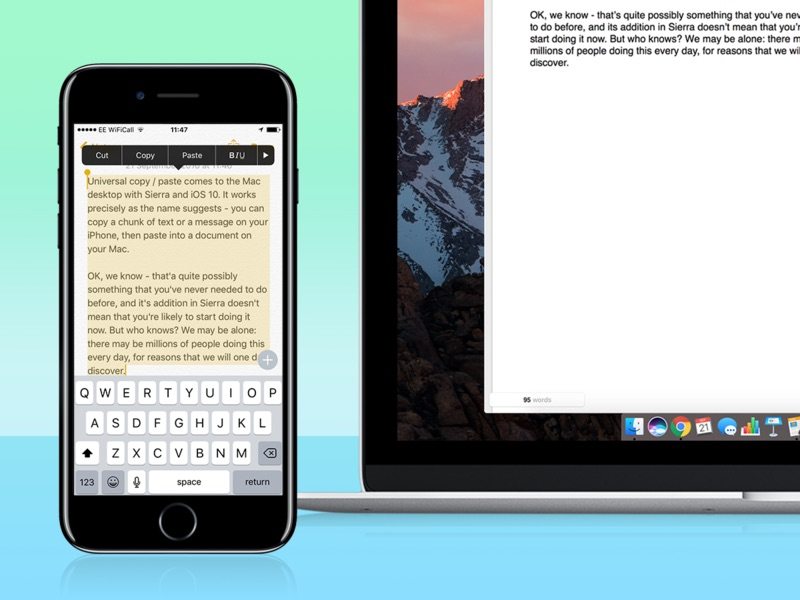
For iOS users who also use a Mac computer, Apple has made it easier than ever before to transfer and share information between your smartphone and desktop.
iOS devices and macOS computers connected to the same Wi-Fi network and logged into the same iCloud account may be used to copy and paste text data directly from one into the other.
- Try bringing your iPhone near your Mac, then opening Notes and copying a selection or entire text of the note.
- Then on your macOS desktop, right-click and select Paste to paste the text in any open field.
5 Screenshot on Mac
To capture screenshots on a Mac running the latest macOS Sierra or High Sierra, press Command + Shift + 4 simultaneously.
There's another way to access the screenshot tool too.
- Alternatively, click the Finder icon from the desktop dock.
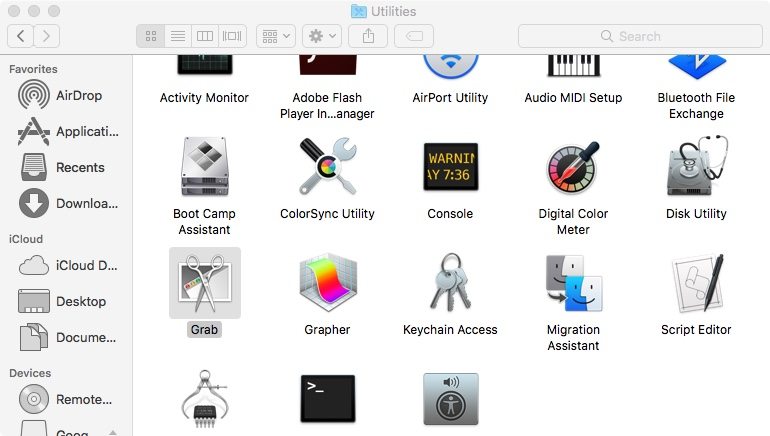
- From the pop-up window, click Applications, scroll down and open Utilities, then double-click Grab to launch the screenshoot tool. NOTE: if you plan to use this feature often, consider placing its icon permanently in the dock for quick and easy access.
- To capture a screenshot: Open Grab, and, from the top macOS menu bar, select Capture, then select which type of screenshot you’d like to capture: a Selection of the window, the whole Window or the Whole Screen.
By selecting either option, macOS will display a prompt with simple instructions on how to proceed and capture the screenshot. Save the image to desktop, new or existing folder in .JPG, .PNG, .PDF or other image format for easy sharing.
4 Rearrange Your Menu Bar Icons

macOS allows users to rearrange the icons displayed in the menu bar on their desktop. Simply hold down on the Command key and drag almost any icon to rearrange its position.
3 Picture-in-Picture Videos

While you’re watching a video on your Mac via YouTube, iDVD, or other Apple/Internet protocol, you’re able to view a condensed, customizable window playing the video content picture-in-picture by selecting the PIP icon in any video player.
- If in the event there’s no picture-in-picture icon in the bottom right-hand corner of the video player, users can access PIP mode by simply holding down on Control while double-clicking inside the video playback area to produce a pop-up menu of shortcuts.
- View the content through a new, customizable and resizable window by clicking Enter Picture in Picture.
2 Optimize iCloud Storage to Free Disk Space
When our Mac’s storage gets full, everything from completing basic tasks to opening and running applications can slow down. Luckily, with recent builds of macOS Sierra and later, Apple has incorporated a useful iCloud feature allowing users to move saved files from your hard drive to the cloud.
- From your macOS desktop, click the Apple logo and navigate to System Preferences.
- Select iCloud.
- Click on the Options button next to iCloud Drive.
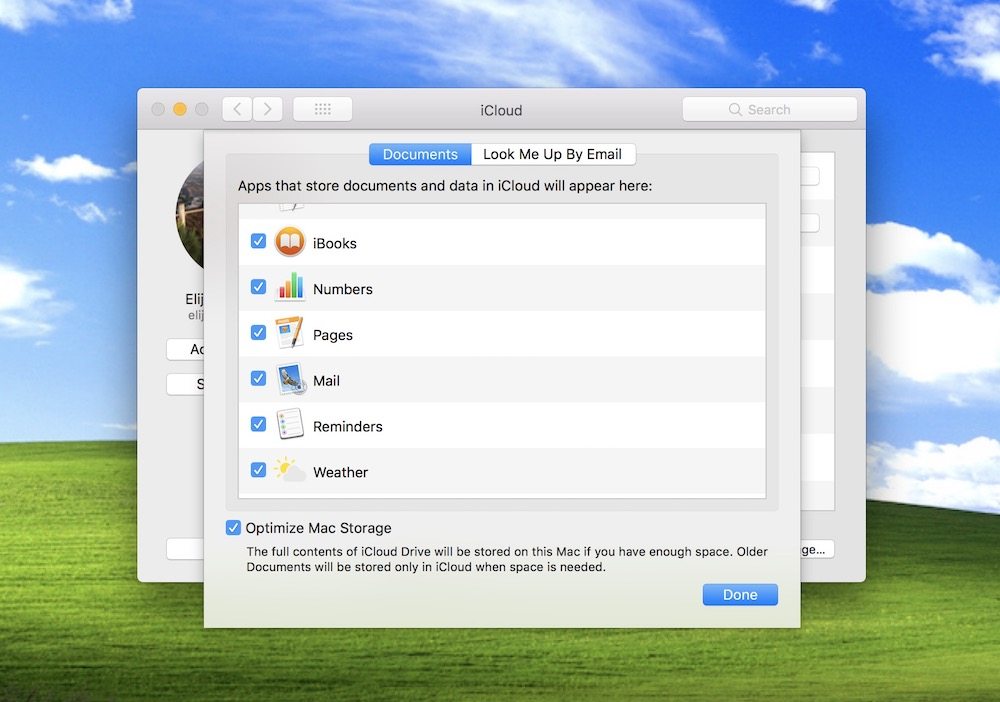
- By checking off the Optimize Mac Storage checkbox as shown in the menu below, macOS will upload copies of older files to your iCloud account, while removing the physical file from your hard drive or SSD. In this way, macOS allows you to free up raw storage space while also giving you access to older files at your discretion by uploading them from iCloud.
1 Clean up Clutter to Free Disk Space
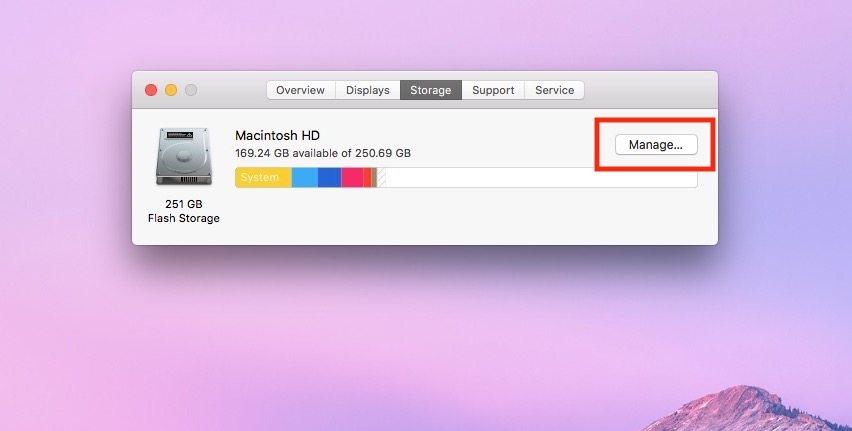
Another sure-fire way to speed up your Mac and free up disk space is to optimize storage using Apple’s proprietary macOS tools.
- To access the menu of options for optimizing macOS storage, click on the Apple icon in the upper left-hand corner of the macOS menu bar.
- Select the About This Mac option, and then select Storage from the upper-middle menu bar.
- From the Storage tab, click Manage and wait for the menu (shown below) to appear displaying a list of options for maximizing your Mac’s storage. You can, for example, transfer photos, files, and other documents stored on your Mac to iCloud, freeing up storage space on your Hard Drive or SSD.
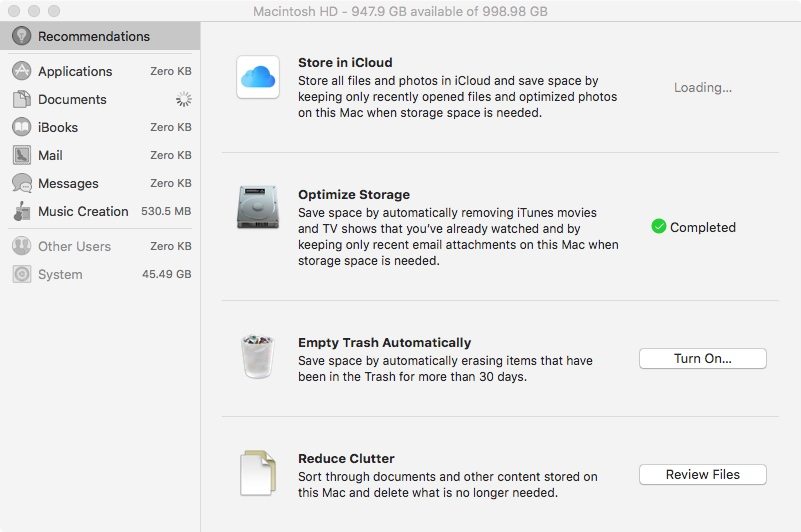
Other optimization features like Empty Trash Automatically are designed to automatically erase deleted files from your hard drive after 30-days in the Trash.
You can also “reduce clutter” by selecting Review Files manually, reviewing a list of files available to delete or transfer at your discretion.
? Final Thoughts
We hope that you've learned a few new things about your Mac from this article. Keep in mind, there are so many other ways to get even more out of your Mac. Be sure check out these great software titles.
