
New to Notes on Mac? Here Are 10 Tips to Get Started
 Credit: Apple
While it's still far from perfect, Apple's Notes app for your Mac is still one of the best note-taking apps available.
Not only can you write down your thoughts, your to-do list, or your homework, but it also comes with a bunch of useful features that you won't find anywhere else. The biggest advantage of using the Notes app is how well it works in the Apple ecosystem. You can start writing a note on your iPhone and almost effortlessly pick up where you left off and finish it on your Mac.
But the Notes app offers many more features, provided you know how to make the most of it. Whether you've been using Notes for a long time or you're just getting started, read on for ten tips to help you master Notes on your Mac.
Use Quick Notes on Your Mac
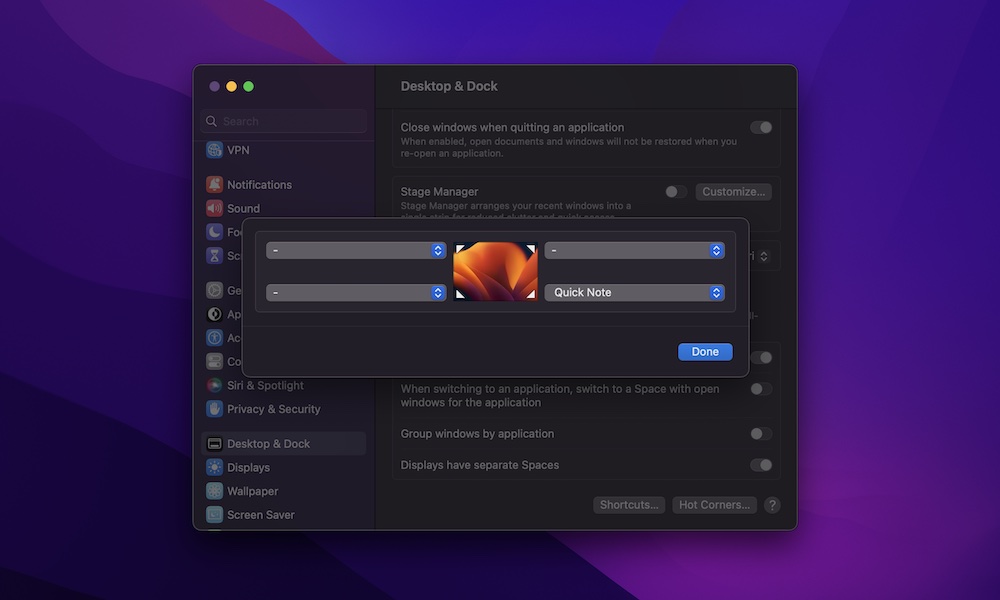
Quick Note is a cool feature that lets you open a new note almost instantly. All you need to do is place your Mac's pointer (cursor) in the bottom right corner of your screen — or any other corner you choose — and then click the little note that pops up.
By default, you should be able to use Quick Note from the get-go, but if you don't have this feature available, here's how you can turn it on:
- Click the Apple menu in the top left corner of your screen.
- Go to System Settings.
- On the left sidebar, scroll down and select Desktop & Dock.
- Scroll down again to the bottom and click on Hot Corners.
- Click on any of the four corners available.
- Search for Quick Note.
- Click on Done.
Create and Use Smart Folders

You've probably already heard of the Notes app's folders. This is a simple feature that helps you organize your notes by manually placing them in the folder you want.
But what happens when you have way too many notes and not enough time to sort them? That's where Smart Folders come in.
Smart Folders in the Notes app let you automatically find notes that meet a specific requirement. For instance, you can create a Smart Folder that stores all your notes with checklists and another one with notes created before 2024.
Here's how to create a Smart Folder in Notes:
- Open the Notes app.
- Click File in the top left corner of your screen.
- Select New Smart Folder.
- Enter a name for your Smart Folder.
- Be sure that Make into Smart Folder is ticked.
- Change the settings to include any filter you want, and when you're done, click OK on the bottom right side of the window.
And that's it. The Notes app will populate the Smart Folder with all your notes that meet your requirements.
Keep Your Notes Organized With Tags
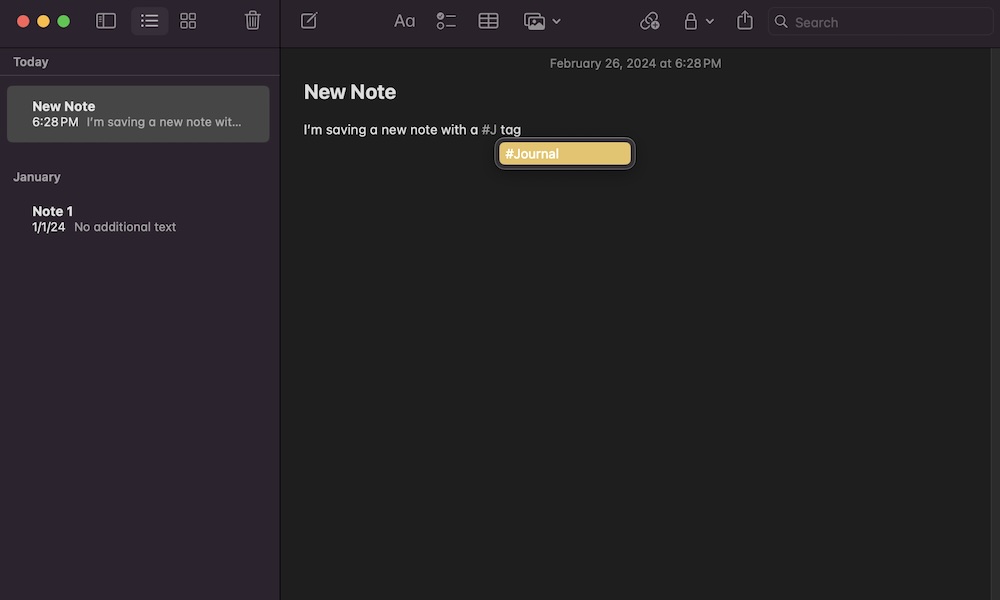
Another quick and easy way to keep all your notes in the same place is to use tags. You can tag any note by using a hashtag (#) followed by the name of the tag you want to use.
For instance, you can write "#Journal" at the end of a note, and you'll be able to find it almost immediately by filtering on this tag. You can create as many tags as you like, and once you write the pound sign, you'll get a list of all the tags available.
To find a list of all the notes that use the same tag, click on the tag you want under the Tags section on the left sidebar. You can also click the search button in the top right corner of the window and type in the tag's name.
Keep Your Notes Private By Locking Them
You can use the Notes app for pretty much anything, whether that's writing a to-do list or jotting down your most personal thoughts. However, you probably won't want anyone snooping around and finding your private notes.
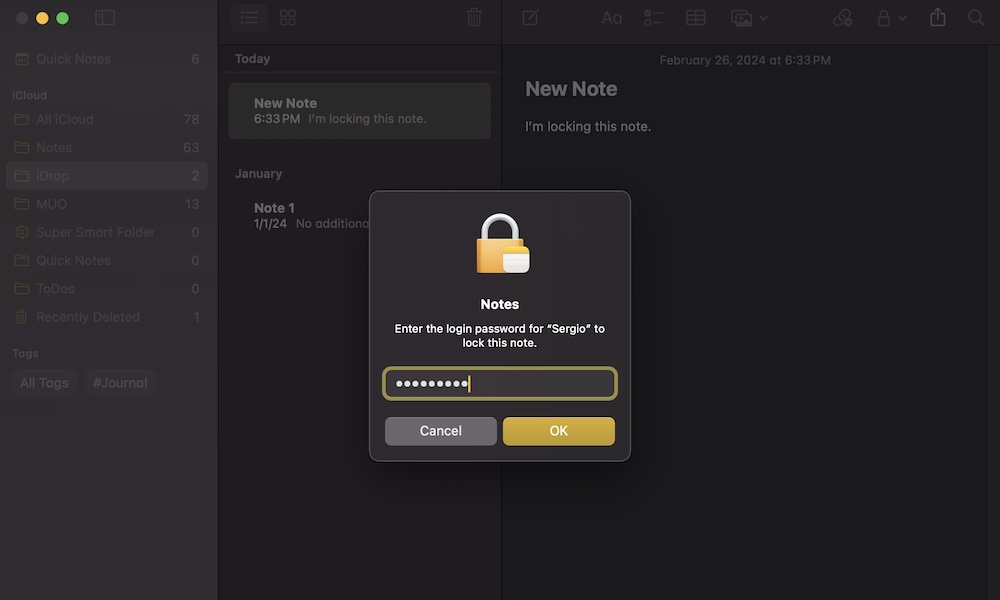
Fortunately, there's a simple way to keep your notes safe: lock them. When you lock them, you'll only be able to open them if you enter your Mac's password or if you use Touch ID.
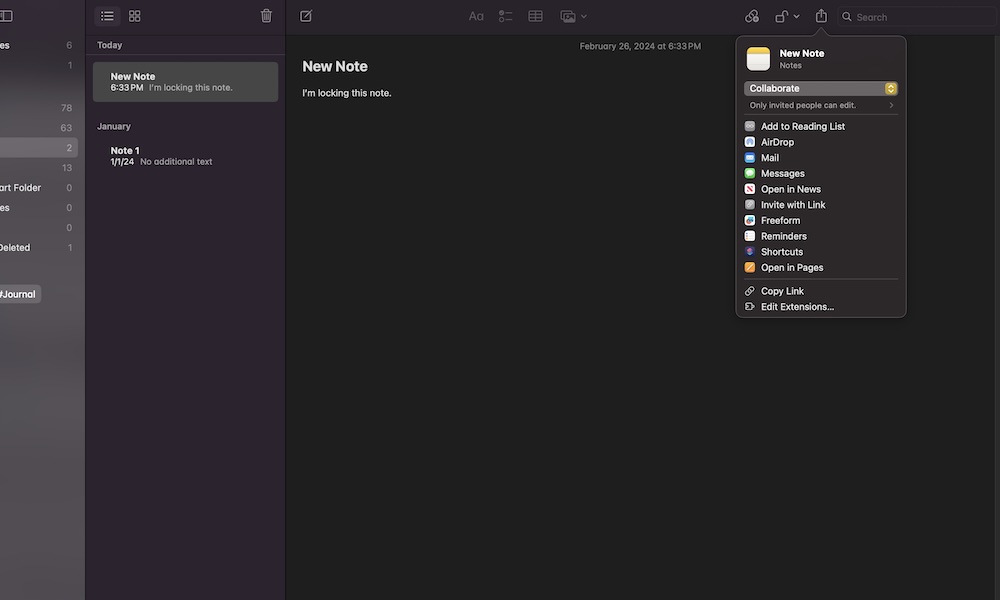
To lock your notes, select the note you want to keep private, click the Lock icon at the top right corner of the Notes window, and then select Lock Note.
Next, enter your Mac's password. Now, you'll see a small lock icon on the left side of the note, but it'll still be open. Don't worry; all you need to do is click the Lock icon in the top right corner again and select Close All Locked Notes. If you close the Notes app, your note will be automatically locked, too.
It's worth mentioning that you can't lock all notes. For instance, notes with a Tag can't be locked. You'll need to remove the tag first.
Convert Your Notes to a PDF File
Another great thing about the Notes app is how easy it is to share your notes with anyone. You can share them via Messages, Mail, or even open them as a Pages document.
And the best part is that if the other person isn't an Apple user, you can still share your notes as a PDF file. Even if you don't want to share it, you can still use this feature to save a note as a PDF on your Mac. Here's what you need to do:
- In the Notes app, select a note you'd like to convert to a PDF.
- Click File in the top left corner of your screen.
- Select Export as PDF.
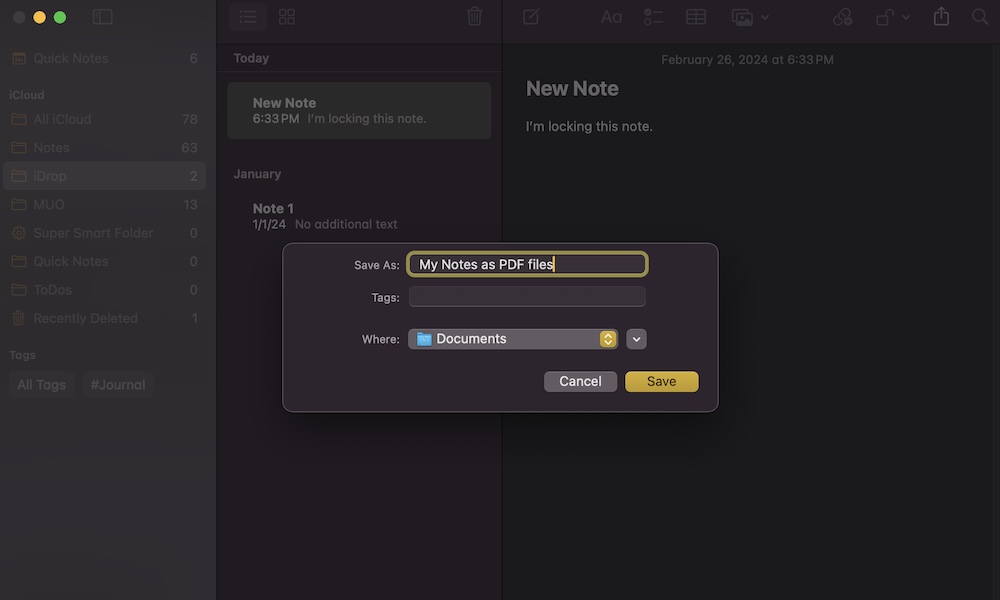
- Enter the name of the note.
- Next to Where select the folder where you want to save your PDF.
- When you're done, click on Save.
And that's it! You can go to the folder you chose, and you'll see that your note has been turned into a PDF file.
Share Your Notes As Reminders
If you wrote something really important on a note, like an event or something you don't want to forget, you can actually share your note with Apple Reminders and set up a reminder with the day, time, and even level of priority you want. Here's how:
- Select the note you want to share as a reminder.
- Click the Share button in the top right corner of the Notes window.
- Select Reminders.
- Enter the contact information of the person you want to send the reminder to. If you want to add another person, click the plus button on the left side of the contact.
- Click on Share Link.
- Enter a name for your reminder.
- If you want to add a specific time, day, or image, click the i icon next to your reminder's name.
- When you're done, click on Add.
You can also use this method to set reminders for yourself that will link back to the note.
Link Your Notes Together
Another cool feature that's fairly recent is linking to a note inside another note. This will make it easier to keep track of your assignments or projects. Here's how to add a link to another note:
- Select any note you like.
- Click on Edit in the top left corner of your screen.
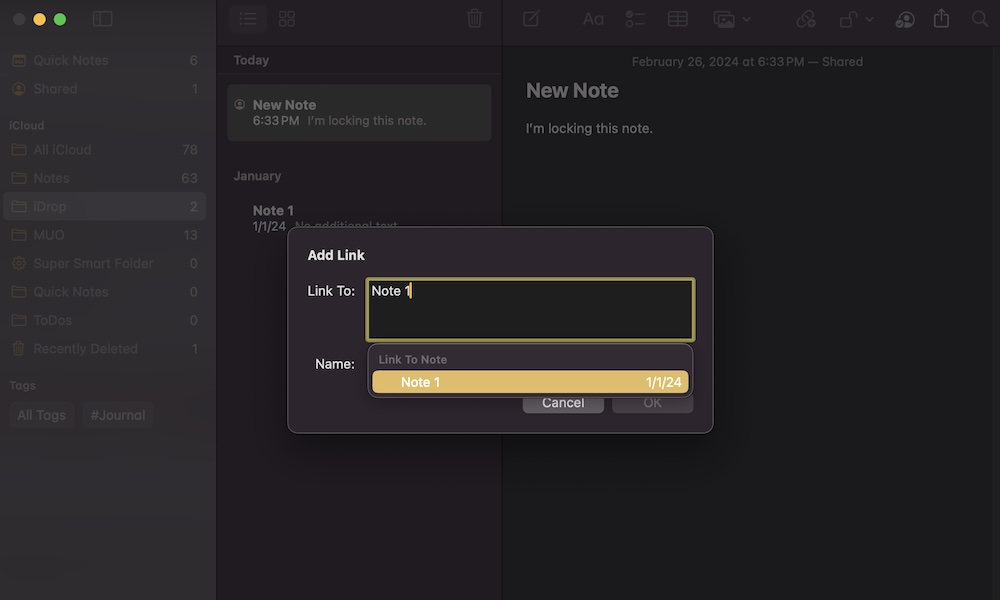
- Select Add Link.
- Enter the title of the note you want to link to. You'll get a list of possible recommendations from which you can choose.
- Select the note you want.
- Select a name for the link or click Use Note Title.
- Finally, hit OK.
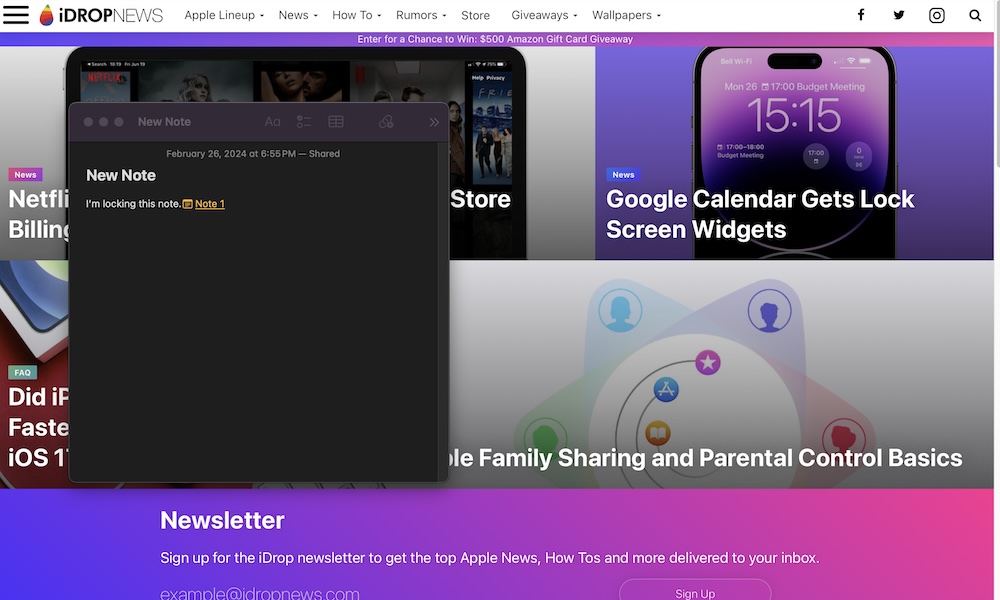
Just like a link on any website, the link to your note will have a different color and will be underlined. As soon as you click it, you'll be redirected to that note.
Keep Your Notes at the Top of Any App
Sometimes, you might want to keep a note floating frontmost on your screen so you can easily see any important information you need while working. Apple knows this, which is why it added a useful feature to keep a note in view at all times.
When this feature is on, you'll see your note on top of every other window, no matter which app you're using. Here's how to use this feature:
- Double-click the note you want to keep on top so it opens in a new window. You can also select the note and click Windows > Open Note in New Window.
- Click on Window at the top of your screen.
- Select Keep on Top.
And that's it. Now open any other app you want and you'll see the note stays floating in front no matter what you do.
If you're done with the note, you can click on it and then go to Window > Keep on Top again.
Change Your Font Size
Let's face it: we don't like wearing our glasses while using our Macs. Maybe we should because the font size is sometimes a bit too small for our liking.
Or, instead of wearing glasses, you can change the font size of the Notes app so it's easier to read. Here's how:
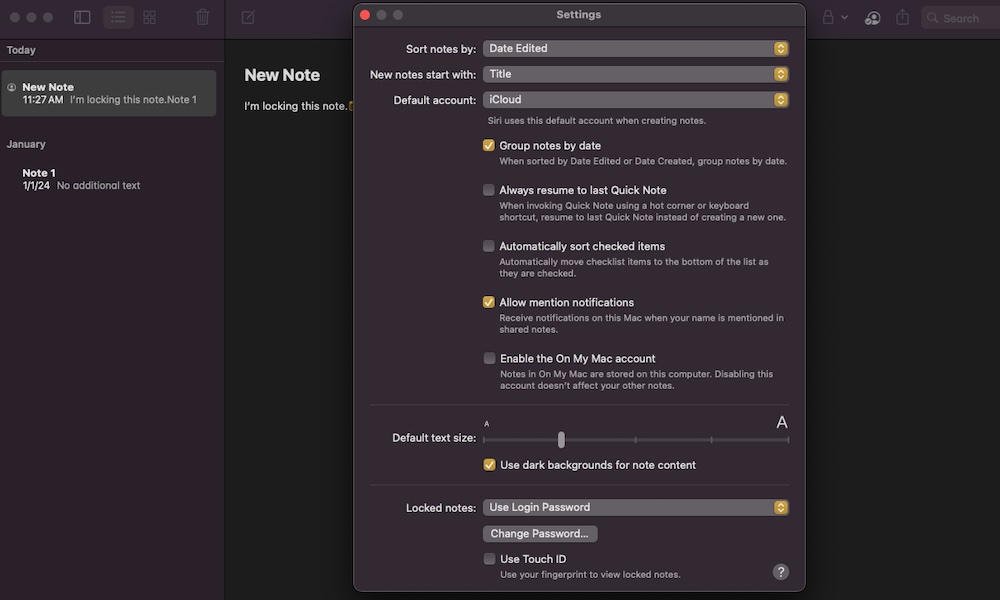
- Click Notes in the top left corner of your screen.
- Go to Settings.
- Next to Default text size, drag the slider to adjust the font size.
- Exit the settings.
As you'll be able to see, this will only change the content of the notes, not the rest of the Notes app.
Automatically Sort Your Checklists
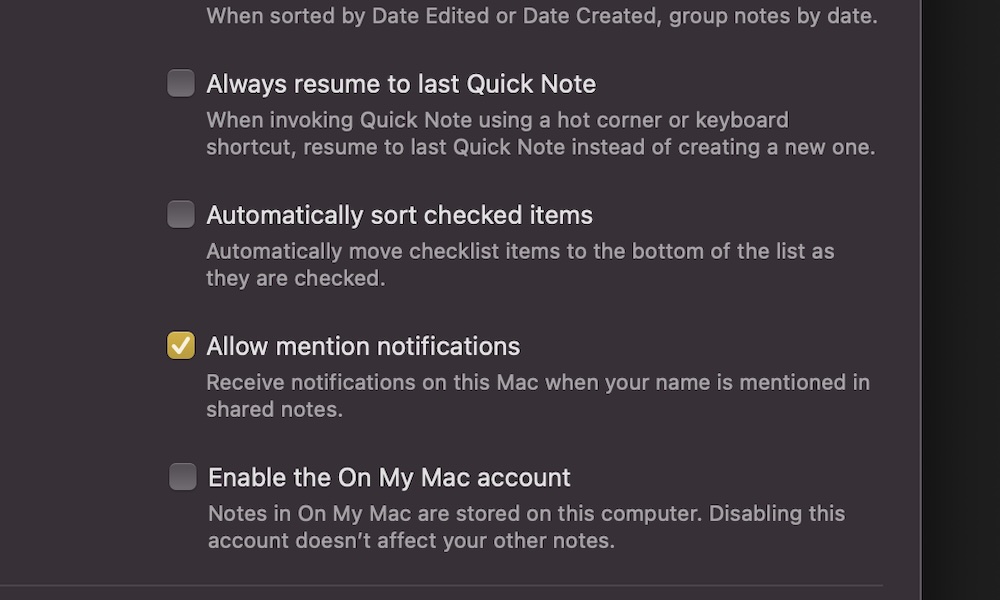
You've probably already noticed when you check an item on one of your checklists that it doesn't move down to the bottom of the list. While this might be useful, it can also be annoying, which is why Apple lets you disable this feature.
Whether you want to sort your checklists or not, here's what you need to do:
- Click on Notes in the top left corner of your screen.
- Go to Settings.
- Click Automatically sort checked items.