Master the Mail App With These 8 Tips and Tricks
 Credit: hilalabdullah / Shutterstock
Not many people pay attention to the Mail app, but it's one of the most feature-packed apps Apple has to offer. Over time, with the help of many software updates, the Mail app has become an amazing tool to work with. And the best part is that there's always something new to learn from the app.
Whether you're already a pro or it's your first time using it, there are a bunch of hacks you can start using right away. Read on to Master the Mail App With These 8 Tips and Tricks
Add a Custom Signature
Don't you just hate when the Mail app automatically signs your emails with "Sent from my iPhone." Bragging rights aside, it doesn't look that good on an email, especially if it's from work.
Fortunately, you can change this. Not only can you delete the Sent from my iPhone signature, but you can also add any signature you want.
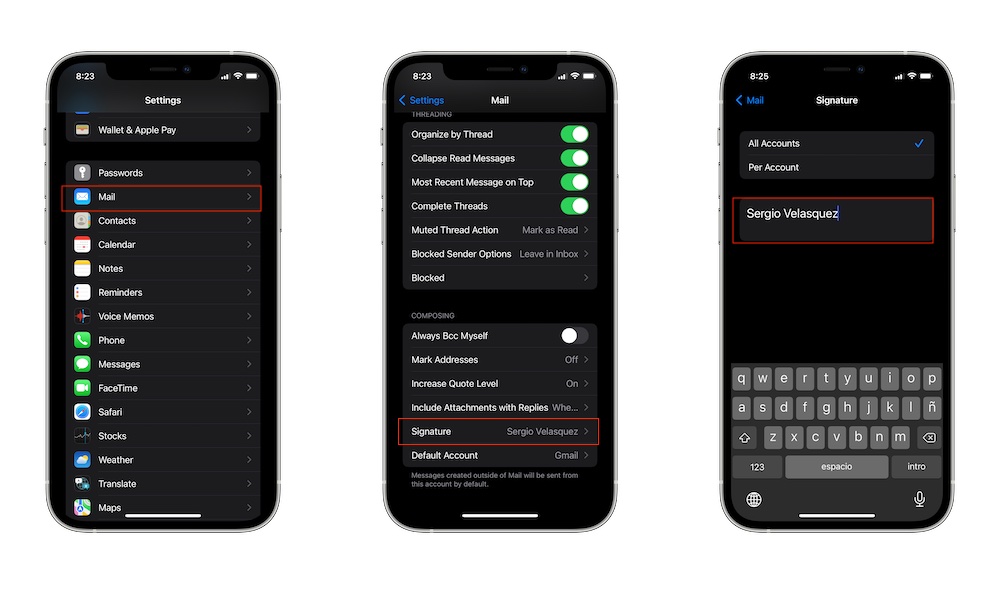
- Open the Settings app.
- Scroll down and select Mail.
- Scroll all the way down and tap on Signature.
- Choose if you want your signature for all accounts or per account. If you choose per account, you'll be able to add different signatures to each one of your accounts.
- Enter the signature you want to use. If you don't want any signature, you can just delete Sent from my iPhone.
Create and Minimize Multiple Drafts
Even if you're writing an email from your iPhone, you can still create multiple drafts at once. Likewise, you can minimize your drafts in case you need to open another email to back up your information.
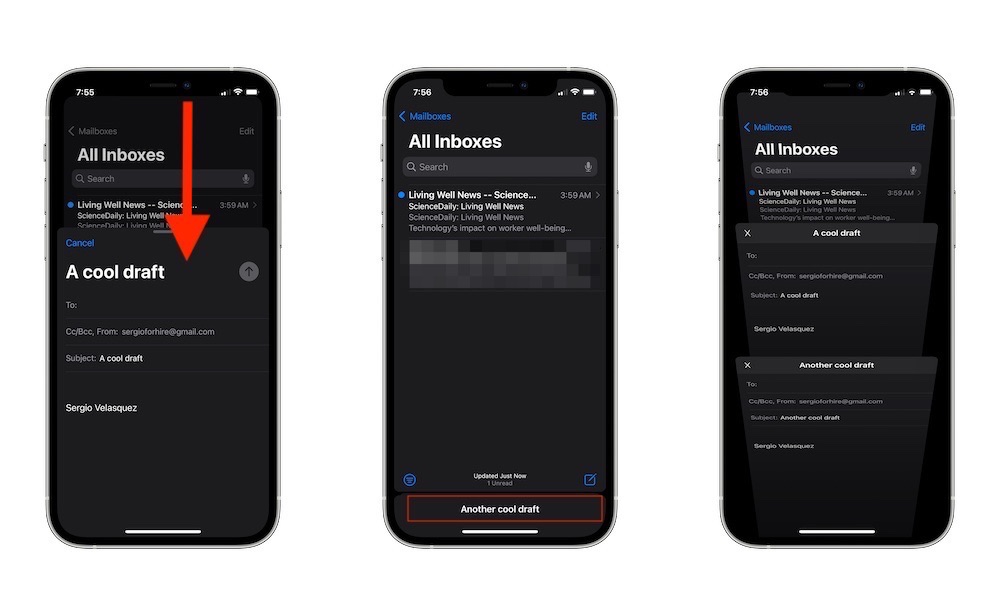
- Open the Mail app.
- Create a new email by tapping the new message button in the bottom right corner.
- Drag your email from the top of your screen to the bottom to minimize it.
- You can open other emails or create a new email if you want.
- To open all your drafts, tap on the bottom of your screen. It should say New Message or the subject you used for your email.
You can repeat this multiple times without losing your drafts. If you want, you can also press and hold the new message button on the bottom right side of your screen to see all your drafts.
Drag and Drop Files Into an Email
Just like you can do on your Mac, you can easily drag and drop files to the Mail app from your iPhone. It's a neat new feature that Apple added with the latest software update, and it can help you save some time. For this example, we'll drop an image from the Photos app.
- Open the Mail app and create a new message.
- Now go to the Photos app and select the picture you want to share.
- Long-press the photo and drag it, so you're able to move the picture.
- Without releasing your finger, switch apps to go back to the Mail app.
- Release your finger to "drop" the picture in the email.
It may take a couple trys, but you'll get the hang of it pretty quickly. You can also do this with other things like PDF files from the Files app. Just make sure to always drag it a little around the screen so you actually "grab" the file.
Create Your Own VIP List
We all have very important people in our lives, and the Mail app makes it easy to choose who these people are. You can add a "VIP status" to anyone you like, and their emails will be stored in a different folder, so they're easy to spot.
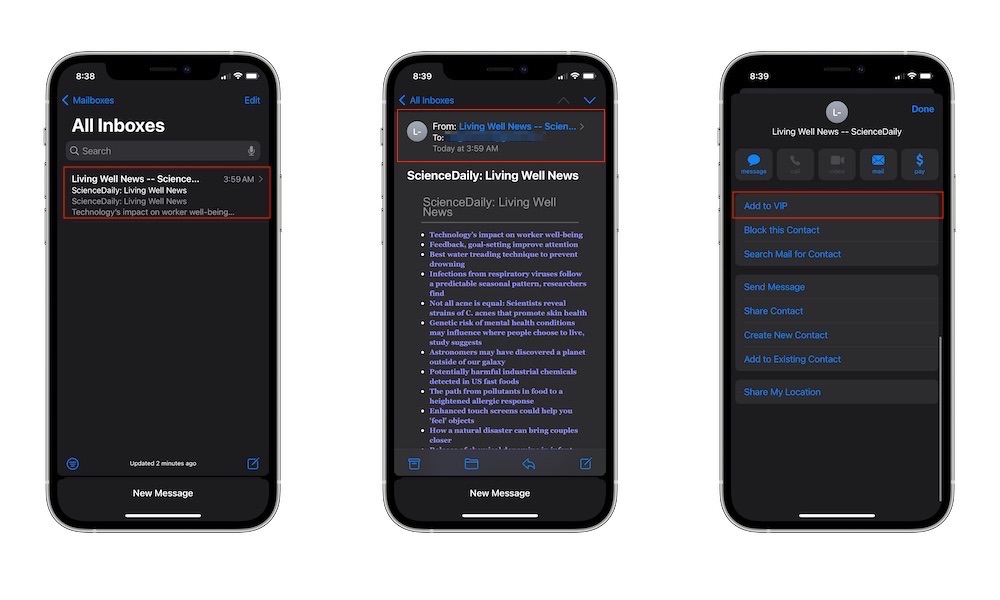
- Open the Mail app.
- Open the email from the person you want to add to your VIP list.
- Tap on their email address to access their profile.
- Tap on Add to VIP.
- Finally, tap on Done on the top right side of your screen.
Next time that person sends you an email, it'll be stored in the VIP folder. If you want to remove them from your list, just repeat the same steps and tap Remove from VIP.
See More in the Email Preview
When you receive a message, you can see a small preview of what the email is about. This is usually about two lines, but you can make it much bigger if you like.
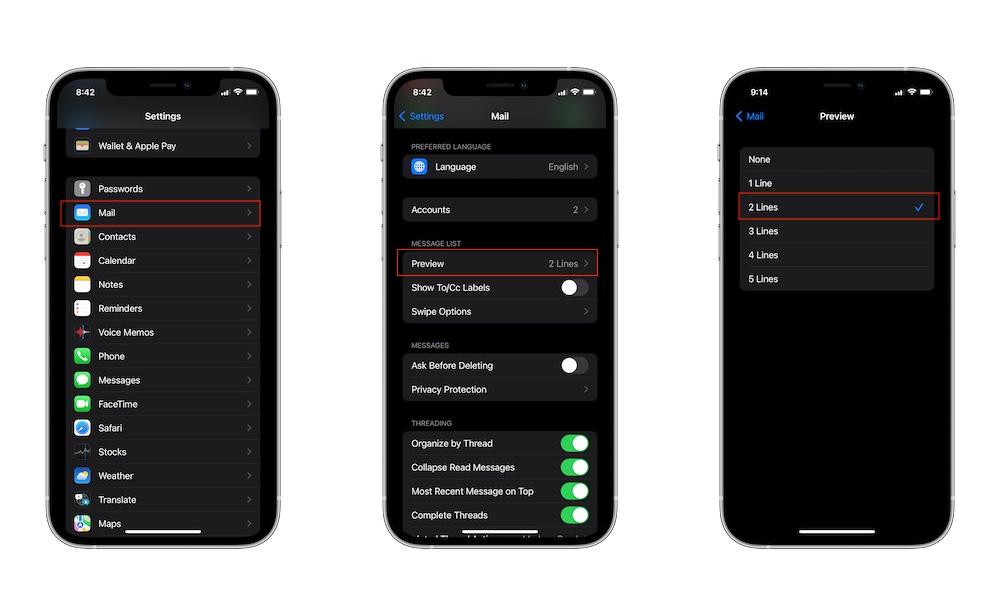
- Open the Settings app.
- Scroll down and tap on Mail.
- Select Preview.
- Choose how many lines you want the preview to be. If you don't want any preview, tap on None.
If you constantly receive too many new messages, you might want to keep the preview lines to a minimum. Don't worry; there's another trick for you to preview any emails from your iPhone.
Make the Most Out Of Haptic Touch (or 3D Touch)
Whether you're one of the rare who still uses 3D Touch, or you're already rocking Haptic Touch, you can use it to find a bunch of extra features and quick actions in the Mail app.
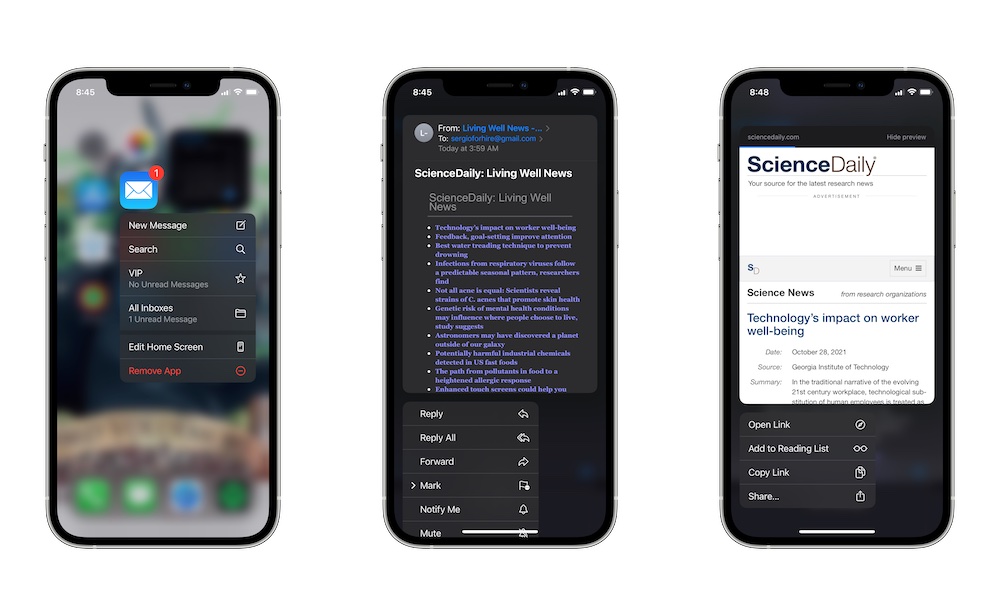
For instance, if you long-press the Mail app from your iPhone's Home Screen, you'll quickly be able to do things like create new messages, search for an email, or access your VIP folder in a matter of seconds.
But one of the coolest features is inside the Mail app is that if you long-press an email, you'll get a preview of the whole email without having to open it. Not only that, but you'll also have some quick actions you can perform, like replying or forwarding the email to someone else.
Want to know something even cooler? If you enter an email and someone sends you a link, you can long-press it to see a web page preview before actually opening the link. The same goes for any file. Just long-press it, and you'll see a preview of any document you receive.
Change Your Swipe Options
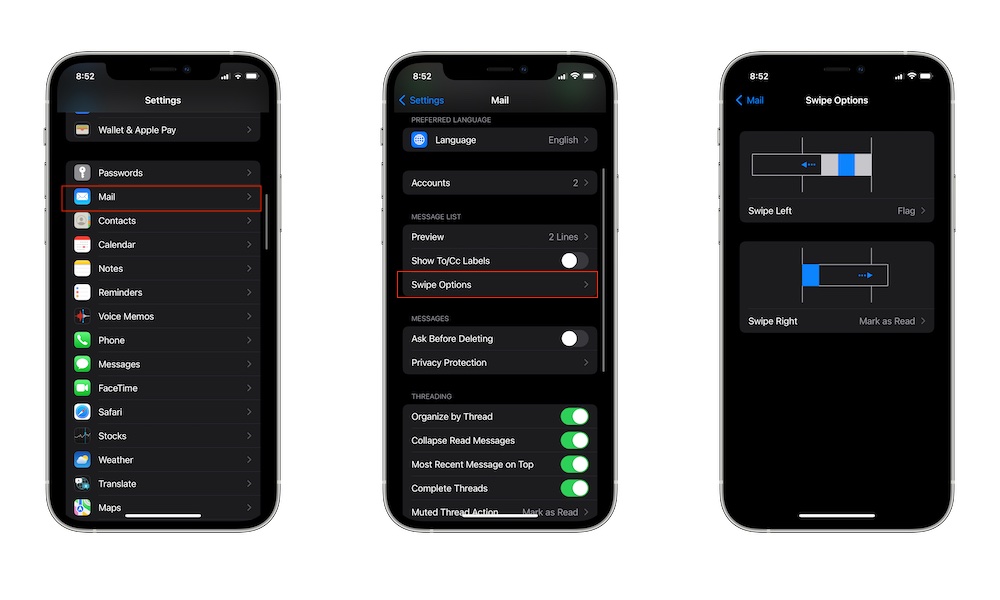
By now, you probably already know that by swiping an email left or right, you'll get a bunch of options to archive an email, mark it as unread, or even delete it. But did you know you can easily change these options from Settings?
- Go to Settings.
- Scroll down and tap on Mail.
- Tap Swipe options.
- Select the swipe option you want to change and customize the actions to your liking.
Turn on Privacy Protection
With the introduction of iOS 15, Apple gave users more control over their data and ways to protect it, and that includes the Mail app.
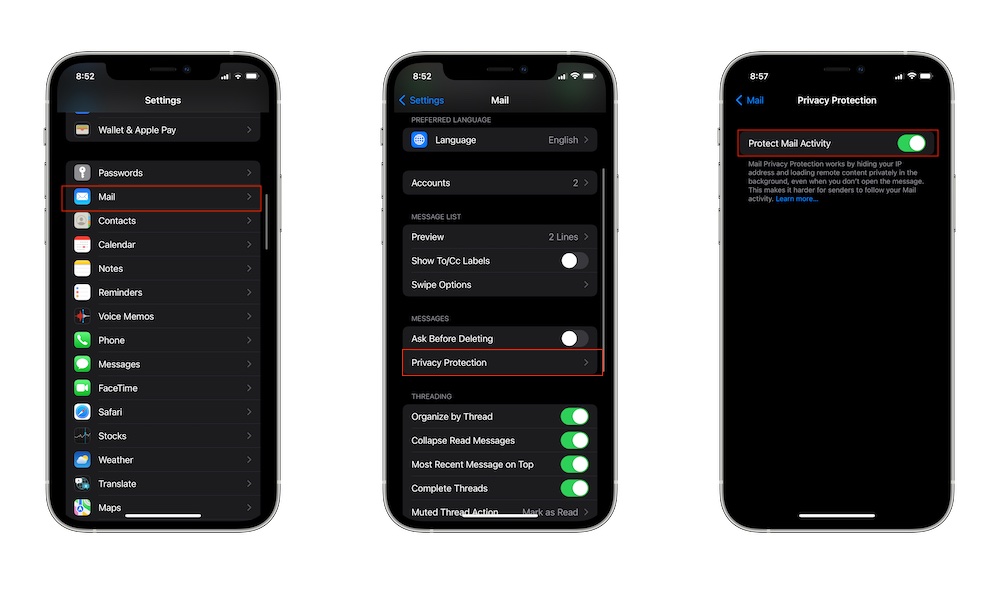
You can turn on Privacy Protection to hide your IP address, so email senders don't know your exact email activity. This will help protect your private information from people and companies, including Apple.
- Go to your Settings.
- Scroll down and select Mail.
- Tap on Privacy Protection.
- Toggle Protect Mail Activity on.
If you want to, you can learn about this feature by tapping Learn more below the toggle.

