Master the Calendar App on Your Mac With These 9 Tips
 Credit: Apple
One of the best parts of having a Mac is how easy it is to keep your work and personal lives completely organized. You can create reminders, check your emails, and even still have some time left over to watch an episode or two of your favorite show.
One app that stands out is Calendar. This app is the best way to organize events, remember important dates, and keep your day-to-day life in check on your Mac.
While you've probably seen and dabbled with the Calendar app, you probably haven't used it to its full potential. Don't worry — you aren't the only one, which is why we bring you the best tips to make the most out of Calendar on your Mac.
Connect More Calendars
By default, you'll have access to a local calendar and likely iCloud calendars if you've signed in with an Apple ID. You can use these to create your own events, which we'll talk about in a moment, or check for important upcoming holidays.
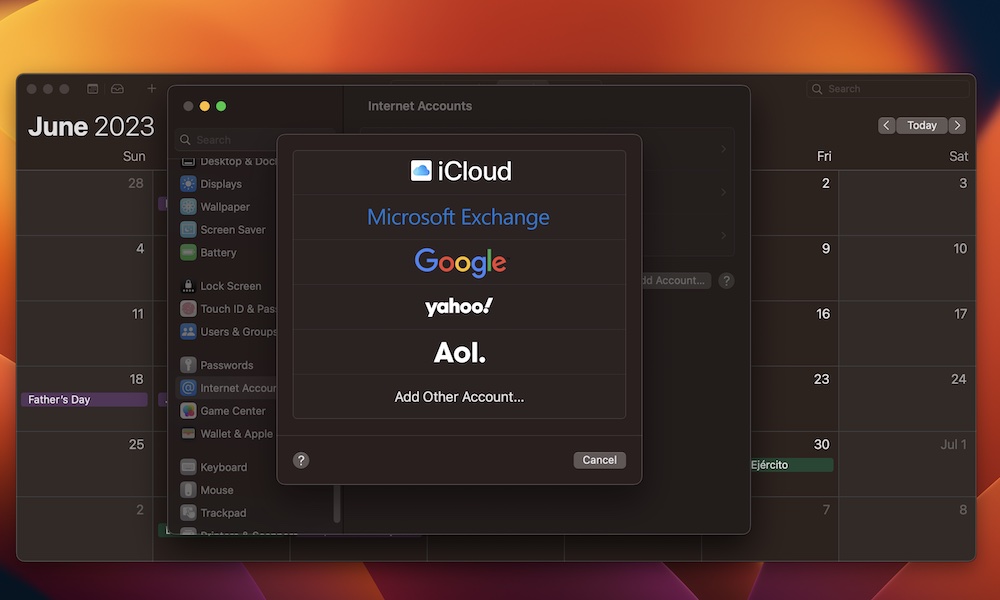
However, if you use different email addresses for work or school, you won't be able to see all the important dates and deadlines from the get-go. Fortunately, the Calendar app lets you add other calendar services like Google and Outlook. That way, you won't miss an important date ever again. Here's how to get started:
- Open the Calendar app.
- Click on Calendar in the top left corner of your screen.
- Click on Accounts.
- Select Add Account.
- Select the email service provider you use.
- Log in to your account.
- Allow the Calendar app to access the information it needs to work properly.
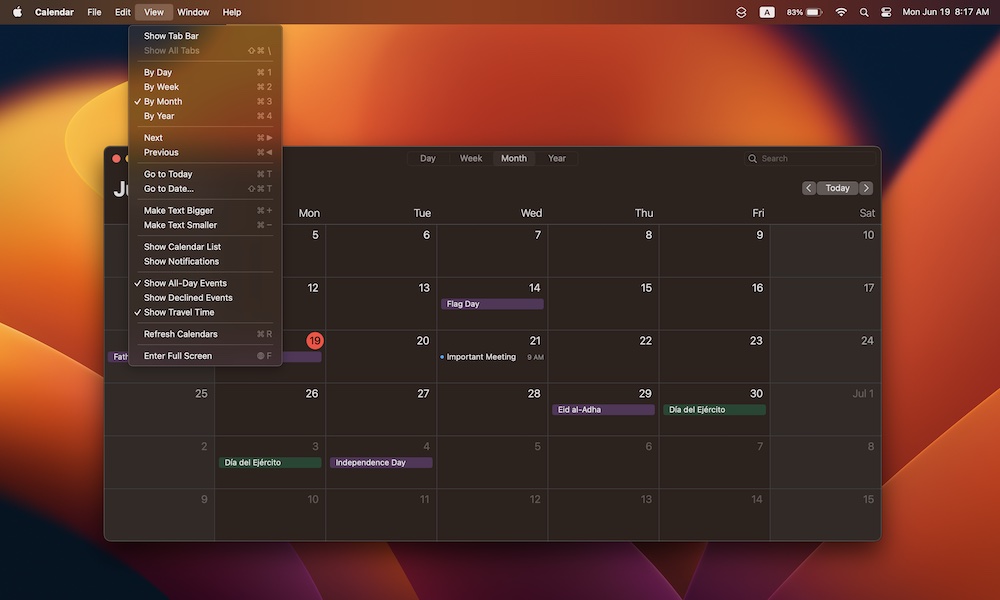
After you're done following the on-screen instructions, you'll be able to see your new calendar on the Calendar's left-side menu. If you can't see it, you can always click View > Show Calendar List.
From there, you can click the checkmark next to your accounts to hide or show their calendar events.
Sync Your Calendars Faster (or Slower)
Your Calendar app will automatically sync all your calendars after a certain timeframe. This will help keep all your calendars up to date no matter where you add new events.
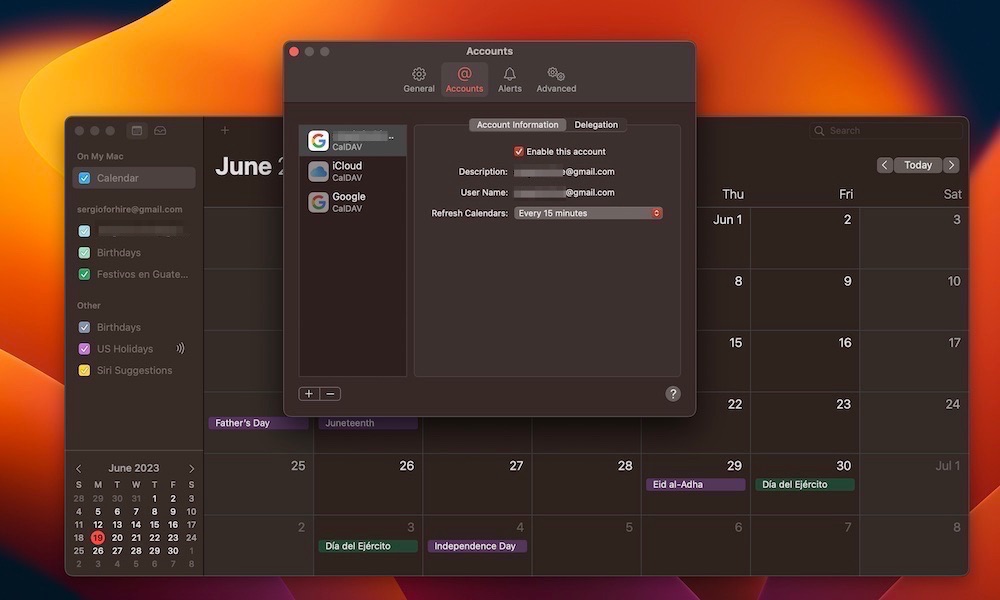
However, by default, the Calendar app updates your calendars every 15 minutes, which might not be the best for you. If you want your calendars to sync at a longer or faster timeframe, here's how to change this:
- Open the Calendar app.
- Click Calendar in the top left-side corner.
- Go to Settings.
- Click on the Accounts tab at the top of the window.
- Next to Refresh Calendars, choose the time you want.
- When you're done, you can close the window.
Regardless of the interval you choose here, you can refresh your calendars manually at any time by selecting View > Refresh Calendars or pressing Command+R on your keyboard.
Create Events in a Flash
There are a few ways to create events, and we'll show go through the ones you need to know on this list. However, by far, the most straightforward way to create an event is also the most complete one.
If you want to add important meetings or dates to your calendar, you need to do the following:
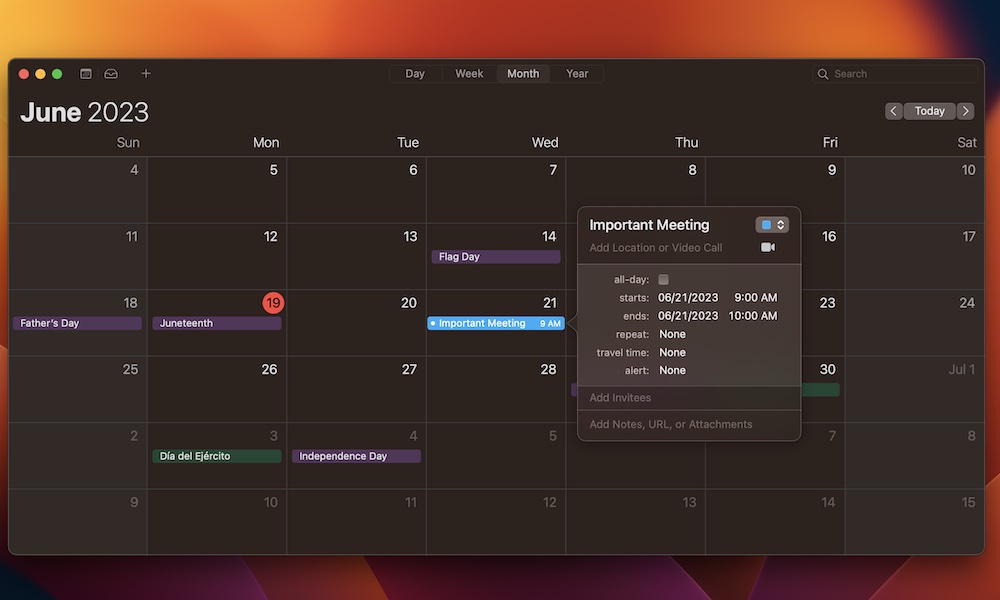
- Double-click the date you want to create a new event.
- Enter the name of the new event.
- Click the date and time to adjust when the meeting is going to start and when it's going to end. Also, if you want, add the travel time and set an alert.
- You can also click Add Invitees and enter the email address or name of the people that are invited. If your Mac finds a matching name, then it'll suggest it to you so you can add them.
- Finally, you can also click on Add Notes, URL, or Attachment to add any other information you may want to keep track of.
- When you're done, click anywhere outside the event.
If you want to go back to the event and edit it, all you need to do is double-click it and make any changes you want. Be careful not to double-click outside of the event, or else your Mac will create a new event.
Let Your Mac Tell You When It's Time to Leave for Your Meeting
Your Mac is smart enough to notify you when it thinks you should leave home if you want to get to your event in time.
Your Mac uses your location, the event's location, and the current state of traffic to give you its best estimate of when you should leave.
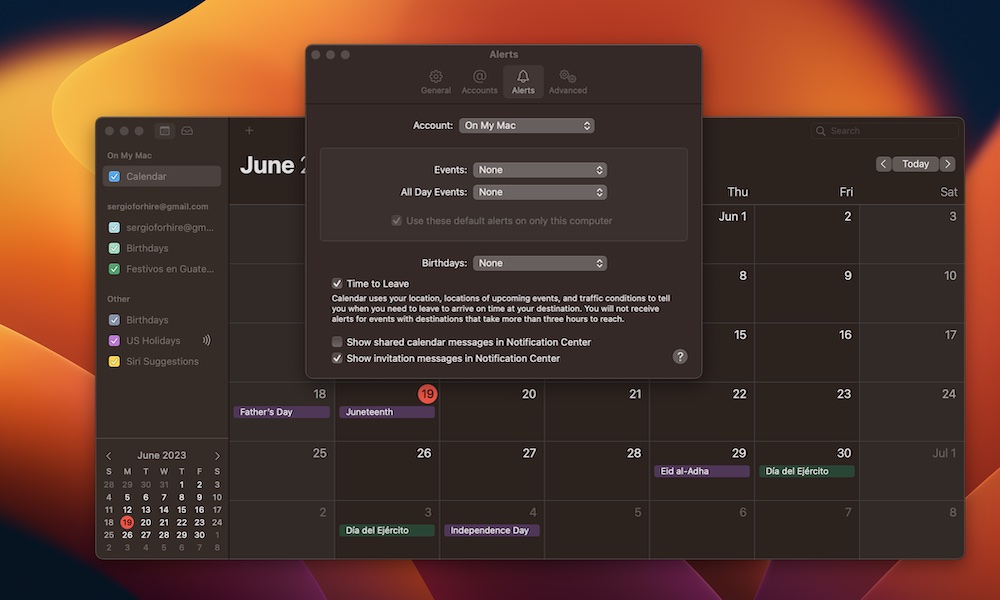
By default, your Mac's Time to Leave feature should be turned on, but this is how you can check.
- Click Calendar in the top right corner of your screen.
- Go to Settings.
- Click on the Alerts tab at the top of the window.
- Click Time to Leave.
Of course, for this feature to work, you'll need to give your Mac all the necessary information. That means it needs to have access to your location, and you'll also need to specify the event's location and the time you need to be there as the start time of the event.
Open Files Automatically Before an Event
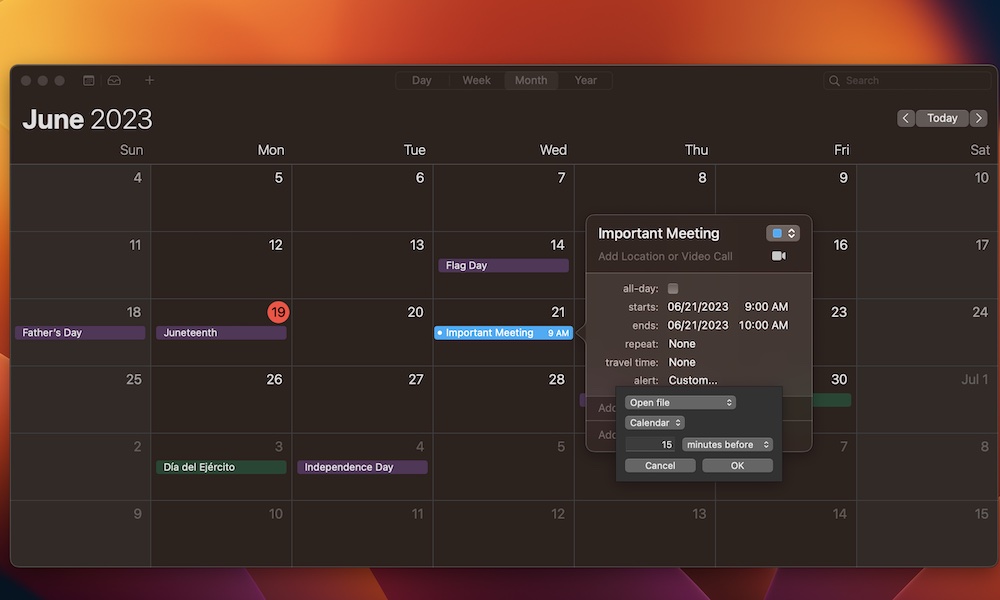
Another cool feature your Mac has is the ability to automatically open any app or file you need before an event. Not only will this remind you that an important meeting is about to start, but it'll also help you get everything you need before it starts.
Here's how to use this feature:
- Create a new event or edit an already existing event, as we showed you earlier.
- Click the date and time of your event.
- If you haven't already, change the event's initial time so your Mac knows when to open your file.
- Next, to alert, click on None or the time you set.
- Select Custom.
- Click Message with Sound and select Open File.
- Click on Calendar and then select Other.
- Find the file you want to open and Select it to add it to your event.
- Choose the time when you want the Calendar app to open the file.
- When you're done, click on OK.
Use Siri to Create New Events
Sure, anyone can create an event with just a few clicks, but if you've got your hands full, you can ask Siri to create a new event for you.
To get started, all you need to do is say "Hey Siri" or press and hold the dictation button, which should be located in the F5 key. You can also try pressing and holding the Option key + spacebar.
Then, ask Siri to "create a new event in your Calendar." Finally, tell Siri what the name of the event is and the time you want the event to take place.
You can play around with this prompt to be more specific from the start. That way, it'll take Siri fewer steps to create your new event.
Additionally, you can also ask Siri to change an event in your Calendar. Siri will ask you which one, and then you can edit it however you want.
Customize How You See Your Calendar App
Apple lets you customize your Calendar app in many different ways. For instance, you can change the current view of your calendar, hide your calendar list, and even change the font size of your events.
To get started, all you need to do is click the View button at the top of your screen. Look at all the items on the list and customize anything you want.
We recommend starting by making your text bigger if you need it and selecting Hide Calendar List so you see more of your actual calendar.
See a List of All Your Events
Unfortunately, the Calendar app doesn't let you see all your upcoming events the way your iPhone does.
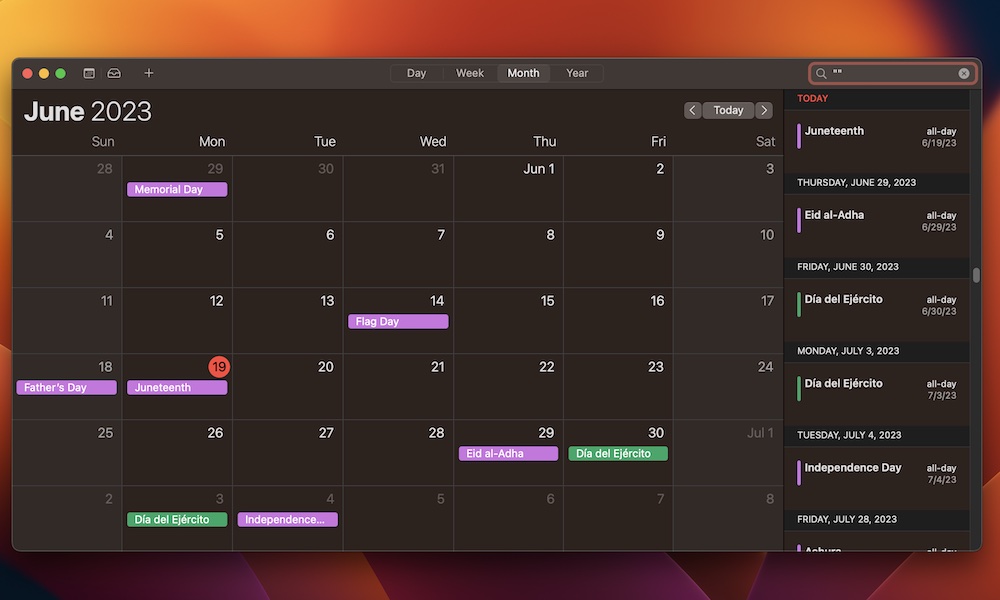
With that said, there's still a small trick you can try. Start by clicking the Search box in the top right corner of the Calendar app.
Next, enter either a double parenthesis—()—or a double quotation mark—""—and your Calendar will show you a list of all your events. Sure, it's far from perfect, but it's still a quick and easy way to check your upcoming events.
Start Using Quick Events
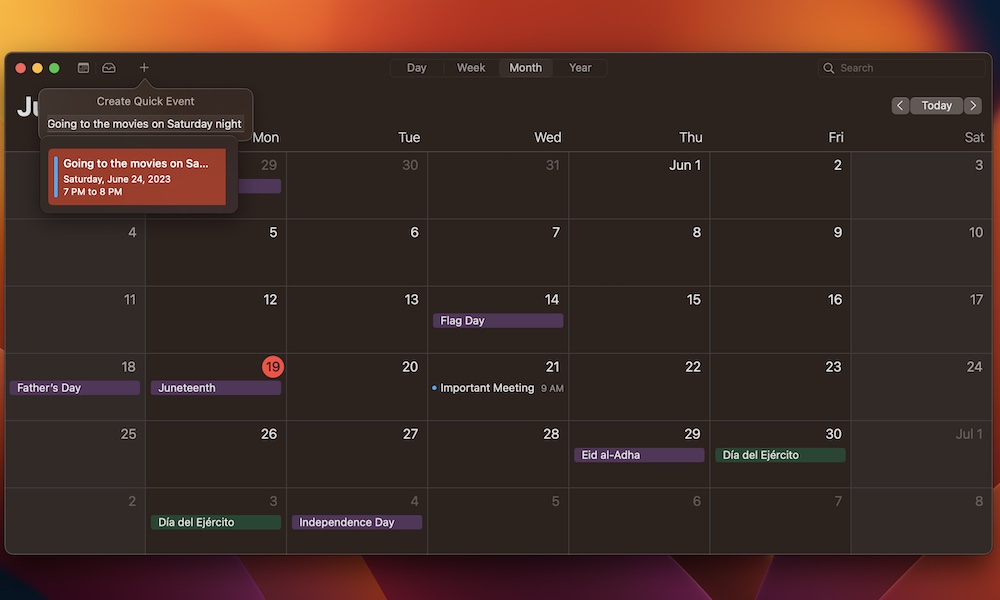
Another way to create events is by using the Quick Events feature. This lets you add a new event using more natural language to tell your Calendar app what the event is going to be. Here's how you use it:
- Click the plus icon in the top left corner of the Calendar app's window.
- Enter what you want to add for your quick event. For instance, you can write something like "Going to the Movies on Saturday night."
- When you're done, press the return key.
You'll notice that the Calendar app will create the event based on what you mentioned. In our example, Calendar added an event for this upcoming Saturday that starts at 7:00 PM and ends at 8:00 PM. Granted, a movie won't last only one hour but you get the idea. You can refine it further by entering specific times and durations.

