
Keep Your iPhone Safe with These 10 Tips

One of the many reasons why people choose iPhone over Android is because of how secure the operating system is.
It's no surprise that iOS is just a bit harder to crack than Android, and it's because of all the security features and patches Apple adds with almost every new software update.
Still, your iPhone can't do everything by itself. You also need to have the right settings and follow the best practices to make sure your iPhone and your data are as safe as possible.
But how can you get started? Read on for the 10 easiest ways to keep your iPhone and your personal data safe.
Make Sure Your iPhone Software Is Up to Date
It goes without saying that you need to update your iPhone as soon as a new iOS software update is available. Even if it's kind of a hassle, new software updates make your iPhone perform better and fix bugs, and, most importantly, they provide extra security for your iPhone.
There are always issues in operating systems that bad people can exploit to get a hold of your data, which is why Apple rolls out software updates regularly. These updates can help you make a difference in your safety, so install them as soon as you can.
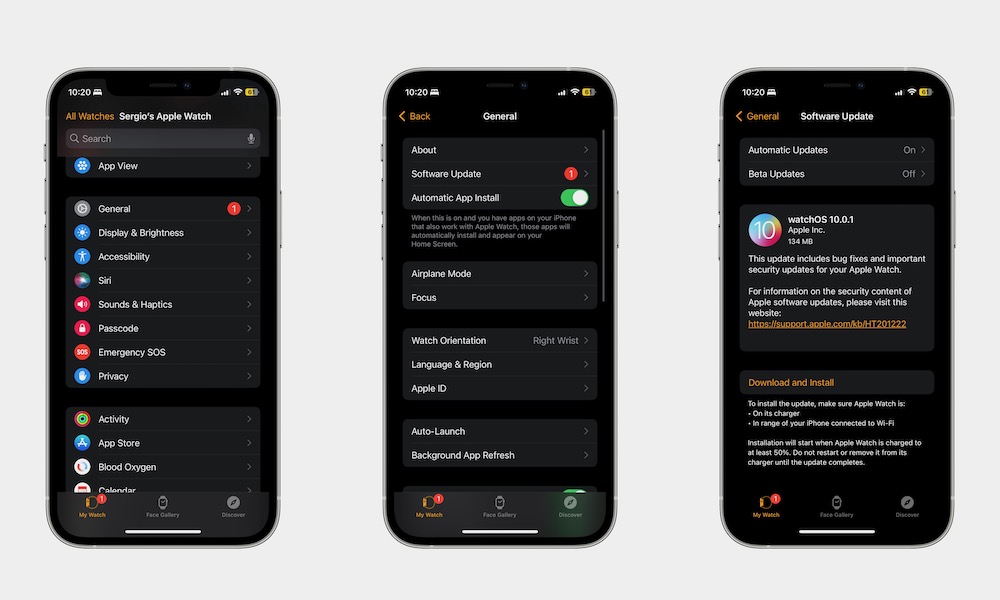
Here's how to check for, download, and install a new software update:
- Open the Settings app.
- Scroll down and go to General.
- Tap on Software Update.
- If there's an update available, be sure to tap on Update Now. You can also select Update Tonight if you don't have time right away.
While you're there, you should also go to Automatic Updates and make sure iOS Updates and Security Responses & System Files are both on. These will help keep your iPhone up to date, but keep in mind updates can take a few days or even weeks to install automatically, so it's still a good idea to check manually from time to time.
Set Up a Two-Factor Authentication
Using two-factor authentication (2FA) is an easy way to make sure no one has access to your iCloud data without your permission.
With 2FA, even if someone gets a hold of your Apple ID and your password, you'll know if they're trying to log in to your account and you can prevent it from happening.
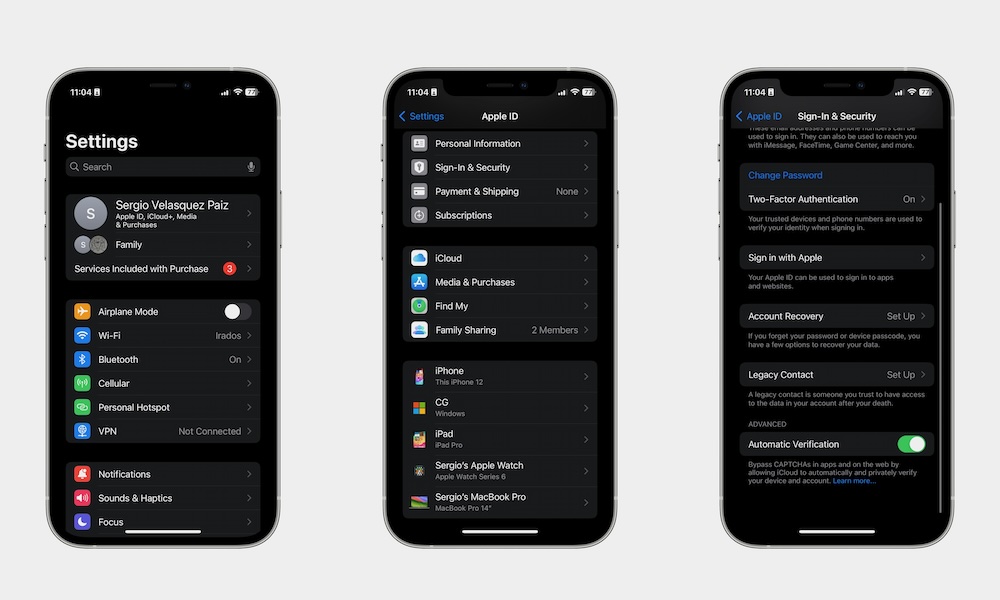
Here's how to set up 2FA for your Apple ID:
- Open the Settings app.
- Tap on your Apple ID at the top of the screen.
- Go to Sign-In & Security.
- Tap on Turn On Two-Factor Authentication.
- Select Continue.
- Follow the instructions on your screen to finish setting up 2FA.
Now, the next time you try to log in to your Apple ID from another device or the web, you'll get a notification on your iPhone asking you to give yourself access and providing a six-digit code you'll have to use to finish logging in.
Turn Off Web Access to Your iCloud Data
Something not many people know about is that you can actually access all your iCloud data from any web browser on any device.
So, even if you have a Windows computer, you can log in to your Apple ID and have access to all your stored data in iCloud.
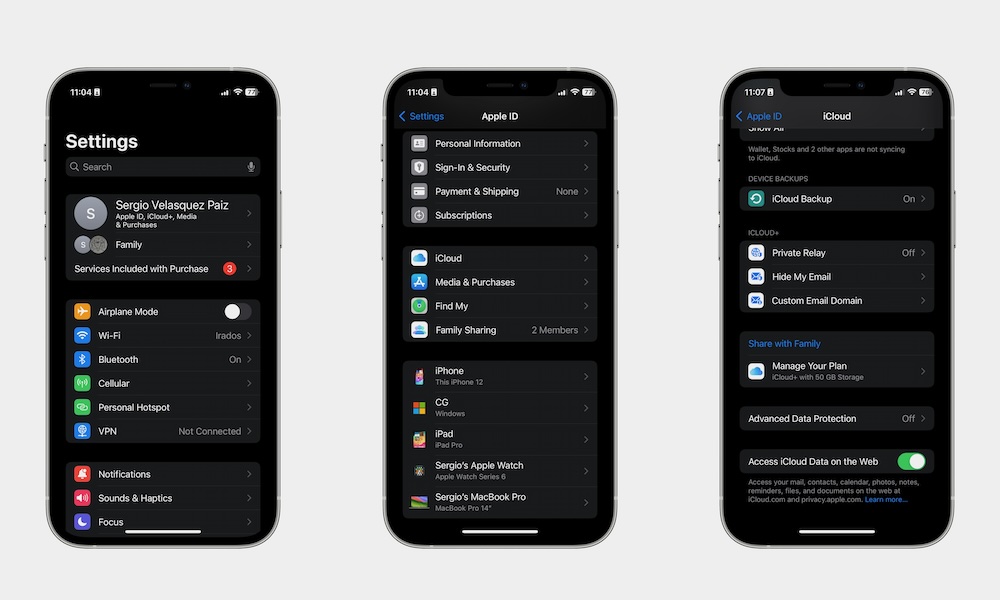
While this might seem helpful, it might also be dangerous to let pretty much anyone try to access your data from any device. Fortunately, you can turn it off like this:
- Go to the Settings app.
- Open your Apple ID at the top of the screen.
- Select iCloud.
- Scroll down and disable Access iCloud Data on the Web.
And that's it. If you ever need to go to your iCloud in a web browser, you can repeat these steps and enable this feature again. Just be sure to keep it off when you aren't using it.
Lock Your Private Safari Tabs Behind Face ID
Another easy way to make sure your personal data is secure is by locking all your private browsing behind Face ID or Touch ID. That way, no one can access your private browsing activity without your consent.
Keep in mind that you'll need to have at least iOS 17 or a later software update to use this feature. If you have that covered, here's what you need to do:
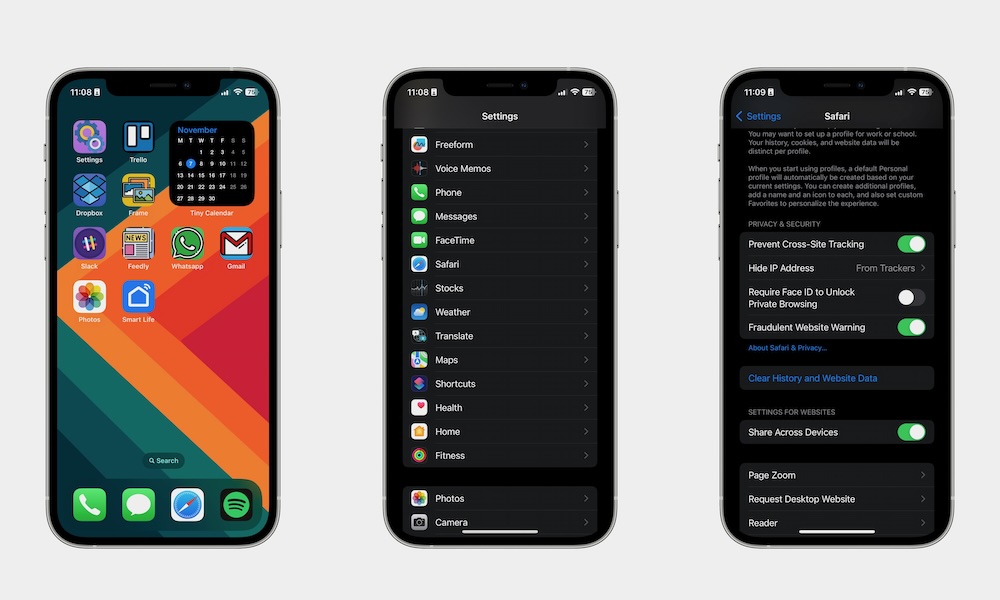
- Open Settings.
- Scroll down and go to Safari.
- Scroll down one more time, and under Privacy & Security, enable Require Face ID to Unlock Private Browsing.
Manage What You Can Access From Your Lock Screen
By default, your Lock Screen has access to a lot of different features to make your iPhone easier to use. However, this means anyone could grab your iPhone and take a look at your Today View and check all the widgets and information you have there.
If you don't want that to happen, your iPhone makes it easy to manage what sort of things you can access from your Lock Screen. Here's how:
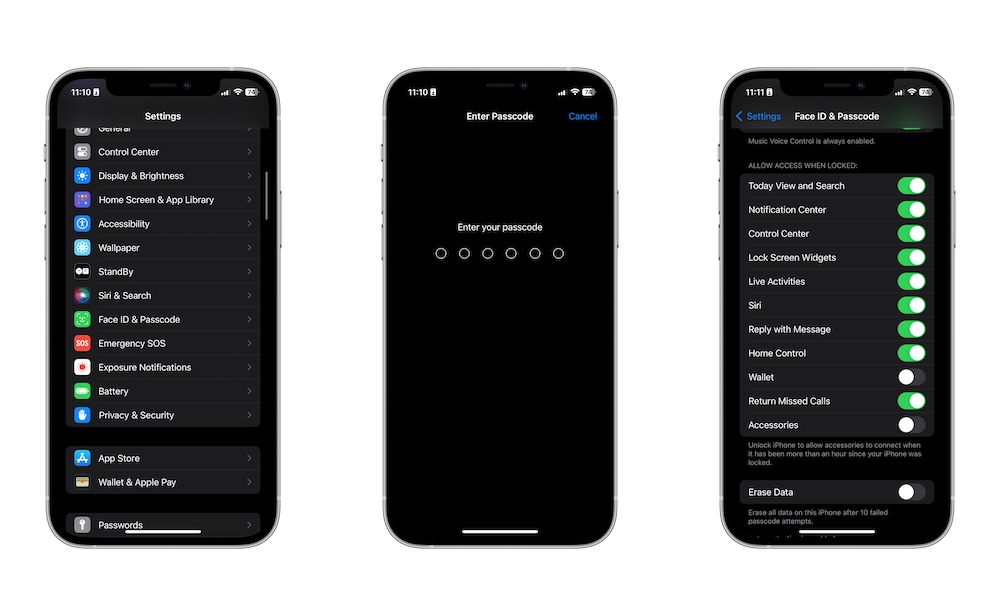
- Open the Settings app.
- Scroll down and tap on Face ID & Passcode.
- Enter your passcode.
- Scroll down again and, under Allow Access When Locked, disable all the stuff you want.
Choose What You Can Use Face ID For

Additionally, you can also change the things Face ID can do for you. By default, you can use Face ID to do stuff like make purchases with Apple Pay, download apps, and auto-fill your passwords.
This means that if someone can use your Face ID, they might be able to do all of this without you even knowing about it. To change this, you need to:
- Open the Settings app.
- Scroll down and go to Face ID & Passcode.
- Enter your passcode.
- Under Use Face ID For, at the top, disable all the things you want.
Set a Stronger Passcode
Since most of us use Face ID or Touch ID to unlock our iPhones, it's understandable that may not give much thought to a passcode you rarely use.
However, the weaker your passcode, the easier it is to get into your iPhone. The good news is that you can create an even stronger password than just a simple six-digit code. Here's how:
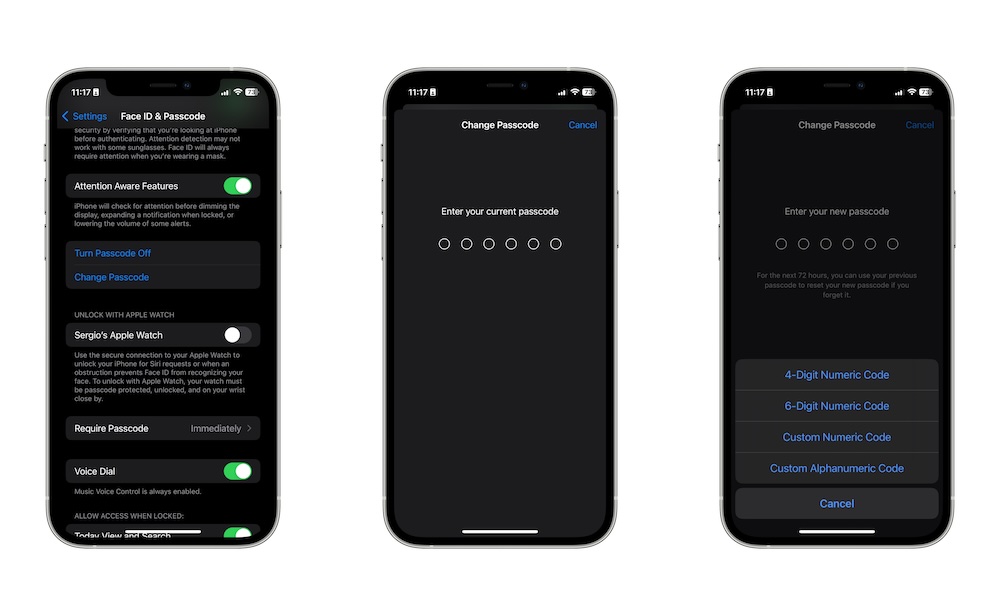
- Open the Settings app.
- Scroll down and go to Face ID & Passcode.
- Enter your passcode.
- Scroll down one more time and tap on Change Passcode.
- Enter your current passcode.
- Before entering a new passcode, tap on Passcode Options at the bottom.
- Select how hard you want your passcode to be.
- Now, enter your new passcode.
This will make your passcode harder to crack, but in case you forget which passcode you used, you'll have up to 72 hours to use your previous passcode to reset the new one if you forget about it.
Keep AirDrop Turned Off
AirDrop is a really handy feature that helps you transfer files in a flash with people near you. However, if you keep it on all the time, you might get files from people you don't want.
Not only that, but hackers may also be able to use it to glean more information about your iPhone. Granted, this is easier said than done, but you should still keep it off when you aren't using it.
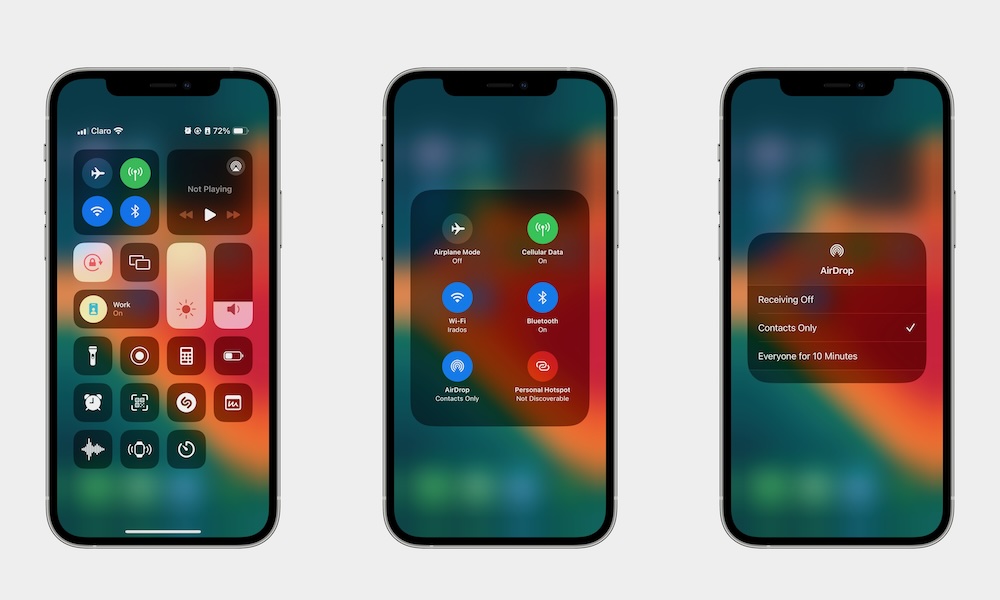
Here's how to disable AirDrop:
- Open your Control Center.
- Press and hold the Wi-Fi tile in the top left corner.
- Tap on AirDrop.
- Select Receiving Off.
Get iCloud+
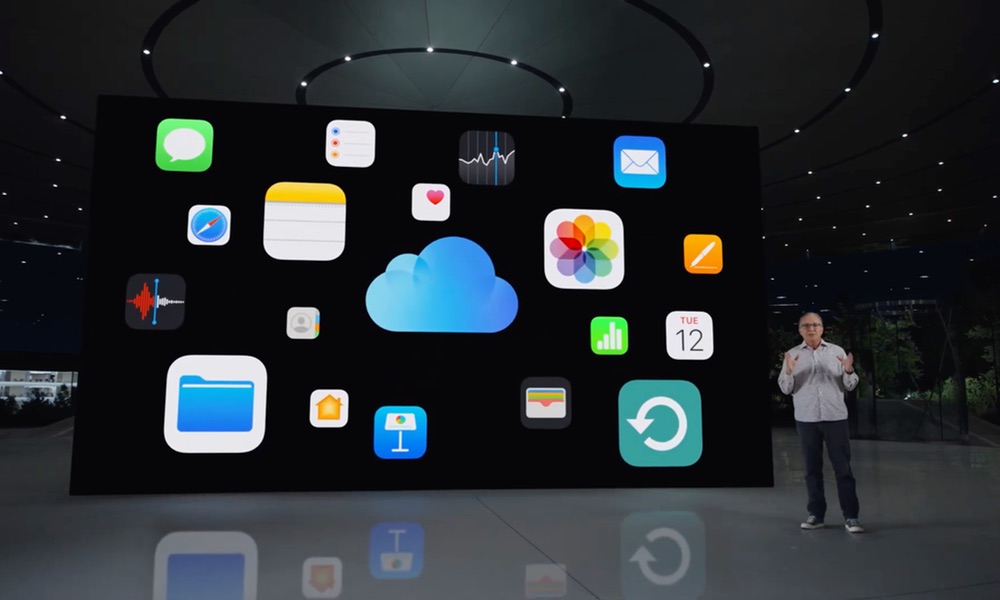
Granted, this is something you'll need to pay for, but Apple has improved iCloud so much in the last few years that paying for iCloud+ feels like a no-brainer.
iCloud+ is the improved version of the old iCloud. Besides giving you extra cloud storage, it also comes with a lot of security features that will come in handy.
For starters, there's iCloud Private Relay, which is a feature that hides your IP address and browsing activity when you're using Safari. Additionally, it also protects your unencrypted internet traffic.
Another note-worthy feature is called Hide My Email. As you can guess by its name, it hides your email and creates a unique but random email address that you can use on any website or platform. Don't worry; you will still get your messages in your personal inbox, but other websites and people won't be able to grab your actual email address.
There are a lot more features, and you can get them for as low as $0.99 per month.
Start Using a VPN
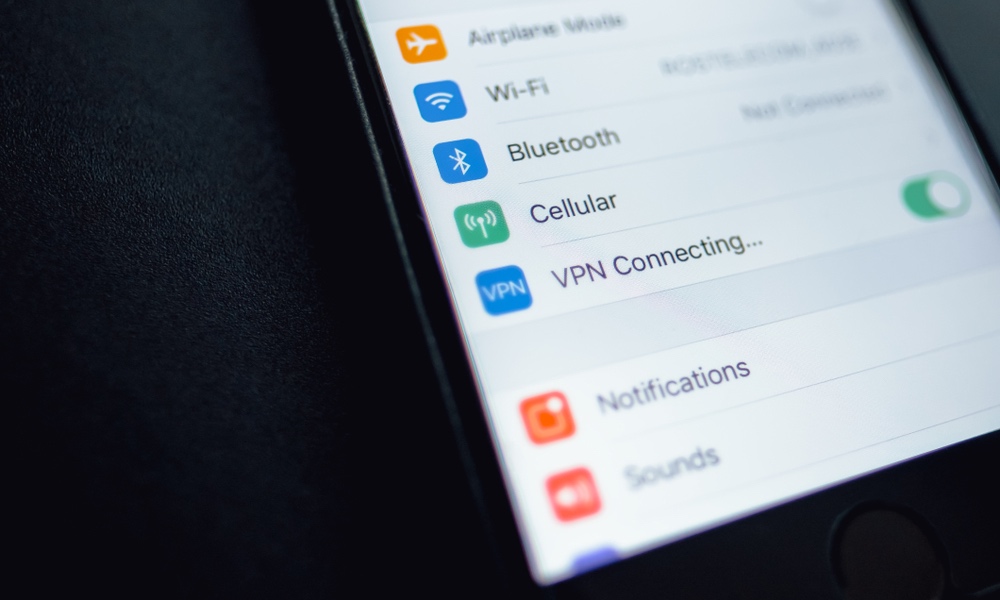
Virtual Private Networks, also known as VPNs, are a great and easy way to keep your iPhone safe at all times, especially if you're constantly using a public network.
A VPN automatically hides your IP address, so it's harder for companies and individuals to track you. Not only that, but you can select a server from a different country to make it look like you're somewhere else.
Not only will this keep you safe, but it can also be helpful when you want to watch content from a different part of the world. Most streaming services block content depending on where you are, so this is a great and quick way to access virtually any content library available in your favorite streaming service.
There are many VPNs available, but to get you started, we recommend you try out something like FastestVPN, which gives you a lifetime subscription for up to 10 devices, which is more than most VPNs give you.