
How to Get the Most Out of Your iPhone 16 Camera Control

Toggle Dark Mode
If you’ve purchased or received a new iPhone 16 this holiday season, you’ve probably already noticed the extra button on the side. This new “Camera Control” is one of Apple’s marquee features for the iPhone 16 lineup, but it does much more than simply open the camera app and take pictures.
That’s because it’s a partially capacitative button, designed with touch sensitivity that allows you to not only push it but also swipe your finger back and forth along it to adjust various settings. It’s so much more than a mere “button” which is probably why Apple has avoided using that term; it’s just the “Camera Control.”

While the Camera Control is mostly for performing actions directly related to photography, Apple also added another trick for it in iOS 18.2 in the form of Visual Intelligence, an AI feature that lets you quickly call up the camera to scan real-world objects and get more information about them using either ChatGPT or Google Lens.
What Is Visual Intelligence?
It’s not surprising that Apple promoted Visual Intelligence as a big new feature when it unveiled the iPhone 16 in September, but what makes it magical isn’t the technology behind it but rather how accessible Apple has made it.
In many ways, Visual Intelligence is just Apple’s answer to Google Lens, which has been around in various forms since 2017. However, Google Lens can be of dubious value when it comes to figuring out the context of what you’re aiming your camera at. It’s great for performing reverse image searches, looking up well-defined products, and extracting text from handwritten notes (something any recent iPhone can already do on its own). However, it falls short when faced with something more abstract or out of context.
That’s why Visual Intelligence isn’t merely Google Lens. Apple has also wrapped ChatGPT into the mix to help analyze an image in real time. This allows Visual Intelligence to go much deeper than what a mere Google Search can provide.
Still, Visual Intelligence isn’t so much a new feature as a way of melding two existing AI tools together and providing a quick way to access them. That’s probably why it’s also limited to the iPhone 16 lineup; sure, it requires the Camera Control, but that’s mainly because that’s the only thing that makes it special.
For instance, you’ve been able to use Google Lens on the iPhone through Google’s apps and website for years, and ChatGPT can analyze any photo you upload to it. The iPhone 15 Pro makes that a bit faster by tying it into Apple Intelligence, but the ChatGPT app is a free download from the App Store that works on any iPhone running iOS 16.4 or later — even the iPhone X and iPhone 8.
How to Use Visual Intelligence
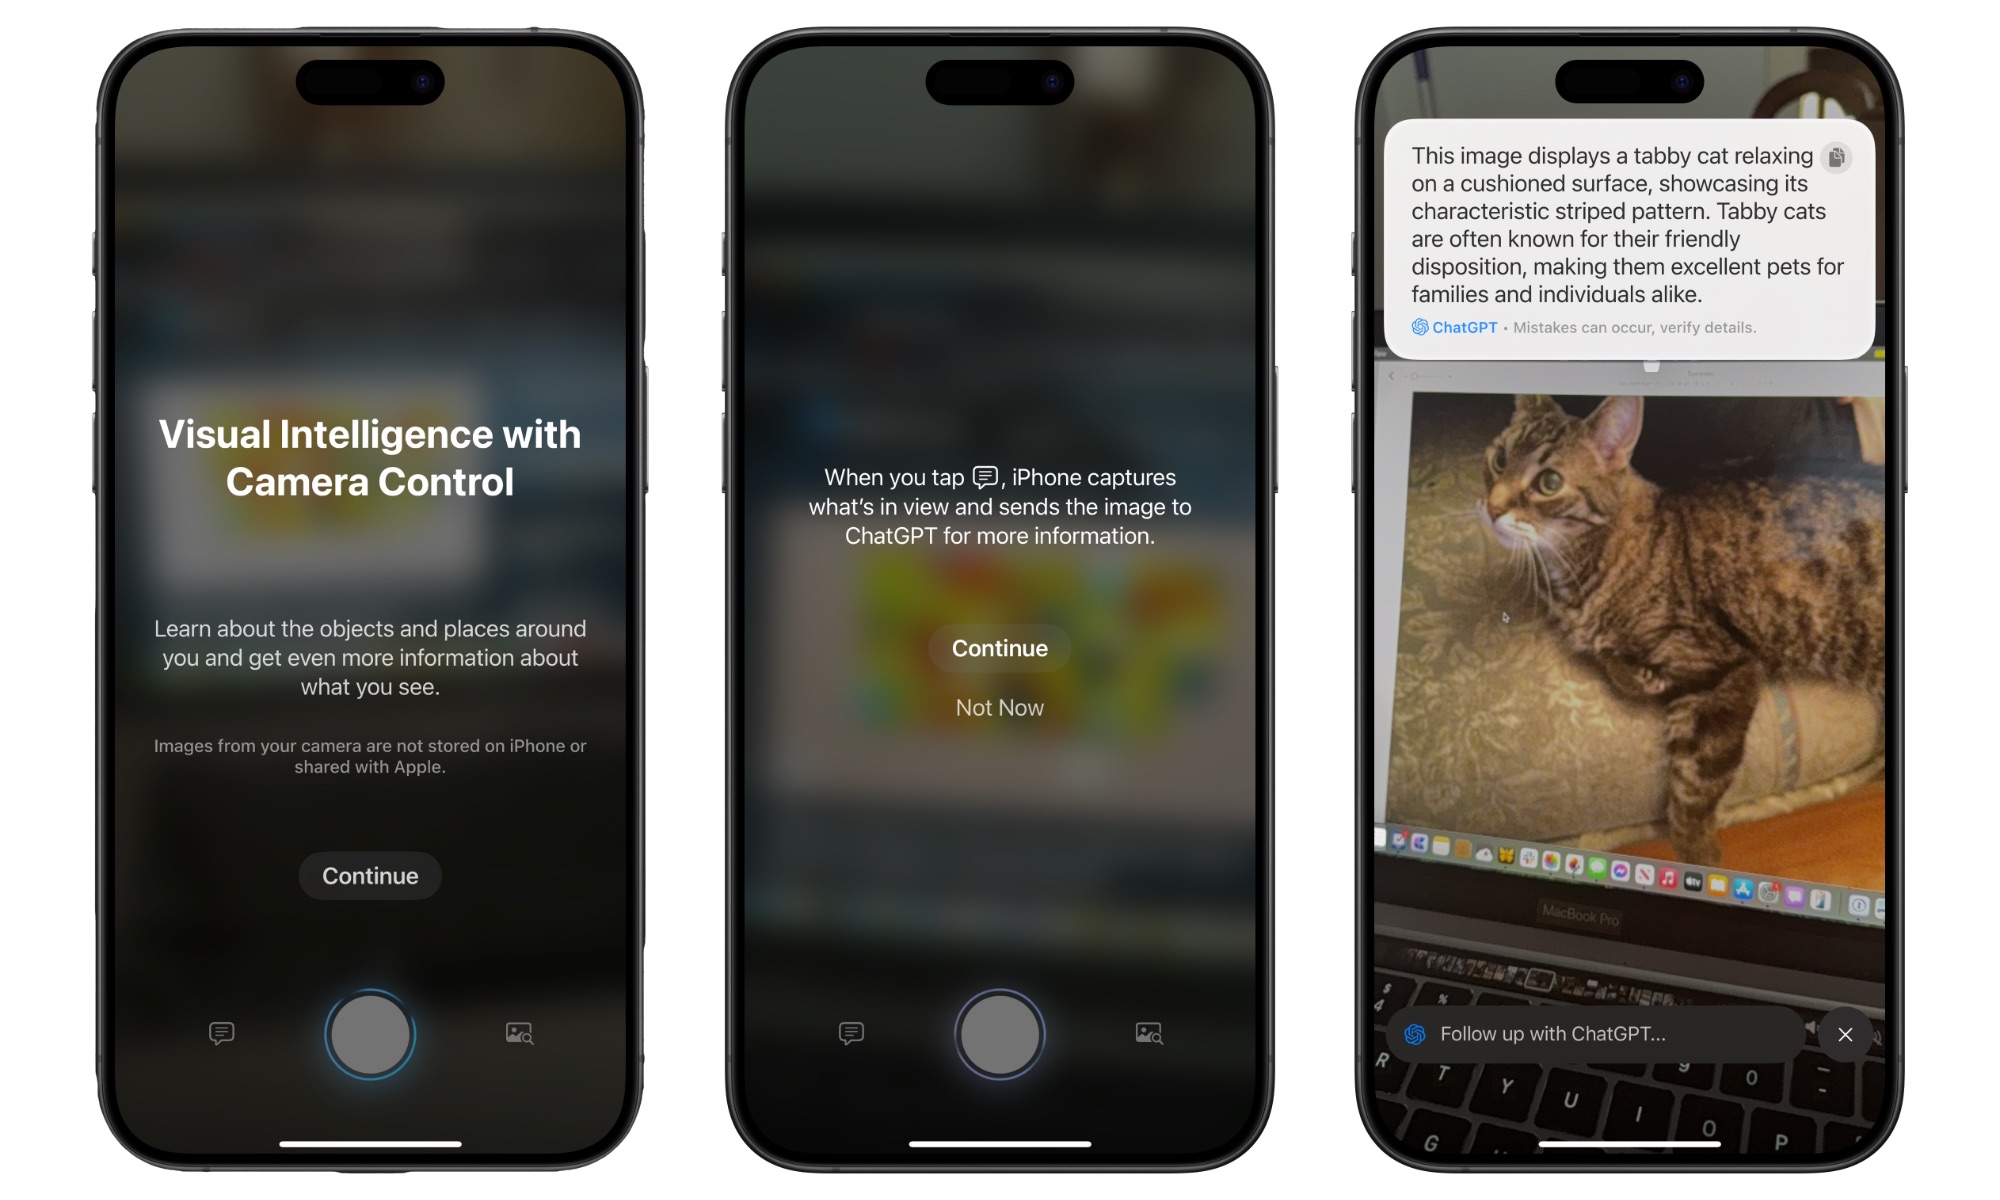
As long as you’re using iOS 18.2 or later, Visual Intelligence is just a press away, and there’s nothing special required to set it up. Hold the Camera Control down for a second or two, and a camera view will open up with three buttons at the bottom.
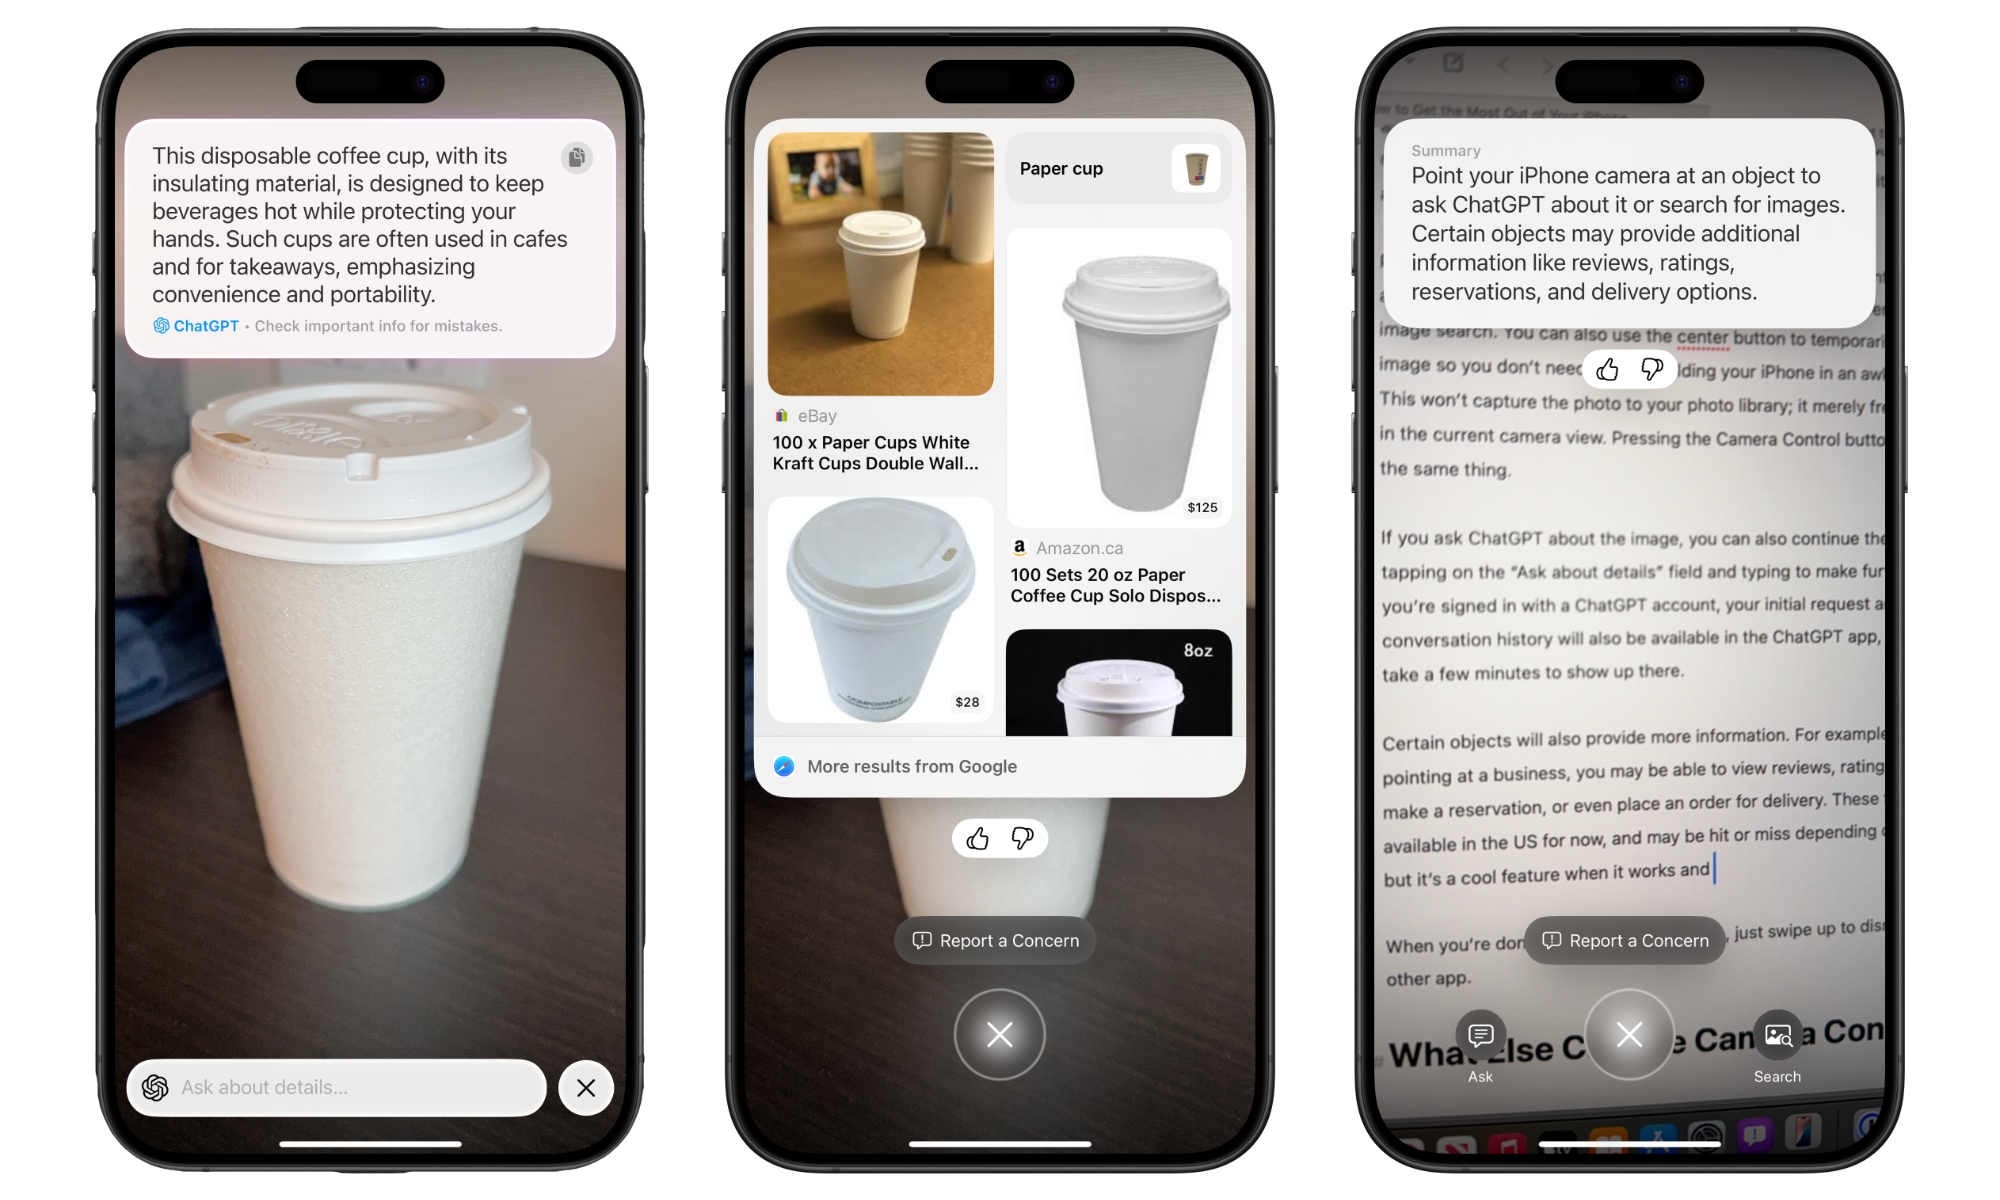
Point your iPhone camera at whatever you want to get more information about, and then tap Ask to ask ChatGPT about it or Search to perform a Google image search. You can also use the center button to temporarily capture the image so you don’t need to keep holding your iPhone awkwardly. This won’t save the photo in your photo library; it merely freezes the image in the current camera view. Pressing the Camera Control button again will do the same thing.
If you ask ChatGPT about the image, you can continue the conversation by tapping the “Ask about details” field and typing to make further requests. If you’re signed in with a ChatGPT account, your initial request and follow-up conversation history will also be available in the ChatGPT app, although it may take a few minutes to show up there.
Particular objects will also provide more information. For example, if you’re pointing at a business, you may see additional buttons like Schedule, Order, and Reserve to view reviews, ratings, and hours, make a reservation, or even place an order for delivery. These features are only available in the US for now and may be hit or miss depending on the business, but it’s a cool feature when it works.
Likewise, using Visual Intelligence on a block of text will show additional buttons to summarize the text, translate it, or read it aloud. You can also tap to quickly call a phone number in the text.
When you’re done with Visual Intelligence, swipe up to dismiss it like any other app.
What Else Can the Camera Control Do?
Of course, there’s much more to the Camera Control than just Visual Intelligence. If anything, that’s a secondary feature, albeit a potentially useful one.
When Apple introduced Camera Control, its primary purpose was to help you take photos. By default, pressing the Camera Control opens the built-in Camera app, and pressing it again captures a photo of whatever you’re pointing at.
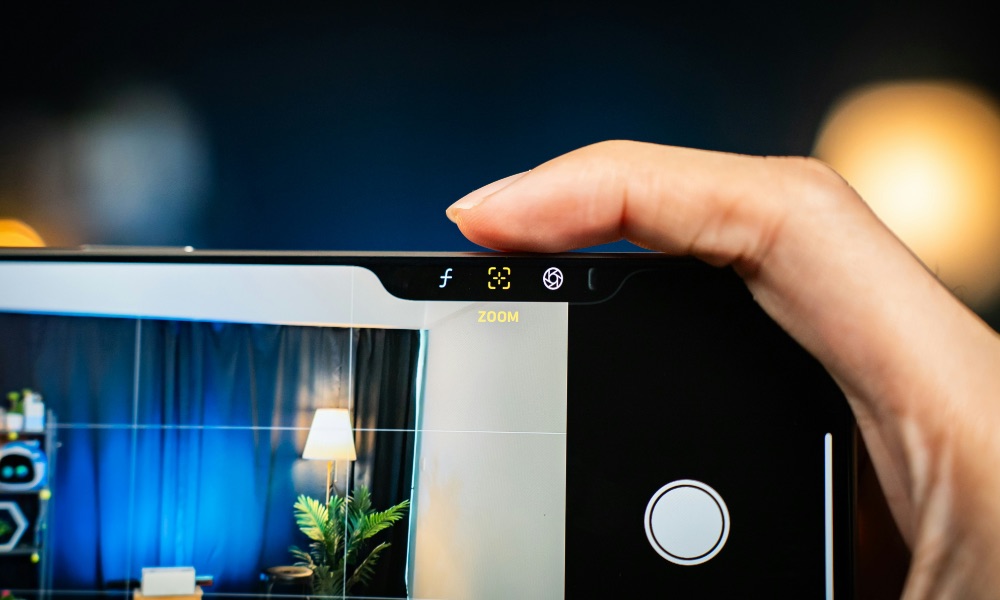
However, a light double-press on the Camera Control will bring up a menu of settings you can adjust. Move your finger along the Camera Control to scroll through options such as exposure, depth, zoom, cameras, styles, and tone, and then make another light press to select the one you want to adjust. At that point, you can swipe to change the setting and then double-light-press again to return to the main menu and choose another setting to adjust.
With iOS 18.2, a light press-and-hold will also lock auto-focus and auto-exposure on the main subject in your frame, similar to how a traditional DSLR camera works. Once you’re ready to take the shot, just press all the way down on the Camera Control.
These are the default actions, but the good news is that the Camera Control is very customizable. Apple has made it available to third-party developers, so you can open your favorite camera app right from the Lock Screen instead of using Apple’s built-in Camera app. Developers can choose how the Camera Control is used in their apps, so the light press and swipe gestures may do different things.
How to Customize the Camera Control
You can also set the camera to open with a double click of the Camera Control instead of a single click, or you can choose to open no camera app at all.
- Open the Settings app on your iPhone.
- Scroll down and choose Camera.
- Select Camera Control.
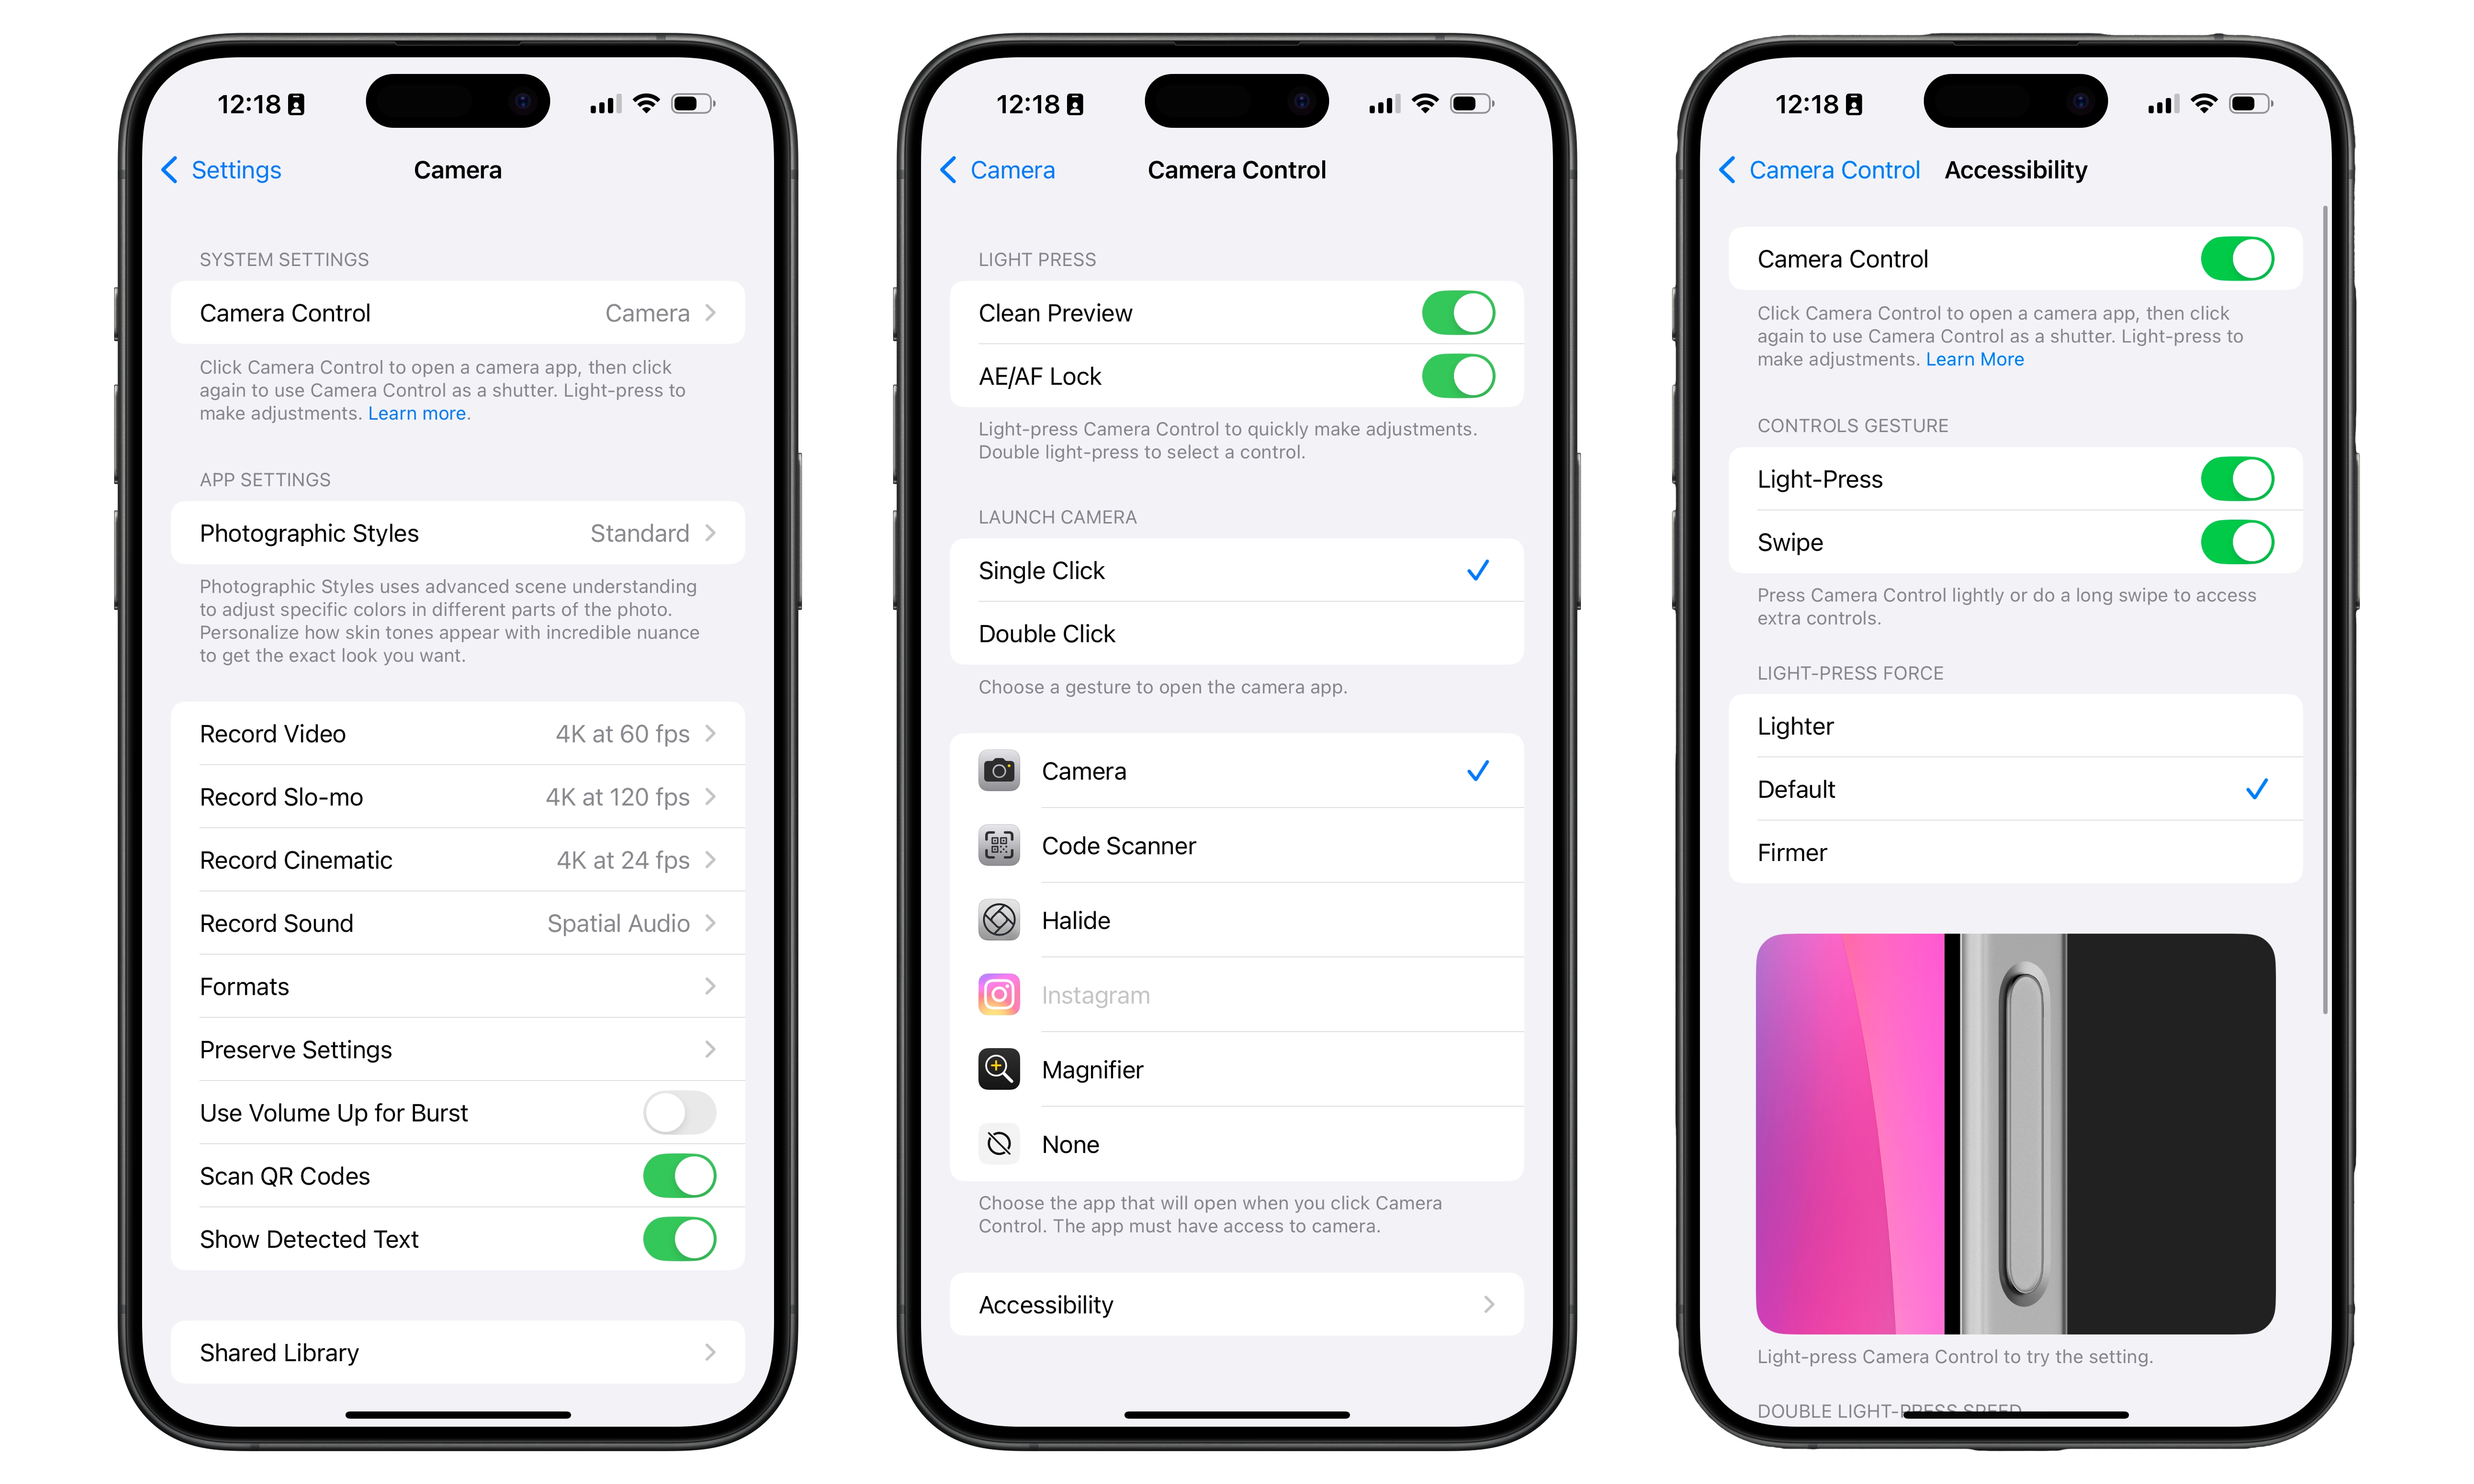
- The first two options define the Light Press action. You can disable the “Clean Preview,” which hides the on-screen controls when using the Camera Control, or turn off the AE/AF Lock if you prefer to avoid locking in the focus and exposure with a light press.
- Under “Launch Camera,” you can choose whether a Single Click or Double Click is required to open your selected camera app.
- Below this, you can choose the app you want to open when the Camera Control is pressed. Note that an app has to be set up to use the Camera Control to appear on this list. Choosing None here prevents the Camera Control from opening any app, but you’ll still be able to use it inside apps that support it.
The Accessibility option at the bottom lets you further customize the Camera Control:
- The Camera Control toggle at the top can disable the button entirely. Turn this off, and that side button becomes entirely inert. It will do nothing in any app.
- Controls Gesture lets you determine whether Light-Press and Swipe gestures are enabled. Turn both off, and the Camera Control becomes little more than a glorified shutter button.
- The remaining settings allow you to adjust the button’s sensitivity to light presses, as well as the speed at which you need to double-light-press or double-click the button.
Lastly, there’s one other new Camera Control setting that Apple added in iOS 18.2 but hid away in an entirely different place:
- Open the Settings app.
- Scroll down and select Display & Brightness.
- Scroll to the bottom and look for Require Screen On. This should be enabled by default, but you can switch it off if you’d rather launch the camera immediately from the Lock Screen, even when your device is asleep.
There’s been a bit of confusion about how this setting applies, as the pre-iOS 18.2 behavior was the equivalent of enabling this switch. That’s why it’s on by default in iOS 18.2, and you have to turn it off if you want the Camera Control to behave differently.

With this switch on — and in all iOS 18.1 and prior versions that lacked this switch — pressing the Camera Control while your iPhone was asleep would first wake the screen. You’d then need to push it again to open the Camera app. Some folks weren’t fond of this idea as it slowed things down; if you want to take a quick picture from your pocket, that extra press can be a problem. As Daring Fireball’s John Gruber pointed out in his iPhone 16 review, it forced him (and many others, we’re sure) into a habit of always pressing twice just to make sure, with the tradeoff of deleting “at least half a dozen blurry accidental shots” when the iPhone is already awake.
As obscurely placed as this new setting is, it’s a godsend if you want to be what Gruber calls “a quick-draw gunslinger” with your camera. After all, capturing fleeting moments quickly is one of the most significant advantages of the new Camera Control.
Nevertheless, while I’m firmly in Gruber’s camp on this one, the level of customizability Apple has provided for iPhone 16 users is very impressive, and it’s hard to imagine anyone not being able to bend the Camera Control to their will, from speeding up photography to disabling it entirely and pretending it’s not there.


