Apple’s Notes App Is Extraordinarily Powerful But Most Users Don’t Realize It
 Credit: Ekaterina_Minaeva / Shutterstock
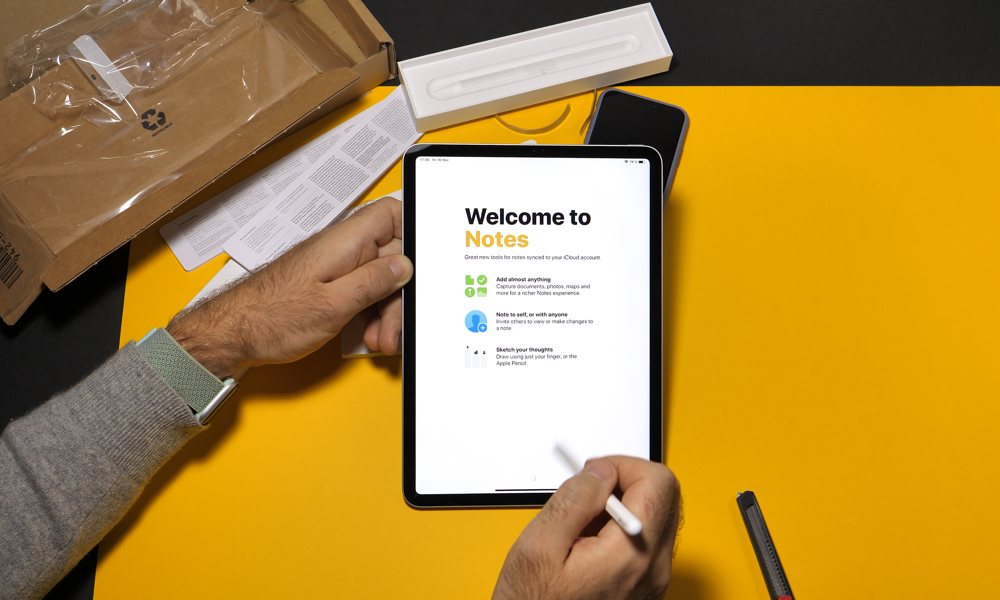
From its humble beginnings as a very basic note-taking app on the original 2007 iPhone, Apple's Notes has grown into a powerhouse of advanced features that many users may not realize are even there. Of course, since it took about eight years for the app to even begin to realize its potential, it's understandable how many users would have filed it away and moved on to more powerful alternatives. Since the release of iOS 9, however, there's been a lot more hidden underneath the deceptively simple sheen of the Notes app.
Notes began its life in the skeuomorphic style that was common to almost all iPhone apps of the pre-iOS 7 era — a yellow notepad that you could type notes into. In those days, there was no rich-text support at all, and in fact users were originally stuck using the "marker felt" font, which was enough by itself to make many avoid the Notes app altogether.
Apple later added the ability to choose other fonts in iOS 4 — Helvetica and Chalkboard, with the latter being swapped out for Noteworthy in iOS 4.3 a few months later. Still, these were just overall font choices that would be used for all of your notes.
Other features were similarly limited; there were no sharing capabilities beyond pasting the contents of a note into an email, no ability to protect notes, and little to no integration with other iOS apps. Notes could be synced between devices, but this was done by creating a "Notes" folder in your email account.
When iOS 9 came along, Apple decided that it was time to give the Notes app its day, and a whole swath of significant new enhancements were introduced. First and foremost, Apple Notes became an iCloud service, allowing users to sync their notes using a system designed expressly for that purpose, rather than hacking it onto the IMAP email protocol.
This single change meant that Apple was suddenly able to support a whole range of new services without risking reliable syncing between devices. In iOS 9, Notes gained rich-text support along with the ability to insert handwritten sketches, and securely lock specific notes with a passcode, and by the time iOS 11 came along in 2017, Apple had added support for its Apple Pencil, collaboration, a whole new array of rich-text features, and even the ability to scan documents using the iPhone camera.
If you gave up on Notes back in the days when it really was too basic, or have simply never taken a closer look at what's behind the little white-and-yellow icon on your home screen, read on to discover some of the really cool and useful things you can now do with Apple's Notes app — it might just become the most useful app on your iPhone.
Sketch Drawings
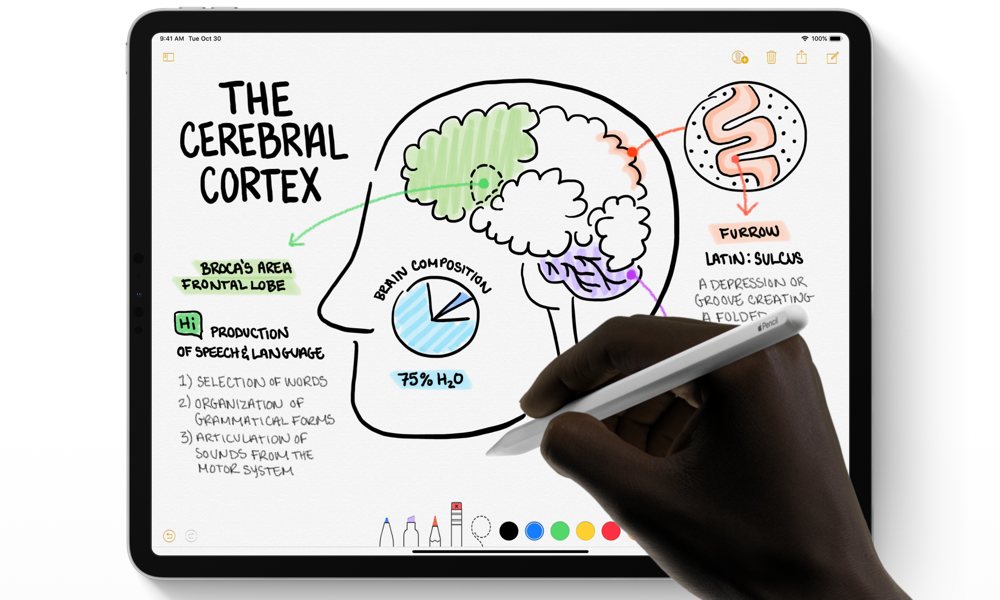
There's no shortage of apps on the App Store that can be used to sketch and draw, and some of them are quite good if you're looking for the ability to create extremely detailed and high-quality sketches with your Apple Pencil.
You may be surprised at what Apple Notes can do with your Apple Pencil, however, especially if you've got one of the new iPad Pros and the second-generation model of Apple's stylus.
There's a wide array of drawing tools available in Apple Notes, and the ability to easy tap the pencil to switch between them, and Apple does a great job of tightly integrating everything into the Notes experience; you can begin by typing a note, and then simply tap into it with the Apple Pencil and start drawing right away — your text will move around to accommodate your drawing, and of course your sketches will be stored in your iCloud account and available across all of your iOS devices and even on your Mac.
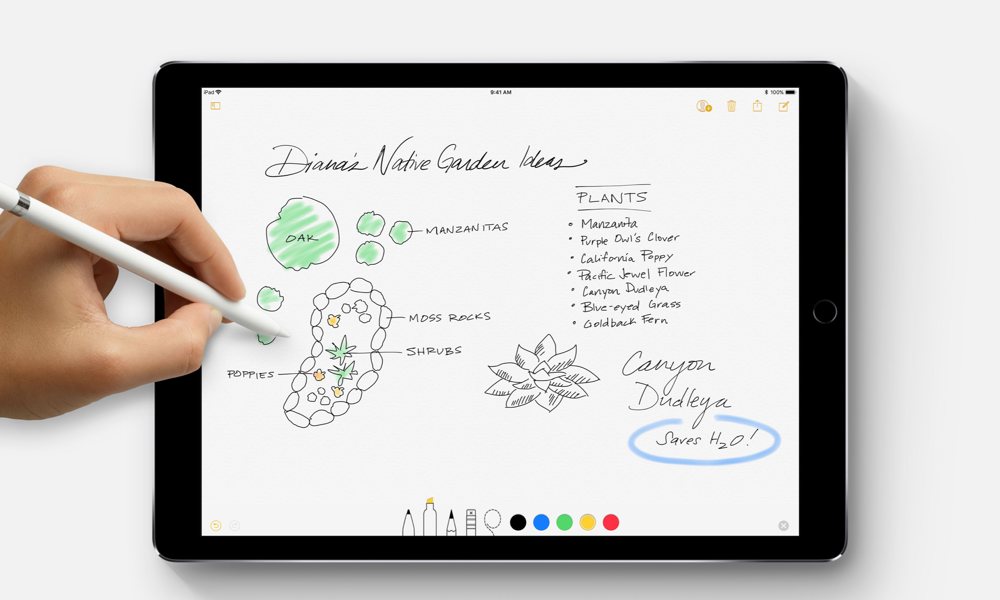
Take Handwritten Notes
In addition to drawing diagrams and sketches, you can of course use the Apple Pencil to take handwritten notes as well. Although it's not quite yet sophisticated enough to turn this into typed text, Apple's Notes app and built-in iOS spotlight search does have the ability to search for notes based on your handwriting, so as long as it doesn't look like complete chicken-scratch, there's a good chance you'll be able to easily find your handwritten notes again in the future. It's a very handy feature if you prefer freeform script versus pecking things out on your iPad keyboard.
Scan Documents
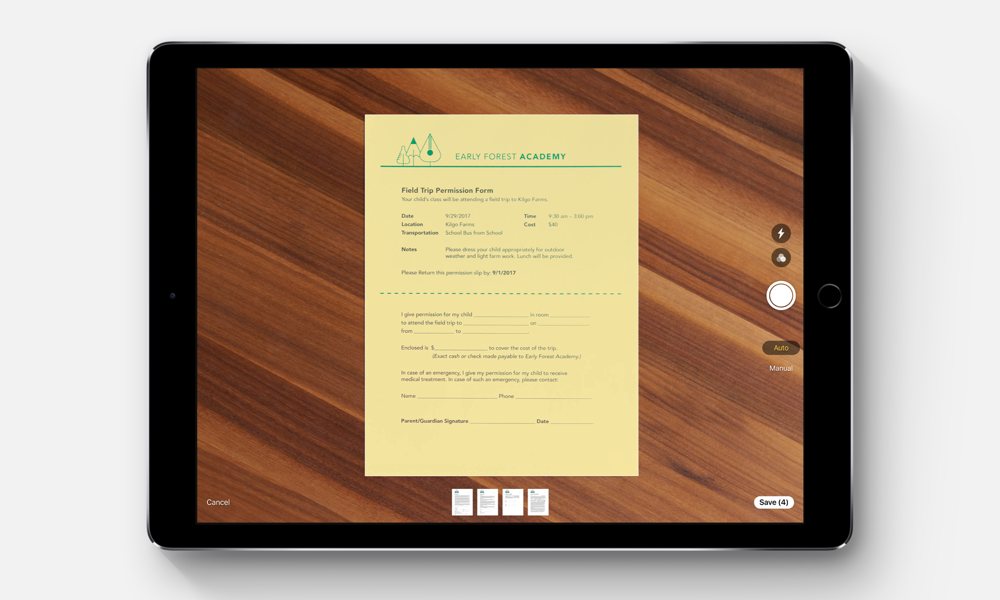
While Notes is obviously a great place to store all of your digital information, Apple also clearly wants to make it the home for all of your paper records as well. Using your iPad or iPhone camera, you can scan in receipts, bills, bank statements, or even your child's artwork in order to keep a permanent digital record.
Scans are inserted into notes like any other attachment, so you can easily add a title and more text around them, such as descriptions for expense receipts, or payment confirmations for bills. They can also be annotated marked up using the built-in markup tools, and you can even add a signature with your Apple Pencil and then send the document back out as a PDF via Mail or Messages.
While the ability to scan documents is a great feature to have built into Notes, there are some limitations worth keeping in mind. Chief among these is the lack of OCR — this is something we're really hoping to see Apple add in a future iOS update, but for now if you want your scanned documents to be converted to searchable and copyable text, you'll need to turn to a special-purpose scanning app like Scanner Pro or Scanbot, although this doesn't mean you'll have to abandon using Apple Notes to store your scans — many of these apps will still let you send scanned documents from them right back into Apple Notes.
Organize Your Notes
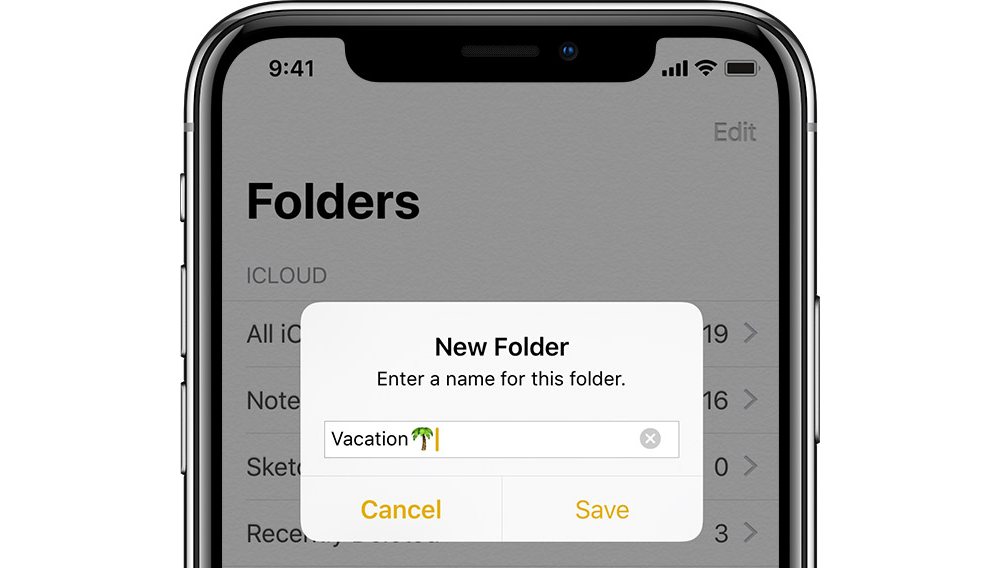
If your use of Apple Notes goes beyond the casual, sooner or later you'll just have too many notes to want to see in a single list. To deal with this, you can easily create folder and organize your notes into them.
Once you've created one or more folders, you can move a note to a folder by swiping on it and choosing the purple folder icon that appears, or use the"Edit" button in the top right corner to select multiple notes and move them all at once.
You don't need to worry about losing notes, though — iOS' spotlight feature will still search everything, regardless of what folder it's in, and an "All Notes" folder at the top will let you see a list of all of your notes, across every folder.
Sadly, Apple Notes doesn't support the kind of tag-based taxonomy that many users prefer; folders are a flat hierarchy where a given note can only be in one place at a time. However, you can still replicate a tag-based system of sorts just by adding tags into the text of your note, and then using the Spotlight search feature to ferret them out.
Keep Important Notes Handy
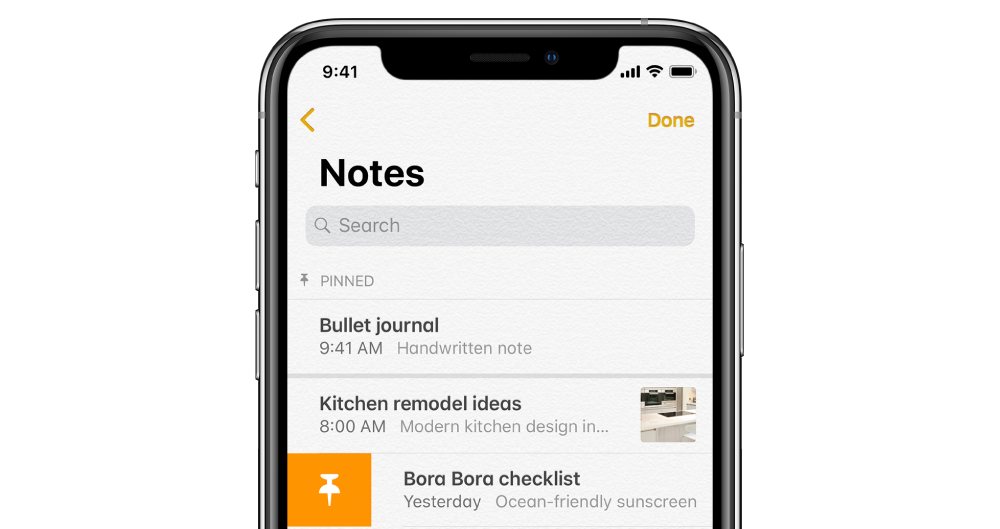
Again, once you've got a lot of notes, it's easy for certain things to get lost in the shuffle. Hence, Apple has provided a way for you to ensure that you can keep your important notes at the top of your list by "pinning" them.
Swiping to the right on any given note will reveal an orange pin icon. Tapping this puts the note at the top, and if you pin multiple notes, they'll all be at the top together, sorted according to your sort preference (date created, date edited, or title, depending on what you've chosen in the Notes app's settings).
If you're using multiple folders, pins are also specific to each folder, so you can free pin your favourite recipes in your "Recipes" folder without worrying about them being a distraction when you're going over your tax receipts.
Create Checklists
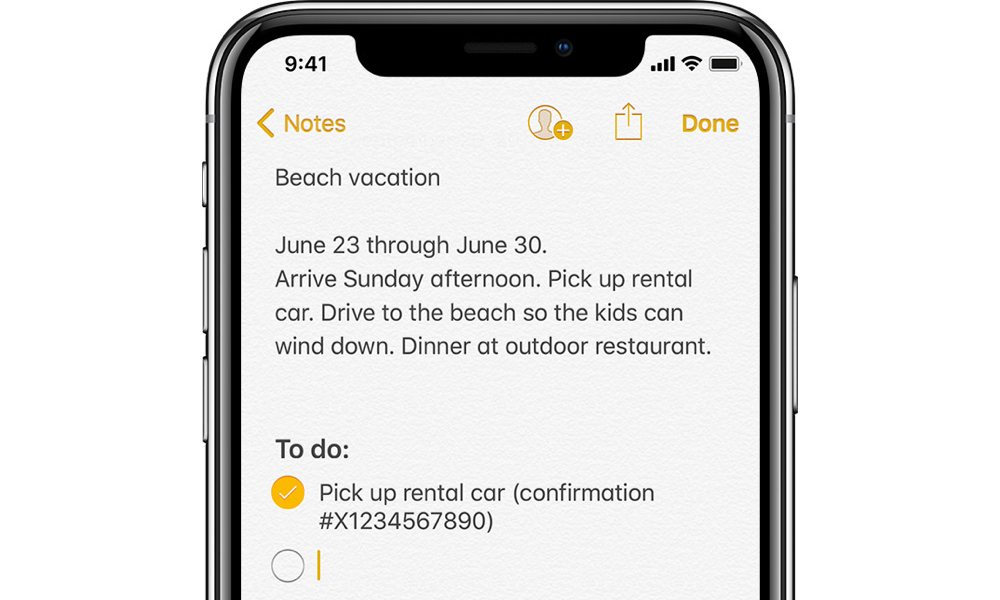
There are a lot of advanced formatting features that can be found in Notes now, and one of the most useful is that ability to create checklists in your notes. A simple tap on the checkbox button at the bottom of the screen when creating or editing a note will add a checklist. This can also be anywhere in the body of your note, and combined with other text, so you could easily tack a to-do list onto a note describing travel plans, or a list of ingredients to buy for a recipe that you've saved.
Once you've created a checklist, you can simply tap on the empty circles to check items off, even when you're not in editing mode. Unfortunately, that's about as sophisticated as it gets right now — there's no drag-and-drop reordering of checklists, nor a way to hide those items that have been checked off. However, it's still pretty handy for dealing with very simple lists, and if you require a bit more, there's always Apple's Reminders app.
Share Grocery Lists
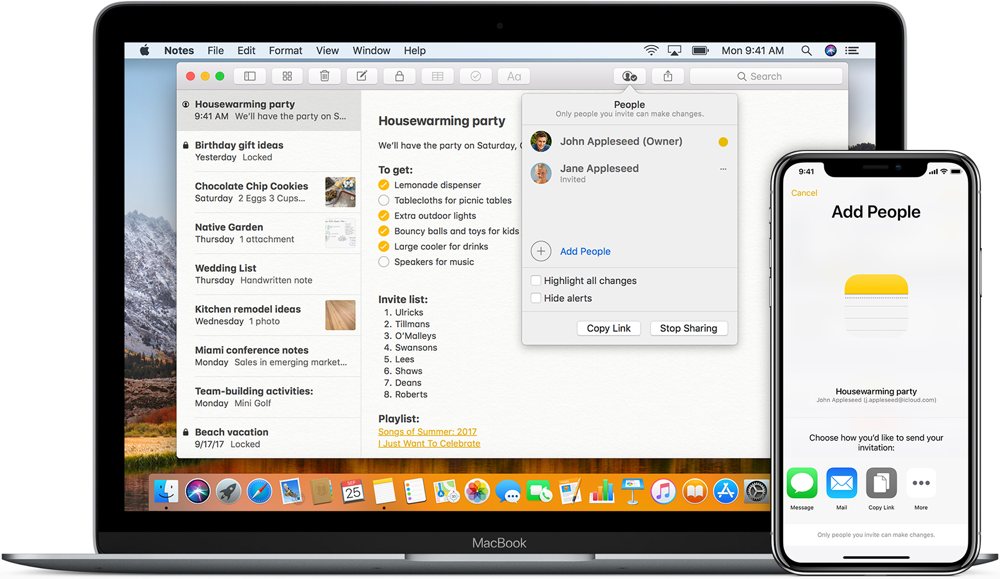
One under appreciated recent development in Notes is the ability to share and collaborate on notes with other iPhone and iPad users. Not only can you make the contents of a note available to a family member, friend, or co-worker, but both of you will be able to edit the note, with changes syncing up between your devices in real-time.
To get started
- Tap the person icon at the top of the note editing screen.
- Choose how to send out your invite (e.g. via Messages, Mail, Facebook Messenger, etc). You can also choose to just copy the sharing link to your clipboard.
- Add the names of people you want to share the note with.
Combined with the checklist feature, it's a great way to create shared shopping lists or lists of household chores among family members. As each person adds or checks off items, everybody will see the updates almost instantly — you can literally divvy up shopping duties while walking around the store and avoid picking up the same items.
In addition, when sharing a note you can also choose whether to receive alerts when the note is updated, and highlight changes made by others so you can quickly see what's new. You can also stop sharing a note at any time by going back into the sharing list and tapping the "Stop Sharing" button. As the owner of a shared note, it will also go away on other people's devices if you delete the original one from yours.
Create Links to Notes
Notes doesn't yet have the ability to create a link to open a note from another app, but you can actually use the sharing feature to work around this.
- Open the note you want to link to.
- Tap the person icon at the top of the note editing screen.
- Select "Copy Link" as the invitation method.
- When the "Add People" screen appears, simply tap "Copy Link" in the top-right corner without adding any names.
- Paste the link from your clipboard into the app that you want to link the note from.
It's a bit kludgy, but this can be a handy way to linking to a note from something like a task management app, or even creating links between notes.
Unfortunately, right now there's no easy way to UN-share the note from iOS, as the "Stop Sharing" button won't appear unless you have at least one other name on the note, although you will be able to find the button in the macOS version of Notes.
Collect Recipes
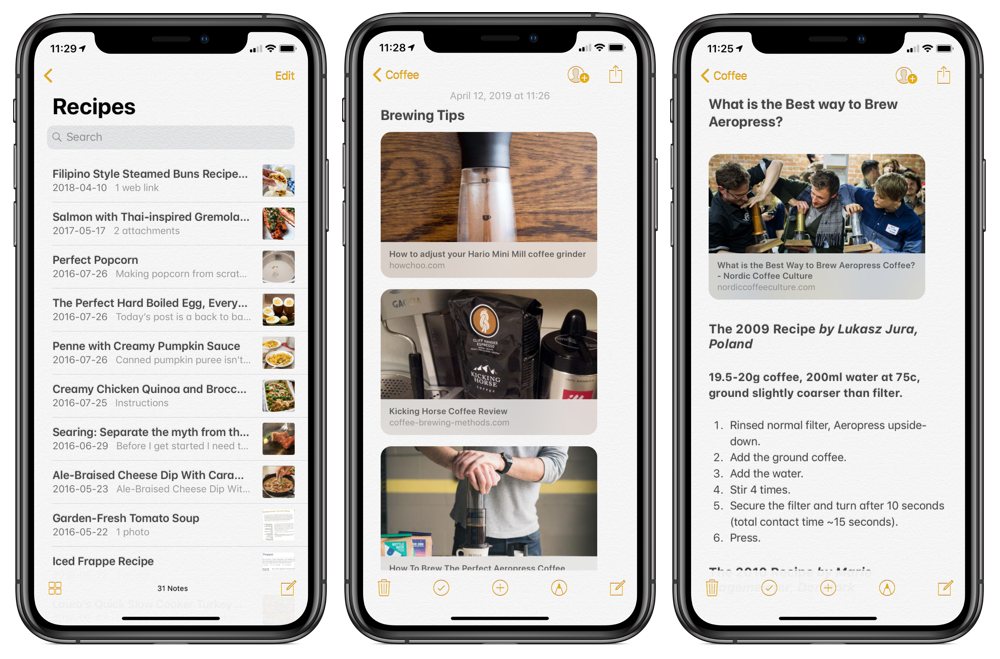
Another great but lesser-known use of the Notes app is found in its ability to be used to collect information from other apps. Notes appears on the iOS Share Sheet pretty much everywhere, so it's a great way of compiling recipes from different web pages, or collecting addresses of favourite restaurants from Apple Maps, compiling information for a term paper, or just about any other collection of resources else that you'd like to keep an easy list of.
What's even cooler is that Notes presents these shared links in a rich format that looks great and allows you to easily visualize what's behind the link. How these will look does depend somewhat on how the source website is designed — obviously text-only sites won't include a picture at all — but it works really well for many image-heavy sites.
As an added bonus, you can also drag and drop these rich links within your notes to easily reorder them, and of course they flow with whatever other elements you want to put into your notes, so you can still add text, create checklists, and even insert sketches, drawings, photos, and scans.
Keep Some Things Secret
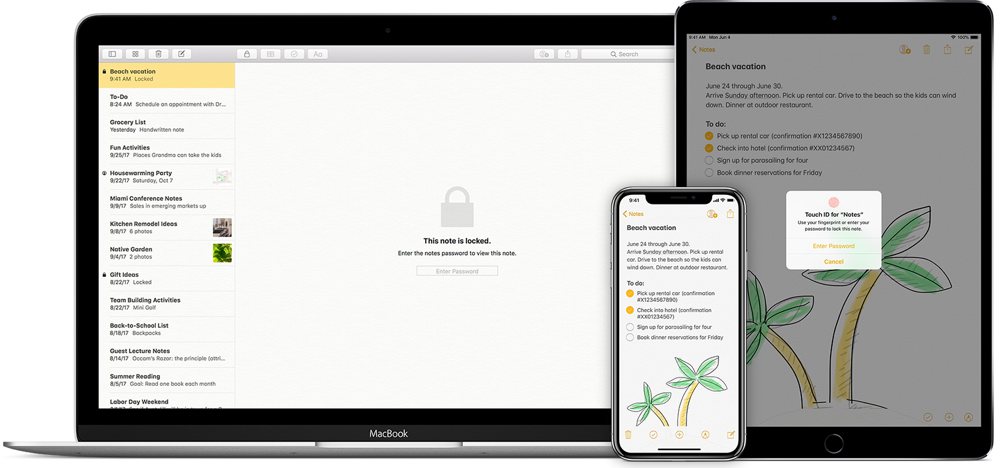
If you sometimes let other people use your iPhone, or you simply want to make sure that personal notes stay private, you'll be happy to know that Apple's Notes app also lets you easily lock notes with a passcode, and then unlock them using Touch ID or Face ID, making it really easy to access for you to get at your secure notes while ensuring that nobody else can. To lock a note:
- Open the note you want to secure.
- Tap the sharing button.
- From the actions at the bottom of the share sheet, choose "Lock Note."
- If you haven't yet setup a password, you'll be prompted to do so. If you have set up a password, the note will simply be locked with your existing password.
Locked notes will be identified by a padlock icon beside them, and when opening them you'll need to either enter your password or authenticate using Touch ID or Face ID. Once unlocked, the note remains accessible for a few minutes to allow you to easily return to it, but it will be locked again if you close the notes app or your device goes to sleep.
It's not a super-sophisticated security system — for instance, only a single app-wide password is used to secure every one of the notes you choose to lock, and it doesn't add any extra encryption to your notes — but it should meet the needs for users who are just concerned about keeping information away from casually prying eyes.
Create Quick Notes from the Lock Screen
If you have an iPad and an Apple Pencil, you can quickly start creating a note just by tapping your Apple Pencil right on your device's lock screen.
Notes has the home field advantage here, as this is one of these privileges that Apple can give to its own apps that you'll likely never see anywhere else. While iPhone users don't have the benefit of the Apple Pencil (yet), a quick note can also similarly be brought up from the Control Center, even if the iPhone is locked.
In the Notes settings, you can also choose to always create a new note when you do this, or resume the last note that you were accessing. The latter can be handy if you just want to keep a note open and add more content to it as your day progresses, like a journal, and you can also set up Notes to automatically create a new note after a certain amount of time has elapsed since it was last updated. It's another one of these really useful but under-appreciated features in Apple Notes.
Access Notes On The Web
Since Apple's Notes app syncs via iCloud, you can also view, search, and create notes by logging into iCloud.com from any supported web browser. If you've locked notes, they won't be available from here, but otherwise it's a great way to look something up or add some more information to a note when you don't have your iPhone or iPad handy.
Make Notes from your HomePod
One other trick that we really love is the ability to note only create notes, but even add to them using Siri on our HomePod. Standard Siri commands all work here, so you can saying things like:
- Hey Siri, note that I need to buy eggs and bread
- Hey Siri, create a note titled Household Chores for Today
- Hey Siri, add milk to my Grocery List note
Items added to existing notes will also continue in whatever format the note is in, so if you have a note that's already a checklist, adding another item will continue the checklist. This can be a great way for family members to update a shared grocery list — it's really handy to call out a request to Siri as soon as you open the fridge and realize you need to buy more of something.

