
9 Great macOS Sonoma Features You Probably Haven’t Tried Yet
 Credit: Austin Distel
Sonoma has been out for quite a few months now, and we've already seen everything this software update can do.
While some of us spend a lot of time playing around with the update and finding all its new features, others are just happy Sonoma didn't break their Mac.
If you're from the latter group, then there's no better time than today to start checking out all the great features you haven't tried yet.
From Safari profiles to accessibility features and even a game mode, read on for 9 great features you need to try in macOS Sonoma.
Add Widgets to Your Mac's Desktop
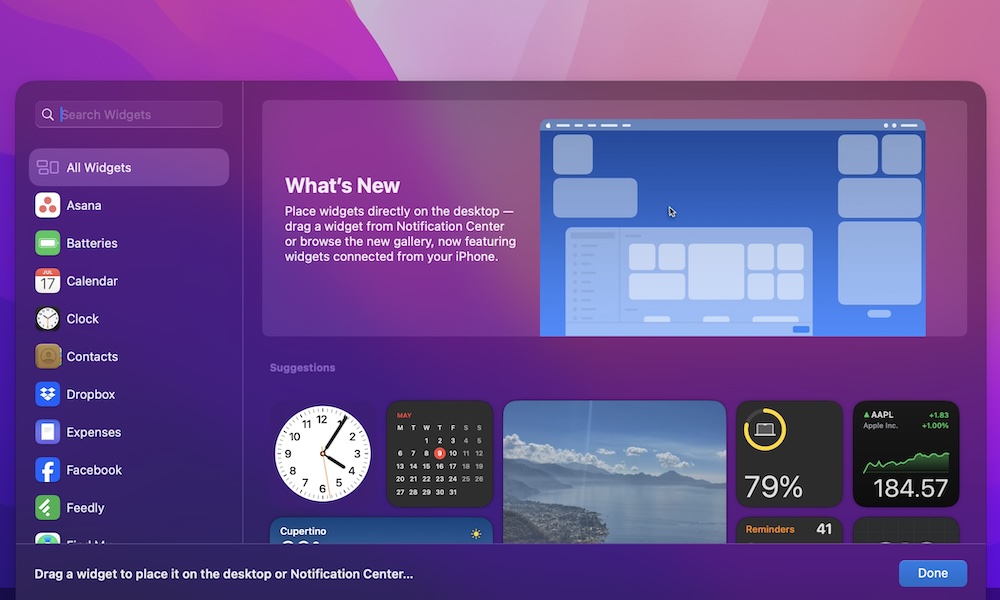
One of the biggest changes that Sonoma brought to the table is widgets everywhere. Before Sonoma, you could only have widgets in your Notification Center, but now you can finally place them right on your desktop.
Moreover, these widgets are interactive; they're not just shortcuts. You can actually perform actions like crossing an item off in your Reminders app or running system shortcuts with the click of a button.
Here's how you can add widgets to your Mac's desktop:
- Go to your wallpaper. You can click on it or press Command + F3.
- Control-click (right-click) anywhere on your wallpaper.
- Select Edit Widgets.
- Find the widget you want to use.
- Click the widget to automatically move it to your wallpaper, or drag and drop the widget wherever you want it.
And that's it. If you added a widget you don't like anymore, simply control-click it and choose Remove Widget.
As you probably noticed, there are also a bunch of widgets for apps that you don't have installed on your Mac. That's because you can use your iPhone's widgets on your Mac too.
Of course, not everyone might like this, which is why you can turn it off if you want. Simply go to the Apple menu > System Settings > Desktop & Dock and scroll down until you see the Widgets section. Next, turn off the toggle next to Use iPhone widgets.
Start Using Web Apps
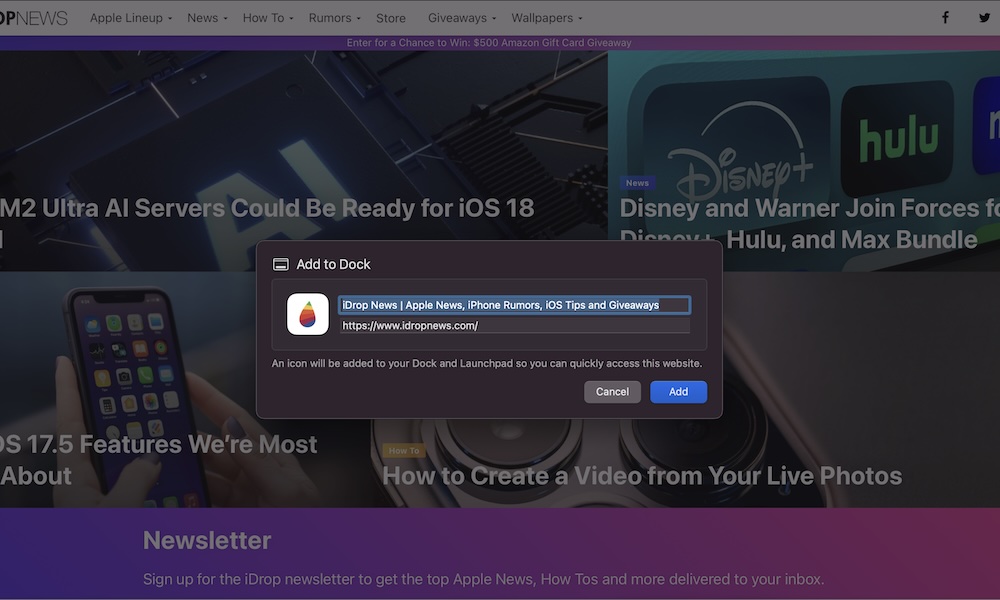
Sonoma brought an interesting feature to the Mac called Web Apps. This feature is basically a way to put a shortcut to your favorite website into your Mac's Dock.
The difference between a Web App and a shortcut is that when you open the Web App, you will only have access to that website. There's no address bar or access to your Tab Groups or Safari Profiles.
To add a Web App to your Mac's Dock, you need to:
- Open Safari.
- Go to the website you want to turn into a Web App.
- Click on the Share button in the top right corner of the Safari window.
- Select Add to Dock.
- Enter the name you want to use for your Web App.
- When you're done, click on Add.
Now, you can go to your Mac's Dock, and you'll find the new Web App on the far right of the Dock.
If you don't want it there anymore, you can simply control-click (right-click) the web app, click Options, and select Remove from Dock, just like any other app.
Safari Profiles
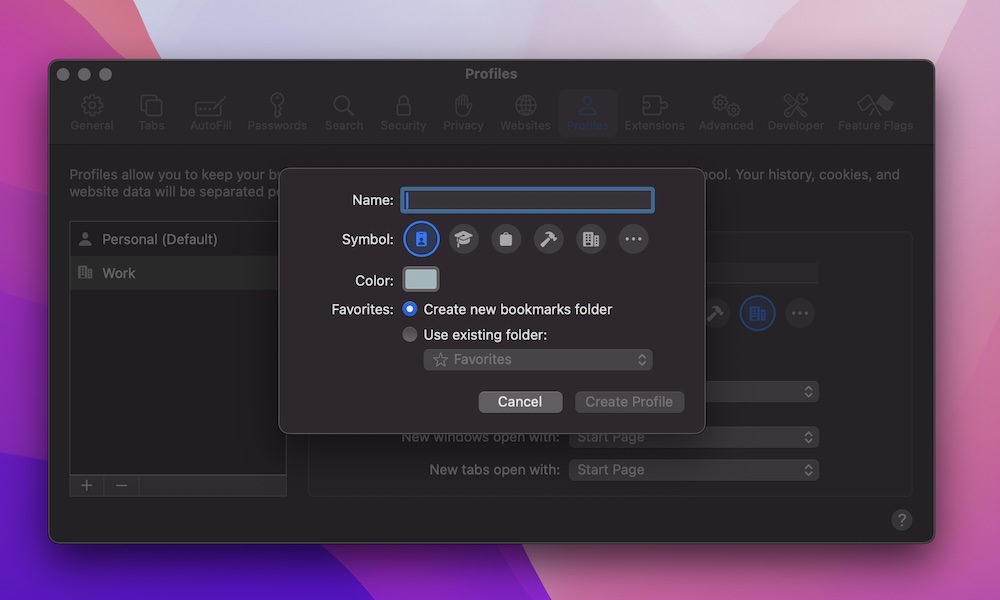
Both iOS 17 and macOS Sonoma added a new feature called Safari Profiles. This useful feature lets you create different profiles for every aspect of your life.
For instance, you can create one profile for work and another one for your personal life. These Profiles will keep all your cookies, browsing history, and Tab Groups separate, so you won't need to mix work and personal stuff ever again.
Here's how to create a new Safari profile on your Mac:
- Open Safari.
- Click Safari in the top right corner.
- Go to Settings.
- Click the Profiles tab at the top of the window.
- On the left sidebar, click the plus icon at the bottom to add a new profile.
- Add a name and change the appearance of your profile. When you're done, click on Create Profile.
Safari will automatically open the new profile so you can start adding Tab Groups or web pages you want to keep.
Quickly Go to Your Mac's Wallpaper

If you regularly keep files or screenshots on your desktop, this is a small but useful feature that we think you'll instantly love.
With macOS Sonoma, you can quickly go to your desktop with one click. All you need to do is click the wallpaper. Your Mac will automatically minimize all your apps and take you to your wallpaper.
Likewise, if you want to see all your open apps again, click your wallpaper again.
Lock Private Browsing
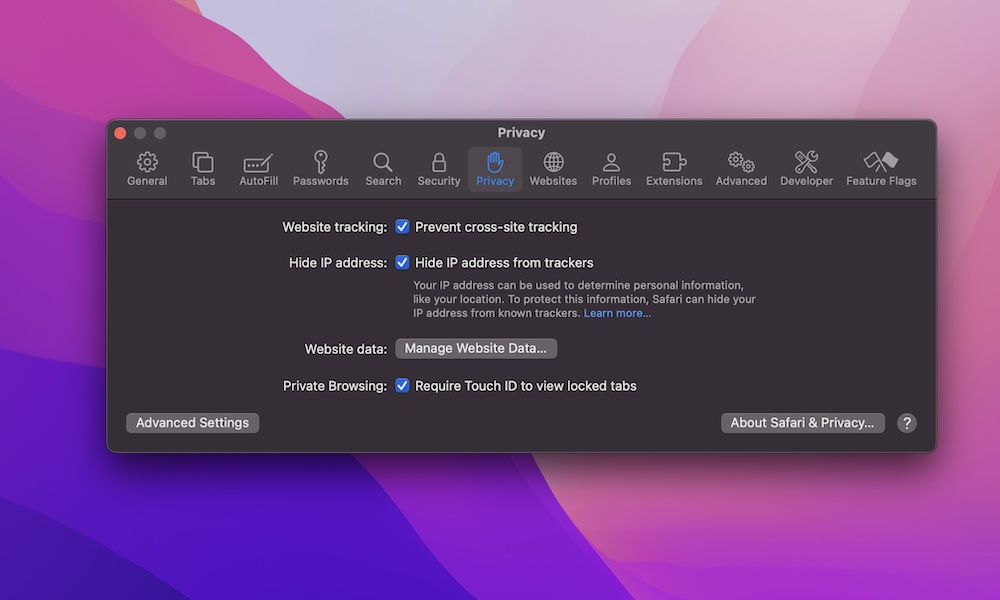
Whether it's embarrassing search queries we don't want showing up in our browsing history or anything else that you want to keep private, you probably don't want anyone snooping around in your private Safari tabs.
Fortunately, there's now a way to keep them safe behind your password or Touch ID. You can lock your private tabs, so no one but you has access to them. This is how:
- Open Safari.
- Click on Safari in the top left corner of your screen.
- Select Settings.
- Click the Privacy tab at the top of the settings window.
- Click on Require Touch ID to view locked tabs next to Private Browsing.
Take Gaming to the Next Level
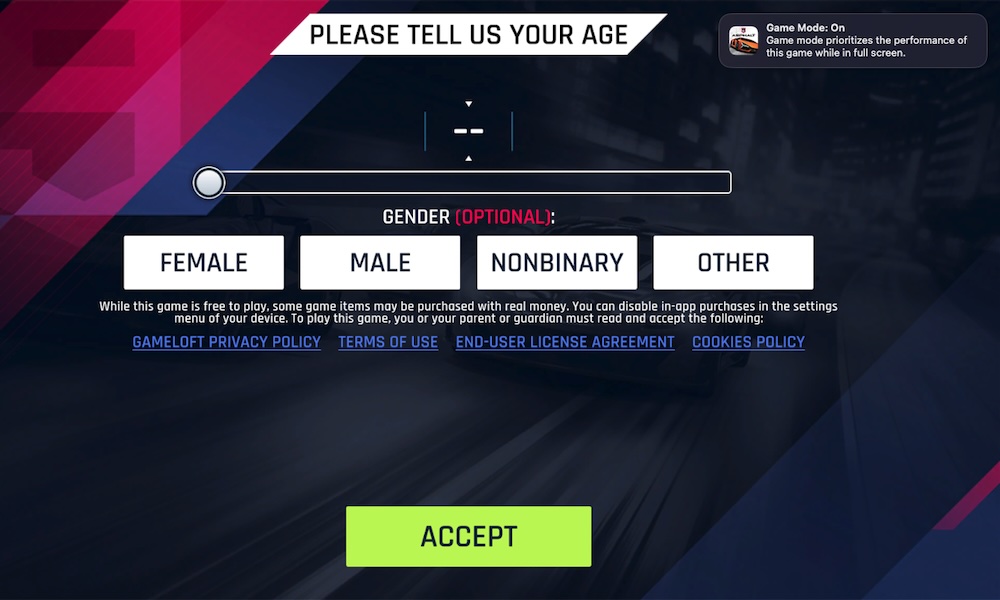
When you think of gaming on your computer, you probably don't think about your Mac. And while PC gaming is still far better than Mac gaming, thre are some amazing games you can play on your Mac.
That's gotten even better in macOS Sonoma, thanks to a new Game Mode that helps take your experience to the next level. This feature reduces any background activity on your Mac, so all your CPU and GPU power is focused on the game you're playing.
When Game Mode is turned on, your Mac will also reduce the latency in your AirPods and game controller so you don't experience any stutter when playing.
The best part is that you don't have to do anything to enable Game Mode; your Mac will do it immediately after you open a game.
With that said, there is a catch: Game Mode is only available for Macs with Apple Silicon. If you still have an Intel-based Mac, you won't be able to use Game mode.
To see what your Mac's processor is simply go to the Apple menu and click About this Mac. You'll need an Apple "M-series" chip to use Game
Show a Large Clock in Your Lock Screen and Screen Saver
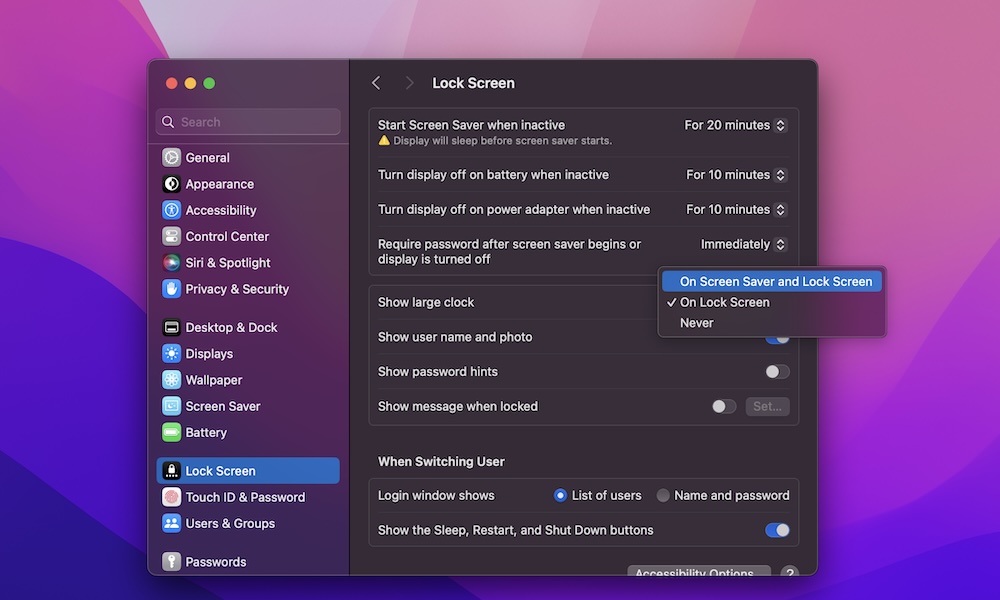
Another small but useful change that came with Sonoma is the ability to show a large clock on your Lock Screen and your Screen Saver. Granted, you probably don't spend too much time on your Lock Screen, but when you do, you'll be able to clearly see the time.
By default, your Mac only shows the large clock on your Lock Screen, but if you want to see it on your Screen Saver, you need to do the following:
- Open the Apple menu in the top left corner.
- Select System Settings.
- Scroll down on the left sidebar and go to Lock Screen.
- Click next to Show large clock, and select On Screen Saver and Lock Screen.
Create Your Own Personal Voice
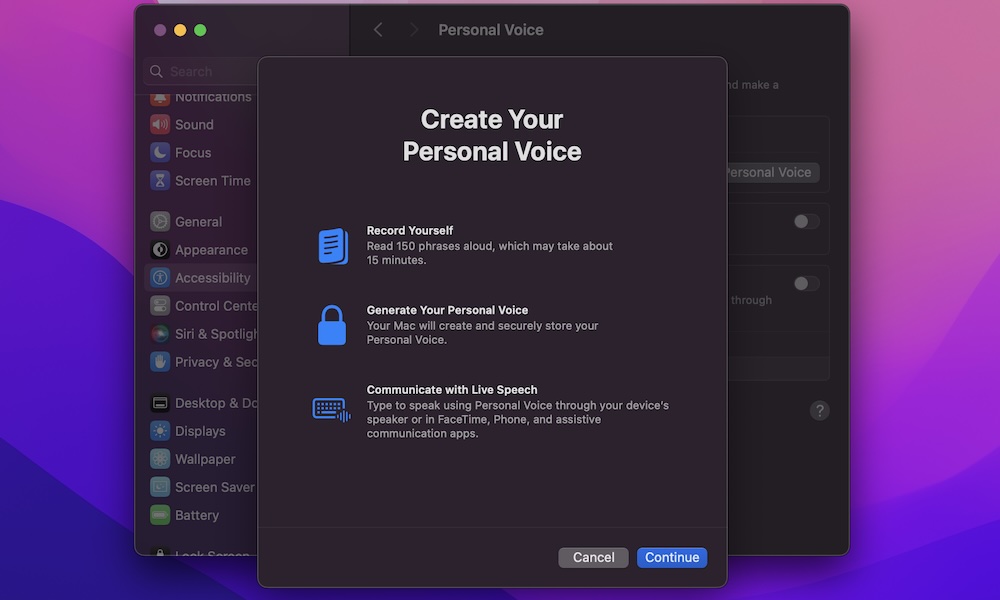
Apple is working on making all its devices more accessible to everyone, including people with speech impediments.
That's why the company introduced a feature called Personal Voice. This feature is similar to Live Speech, which already lets your Mac read anything you write out loud so people nearby can hear you. With this feature, though, your Mac will create a synthetic version of your voice to make your conversation more personal — hence the name.
Here's how to start using Personal Voice:
- Click the Apple menu.
- Go to System Settings.
- Scroll down on the left sidebar and click on Accessibility.
- Scroll down on the right side of the window, and under Speech, click on Personal Voice.
- Select Create a Personal Voice.
- Use your password or Touch ID to continue.
- Click on Continue and follow the instructions on your screen.
Creating a Personal Voice is a lengthy process. You'll first need to read 150 phrases out loud, which takes around 15 minutes. Then, you'll need to wait for your Mac to complete the creation of your personal voice.
When that's done, you'll be able to use it in FaceTime calls or to talk with people near you.
"Read" Your Favorite Podcasts
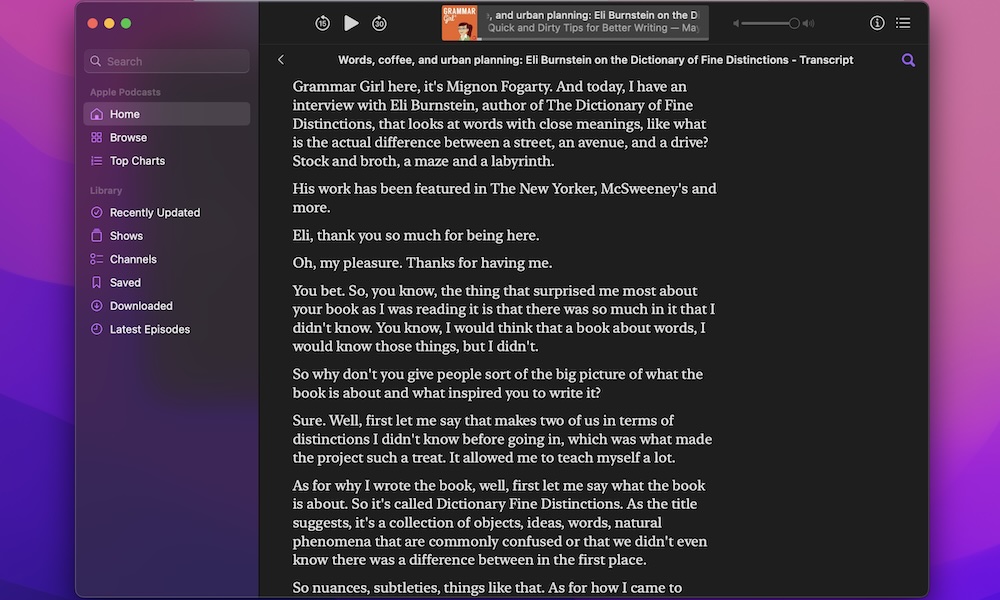
With iOS 17.4 and macOS Sonoma 14.4, you now have the ability to read your favorite podcast episodes.
This is thanks to a feature called Podcasts Transcripts, which, as you can guess, automatically creates a transcript of any podcast you're listening to. This will help you read what the people in the podcasts are saying, but there's so much more to that.
This feature works like the Lyricis features in Apple Music or Spotify. You can click any part of the transcript, and Apple Podcasts will automatically take you to that moment in the podcast.
Likewise, you can search for a specific word or phrase in the transcript, so you don't have to listen to the whole episode to find what you're looking for.
To use transcripts on Mac, all you need to do is open Apple Podcasts and start playing a podcast. When you see the player at the top of the app, click the three-dot menu on the right side and select View Transcript.