
8 Ways to Theft-Proof Your iPhone
 Credit: Tommaso79
When it comes to your really expensive iPhone, you can never be too careful. After all, it's not just the money you spent on it; there's most likely a bunch of private data on there that you don't want anyone to get a hold of.
Luckily, you don't have just to wait for someone to try to steal your iPhone. Instead, there are plenty of settings you can adjust to make sure almost no one can access your iPhone — even if they take it from you.
If you want your iPhone to be as impossible to crack as possible, read on for eight tips you need to follow.
Set Up Stolen Device Protection
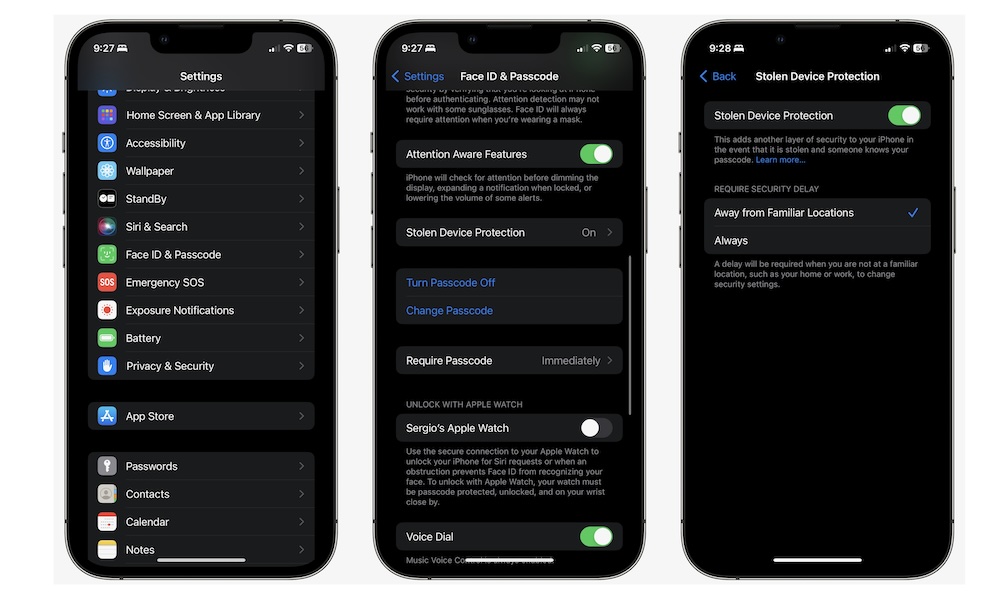
Stolen Device Protection is a fairly new feature Apple added that prevents anyone from immediately changing your critical settings, even if they know your passcode.
When Stolen Device Protection is turned on, your iPhone will add a time delay before anyone can change any important settings. This time delay lasts at least one hour, and it'll give you enough time to find your iPhone or delete it remotely if you lose it, even if the other person has your passcode.
Here's how to set up Stolen Device Protection:
- Open the Settings app.
- Scroll down and go to Face ID & Passcode.
- Enter your passcode.
- Scroll down and tap on Stolen Device Protection.
- Enable Stolen Device Protection.
And that's it. If you want extra security, you can change Stolen Device Protection's settings from Away from Familiar Locations to Always, so you or anyone else always has to wait at least one hour before changing any security settings, even when you're at home.
Use a Strong Passcode
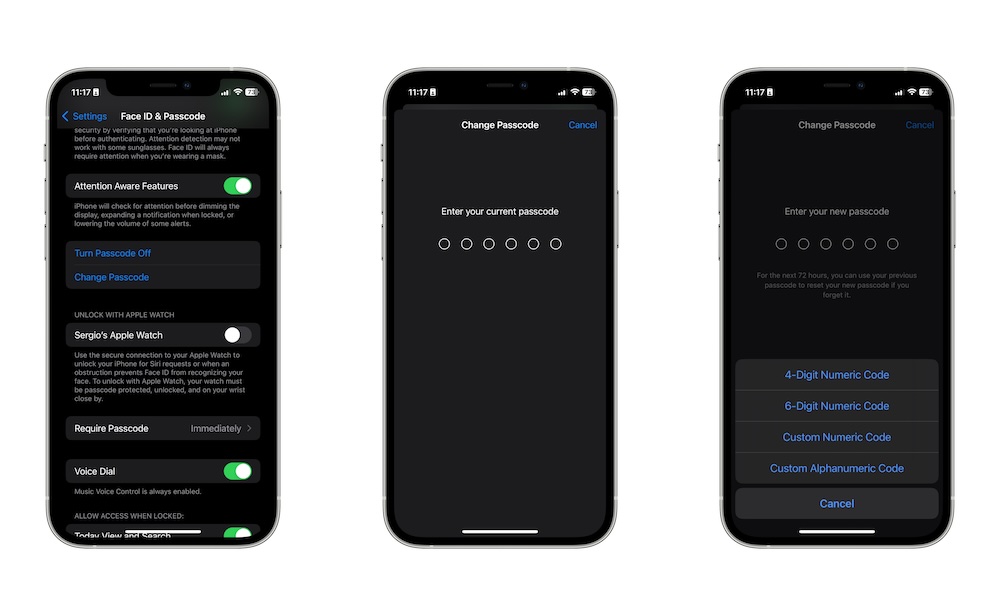
It goes without saying, but you should always set up a really strong passcode on your iPhone. There have been many cases when thieves will try to look at your passcode before taking your iPhone.
That way, they can immediately gain access to all your apps, pictures, and private information. And, of course, the simpler the passcode, the easier it'll be for them to get it.
By default, your iPhone's passcode is a 6-digit numeric code, which is already pretty solid — unless you use 000000 as your passcode. But if you want to make it even more secure, you can try using a custom alphanumeric code. Here's how:
- Open the Settings app.
- Scroll down and go to Face ID & Passcode.
- Enter your passcode.
- Scroll down and tap on Change Passcode.
- Enter your passcode again.
- Tap on Passcode Options at the bottom.
- Select Custom Alphanumeric Code.
- Enter your new passcode and then tap on Next.
This will let you use numbers, letters, and special characters to create the strongest passcode you can.
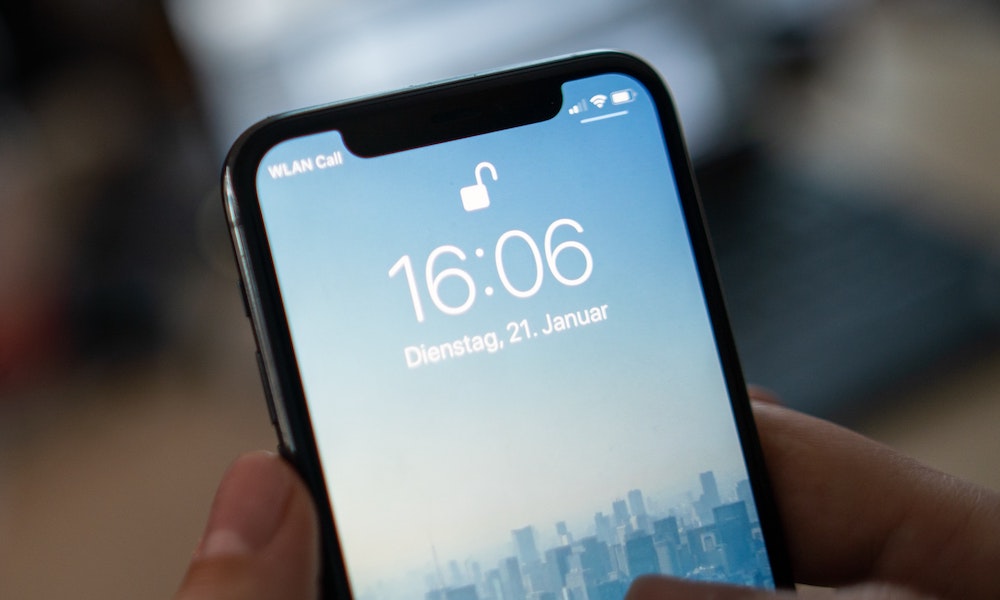
Disable Lock Screen Features
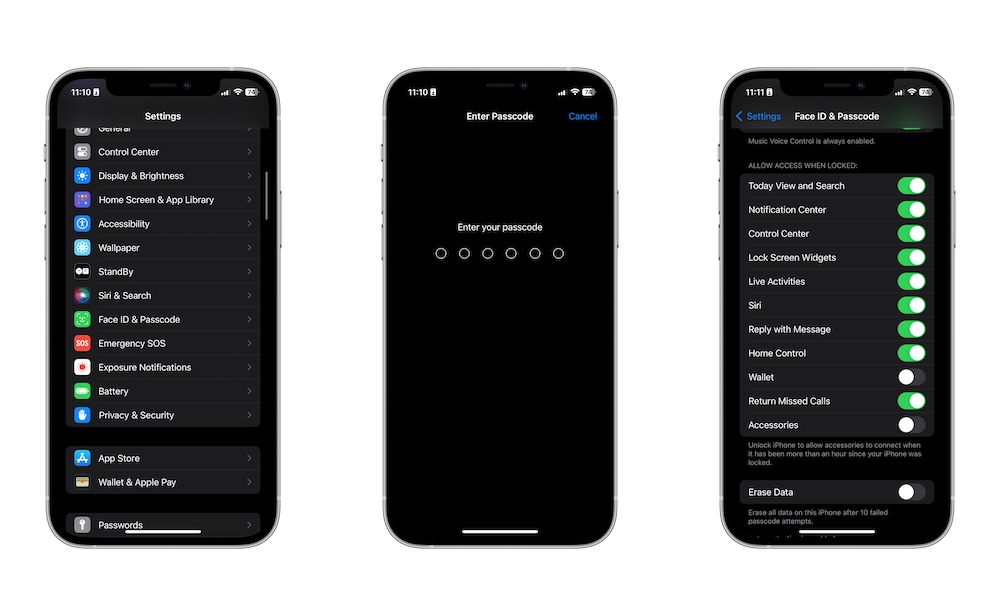
By default, your iPhone lets you use different features from the Lock Screen, even if you don't unlock it. This is extremely helpful, but it also allows other people to view and access things like your Notification Center, Today's View, and Siri.
Luckily, you can disable most or all of these features by doing the following:
- Open the Settings app.
- Scroll down and tap on Face ID & Passcode.
- Enter your passcode.
- Scroll down and under Allow Access When Locked, disable the features you want.
Enable Find My on Your iPhone
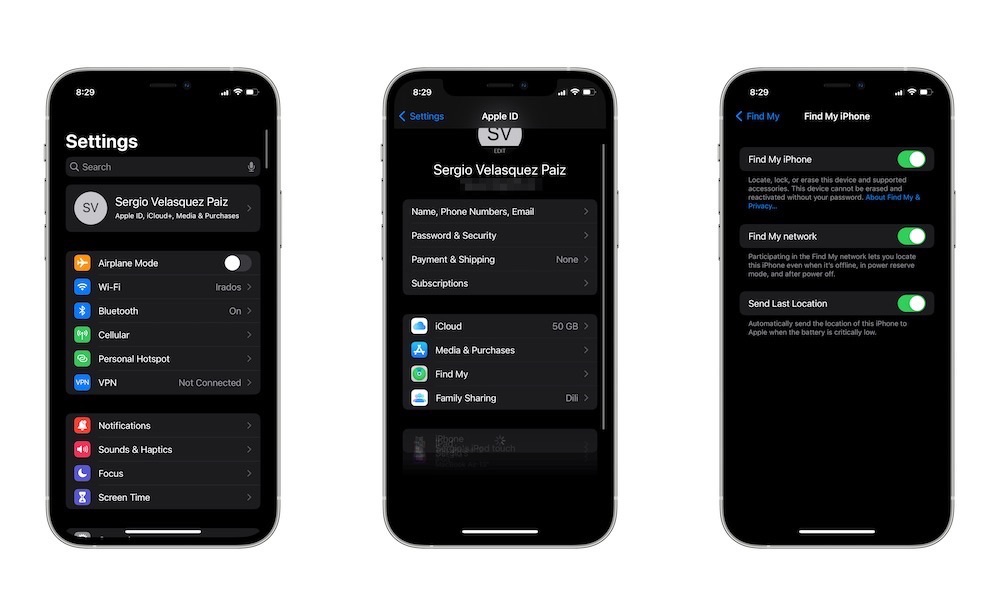
Whether you lose your iPhone or someone takes it from you, using the Find My network is the best way to track it down. Plus, you can even use the Find My app to completely wipe your iPhone remotely, so no one can get a hold of your data.
Your iPhone should already have Find My enabled by default, but here's how to check and switch it on manually if you need to:
- Open the Settings app.
- Tap on your Apple ID. That is, your name at the top of the Settings app.
- Select Find My.
- Go to Find My iPhone.
- Enable Find My iPhone, Find My network, and Send Last Location.
With these features turned on, you'll be able to access Find My from other Apple devices and see the location of your iPhone or delete it with one click.
Use Your Apple Watch to Lock Your iPhone
One of the best things about having an Apple Watch is that it can help you control specific stuff from your iPhone. However, it also gives you the ability to lock your iPhone remotely.
Unfortunately, this isn't an Apple feature, per se. Instead, you'll need to take quite a few steps to make this work. However, once you set it up, you'll be able to lock your iPhone with your Apple Watch or even other Apple devices, even if your iPhone isn't nearby.
All you need to do is follow our guide to lock your iPhone with your Apple Watch, and you'll be good to go.
Lock Apps Behind Face ID
You can add an extra layer of protection by locking specific apps behind your Face ID. When you use this feature, most apps will require you to use only Face ID to access them.
For instance, the Hidden album in the Photos app can only be accessed with Face ID. Even if they have your passcode, they won't be able to open it. On the other hand, the Notes app does let you use your passcode to unlock it.
There are plenty of apps that allow you to do this on their own. For instance, you can lock photos, notes, your private browsing tabs, and even other third-party apps like Google Photos behind Face ID. For most apps, you can go to that app's settings in the Settings app and see for the option to lock with Face ID.
What if the app doesn't support Face ID? Well, we have a trick for that, too; check out our handy guide on how to lock any app behind Face ID.
Set Up Two Factor Authentication on Your Apple ID
Your Apple ID lets you add another layer of protection with two-factor authentication. With this feature, whenever someone tries to log in to your Apple ID, your iPhone will send an alert to your other Apple devices. That way, you'll know when somebody has your password, and you'll be the one who decides if they get it or not.
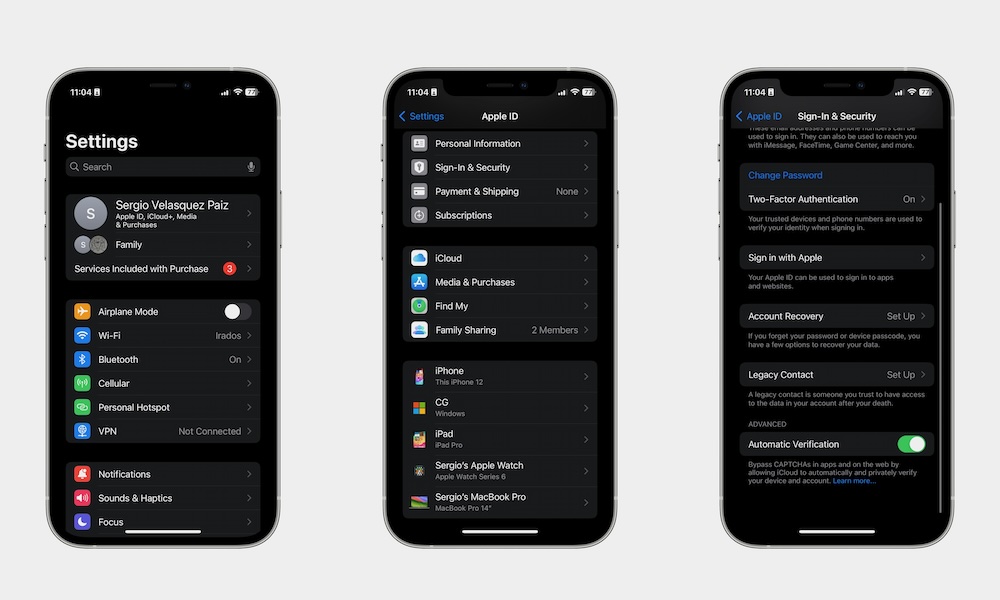
Chances are, you already have 2FA turned on on your Apple ID, but if you want to set up two-factor authentication manually on your Apple ID, here's how to find it:
- Open the Settings app.
- Tap on your Apple ID at the top of your screen.
- Go to iCloud.
- Tap on Sing In & Security.
- Select Two-Factor Authentication.
- Turn on Two-Factor Authentication.
Use Screen Time Restrictions
This is a cool feature that not everyone knows or uses. With Screen Time, you can change a few settings in to make it more difficult for others to change important security settings like your passcode.
In order for anyone — including you — to change these settings, they'll need to enter your Screen Time passcode. That doesn't need to be the same passcode that unlocks your iPhone, and we highly recommend you use a completely different one.
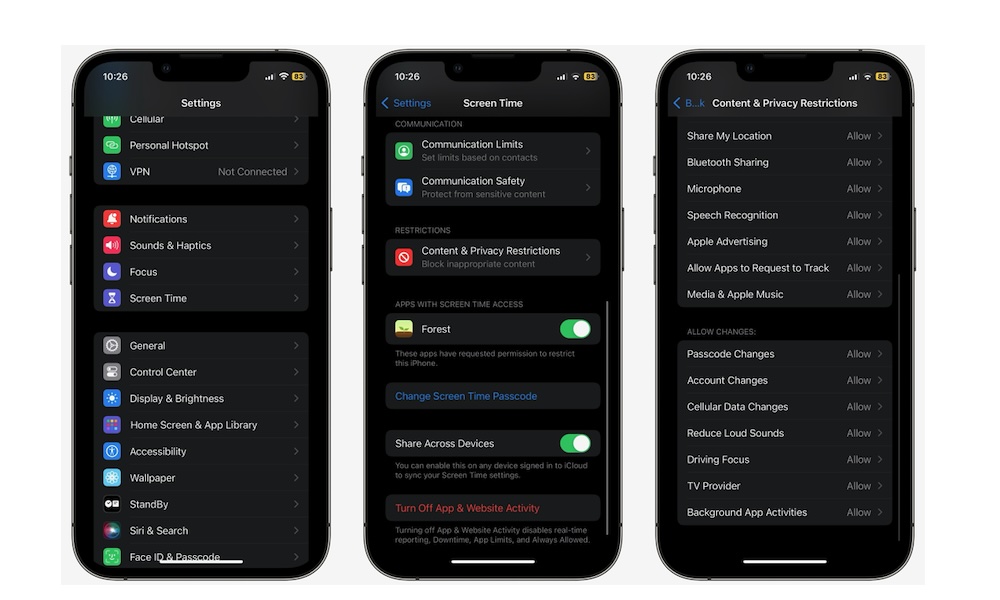
Here's how to use Screen Time restrictions:
- Open the Settings app.
- Scroll down and go to Screen Time.
- First, tap on Lock Screen Time Settings.
- Enter a Screen Time passcode. Again ,we recommend you use a different one from your main passcode. Enteryour passcode again to confirm it.
- Also, enter your Screen Time Passcode Recovery method, which can be a phone number or email address. This is optional, but we recommend you set it up.
- Once you're done, select Content & Privacy Restrictions.
- Enable Content & Privacy Restrictions at the top.
- Scroll down, and under Allow Changes, tap on Passcode Changes. Enter your passcode, and select Don't Allow.
And that's it! If you close and reopen the Settings app, you'll notice the option to access Face ID & Passcode is gone. Your iPhone is hiding it, and you'll only be able to access it by following the steps above and selecting Allow in the Passcode Changes option.
You can also take a look at all the restrictions available in Content & Privacy Restrictions to make your iPhone even more secure.