8 Notes Tricks You Probably Didn’t Know About
 Credit: Apple
There's really no better note-taking app for the iPhone than Apple's own Notes app. There's something satisfying in just typing a note and having it available on pretty much every Apple device you use.
Plus, Apple is constantly improving it and adding new features, so it gets more helpful and easier to use with each big iOS update. With so many features available, though, there are likely at least a few things that you probably never knew you could do.
Whether you're using an iPad, an iPhone, or even a Mac, there are a whole bunch of tips and tricks in Notes that can take your experience to the next level. Continue reading for 8 cool tips to get the most out of Apple's Notes app.
Quickly Create a Note Without Unlocking Your iPad
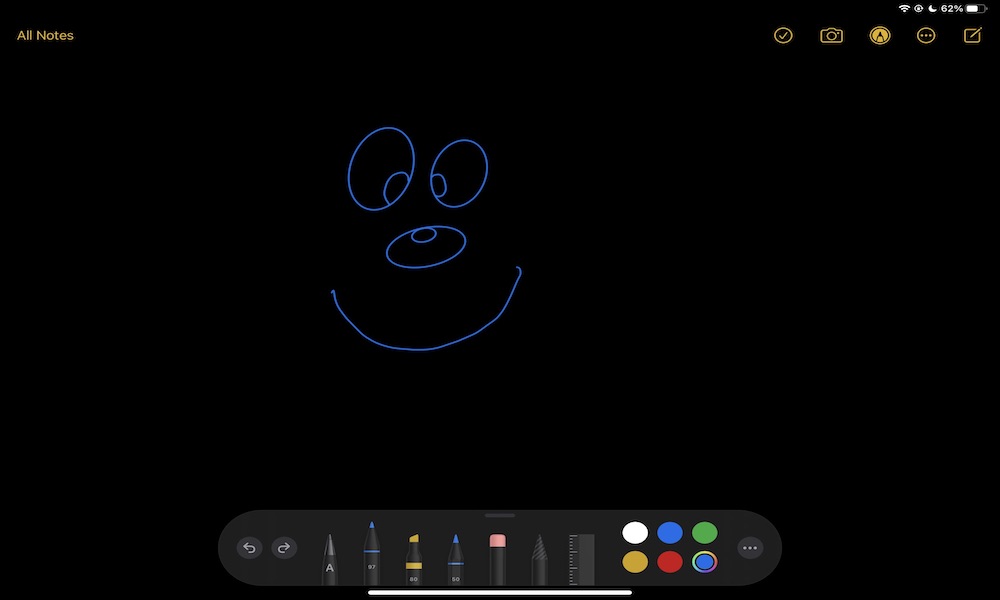
This trick is exclusive to the iPad, but it's a great way to jot down a note on the fly — without the need to even turn your iPad's screen on first. It's a nice trick that'll save some time if you're in a hurry.
There are two ways to do this. If your iPad's screen is locked, all you need to do is grab your Apple Pencil and tap your iPad's screen. That will automatically open a new note, even if the screen is off. Since your iPad remains locked, you'll only be able to create a new note, not browse through any old ones.
If your iPad's screen is already unlocked, you can also swipe down from the top to bring up the Notification Center, and then grab your Apple Pencil and tap on the screen from there. This will also quickly open the Notes app with a new note ready to go, but since your iPad is already unlocked, you'll be able to access previous notes from here too.
You can also go into Settings > Notes > Access Notes from Lock Screen to determine whether this always creates a new note, or resumes the last note you created or viewed within a certain timeframe. For instance, you could configure the settings to pull up the same note throughout the day, letting you continue to add to it like a journal, while automatically creating a blank note for the next day.
You can also quickly create notes on the iPhone in a similar manner, but since the iPhone doesn't support the Apple Pencil, the process isn't quite as fast. You'll need to add the Notes icon to Control Centre and pull it up from there. Plus, if you want this to work from the Lock Screen, you'll need to ensure that Control Centre access isn't locked out in your iPhone's security settings.
Master Quick Notes on Your iPad (and Mac)
With iPadOS 15—and macOS Monterey — Apple added a cool new feature called Quick Note.
You can probably already guess what this feature does just from the name. Swiping up from the bottom right of your iPad's display, using either your finger or Apple Pencil, brings up a Quick Note that will hover over any app you're using. You can even drag it around the screen to move it out of the way. Once you're done with it, you can tap on Done, and the note will be automatically saved in the Notes app.
If you're using Apple's Magic Keyboard with your iPad, you can also call up the Quick Note function by pressing the Globe key and the Q key at the same time. This also works on the Mac; on older Macs, use the FN key in place of the Globe key.
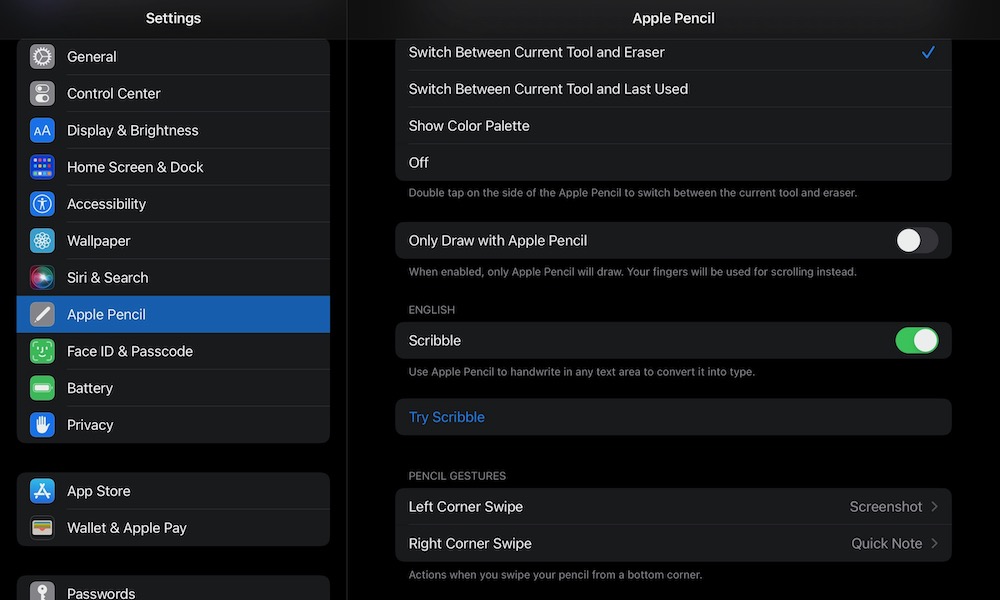
Quick Note should normally be enabled by default, but if you want to get rid of it, or set it so that it only works with your Apple Pencil and not your finger, just follow these steps:
- On your iPad, open the Settings app.
- Scroll down and tap on Notes.
- Scroll down and tap on Corner Gestures
- To disable the finger gesture, tap the switch beside Allow Finger to Swipe from Corner to toggle it off.
- To disable the Quick Note gesture entirely, tap on Right Corner Swipe, and then tap Off.
From here you can also change the setting to allow you to take a screenshot by swiping from the bottom right corner, or set Quick Note to come up when swiping from the bottom left corner instead. Note that this won't disable the Globe-Q keyboard shortcut, so you can still use that from an external keyboard even if you've switched off the swipe gestures.
There are several other options for Quick Notes that you can customize in the Notes settings as well, such as whether calling up a Quick Note window pulls up the last quick note or creates a new one. You can also have your iPad automatically suggest links to whatever apps you're using, such as a web page in Safari or an email in the Mail app.
Save Your Notes as a PDF File
Another cool thing about the Notes app is that you can share your notes with any other iPhone user. What's even cooler, though, is that you can also export your notes to a PDF file to share them that way. This ensures that just about anybody will be able to read your note, while also preserving all your formatting so that it looks exactly the way you intend it to.
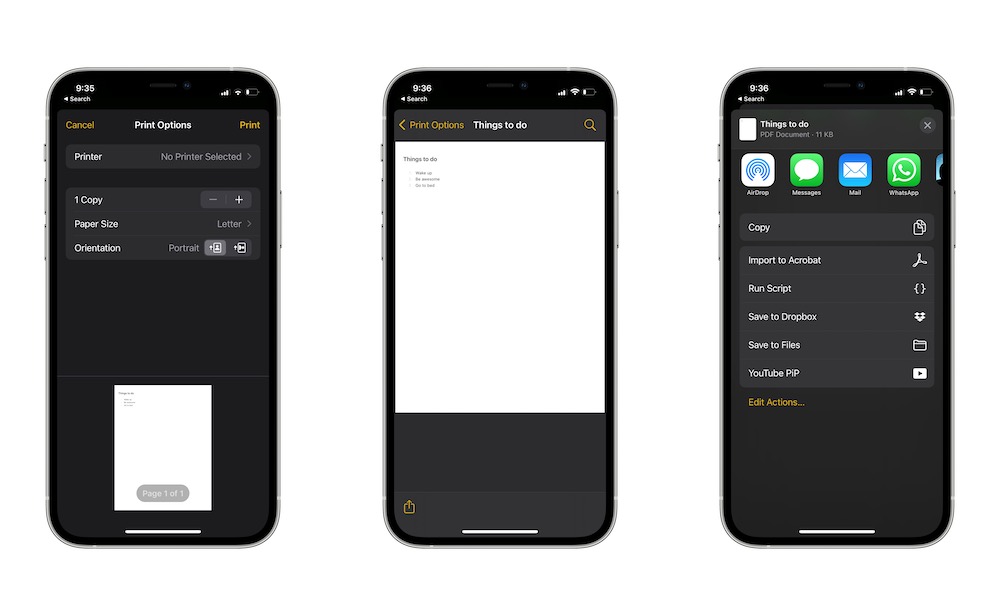
Here's how to do it:
- Open the Notes app.
- Go to the note you want to turn into a PDF.
- Tap on the menu icon. It's the three dots icon in the top right corner.
- Tap on Print.
- You'll see a preview of your note at the bottom. With two fingers, pinch out to make it bigger.
- Tap on the Share icon. This brings up the standard share sheet, but as you can see from the note at the top, you'll actually be sharing a "PDF Document."
- Share this as you normally would anything else by tapping a contact, or an app icon like AirDrop, Messages, or Mail, or scroll down and tap Save to Files in the menu below to save a copy in your Files app that you can access and share later.
It's quite a few steps, but once you're done, your note will automatically be saved as a PDF and sent to the recipient or saved in your Files app.
Add Tags to Your Notes
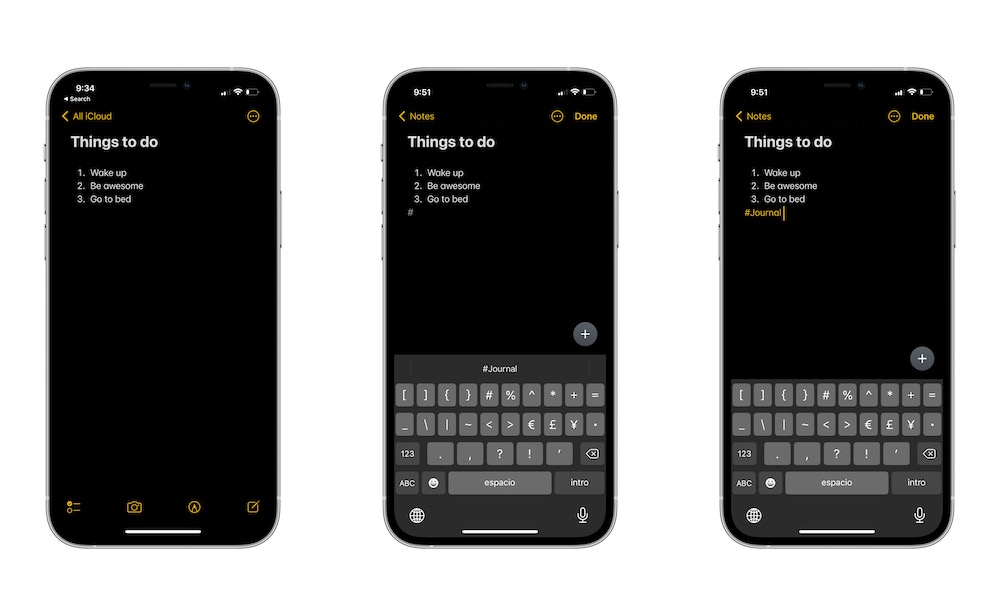
With iOS 15 and iPadOS 15, Apple added tags for the Notes app. This makes it easier to search for the notes you need without trying to remember what you wrote in them, or figuring out which folder you buried them in.
To add a new tag on your notes, all you need to do is type "#" followed by the word you want to use. Your keyboard will offer autocomplete suggestions for any tags you've already created, but you can also keep typing to create a new tag right on the spot.
As with other tag-based systems, you can add multiple tags to a given note, and can even drop them right in the middle of your text.
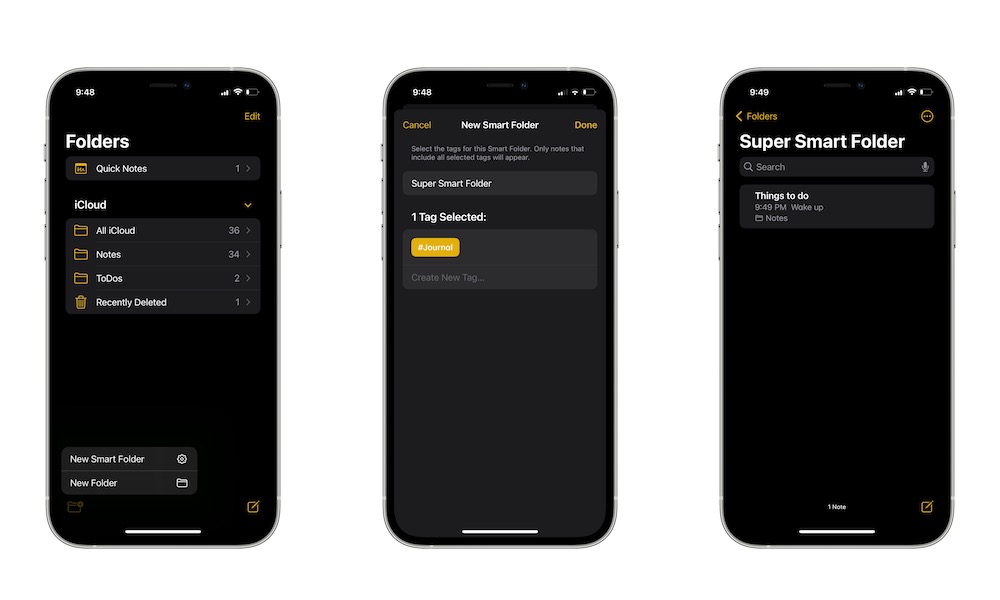
Create Smart Folders
So you probably already knew that you can now add tags to your notes on your iPhone, iPad, and Mac.
Did you know you can create smart folders for each tag too? Smart folders will automatically collect all of your notes with one or more specific tags, so you'll know where to find them without having to manually file them into folders. Best of all, since a note can have more than one tag, it can also appear in more than one smart folder — something that's not possible with normal folders.
Here's how to create a new smart folder.
- Open the Notes app.
- Tap Folders in the top-left corner to go to your Folders view.
- Tap the new folder icon in the bottom left corner of your screen.
- Tap New Smart Folder from the pop-up menu that appears.
- Enter a name for your folder.
- Select the tags you want to include in this smart folder. You can select multiple tags here by tapping on them, or even create a new tag by typing in the Create New Tag field.
- When you're finished, tap Done.
And that's it! You don't have to do anything else for your tagged notes to appear in that folder automatically.
Sync Your Notes to Gmail or Your Other Email Accounts
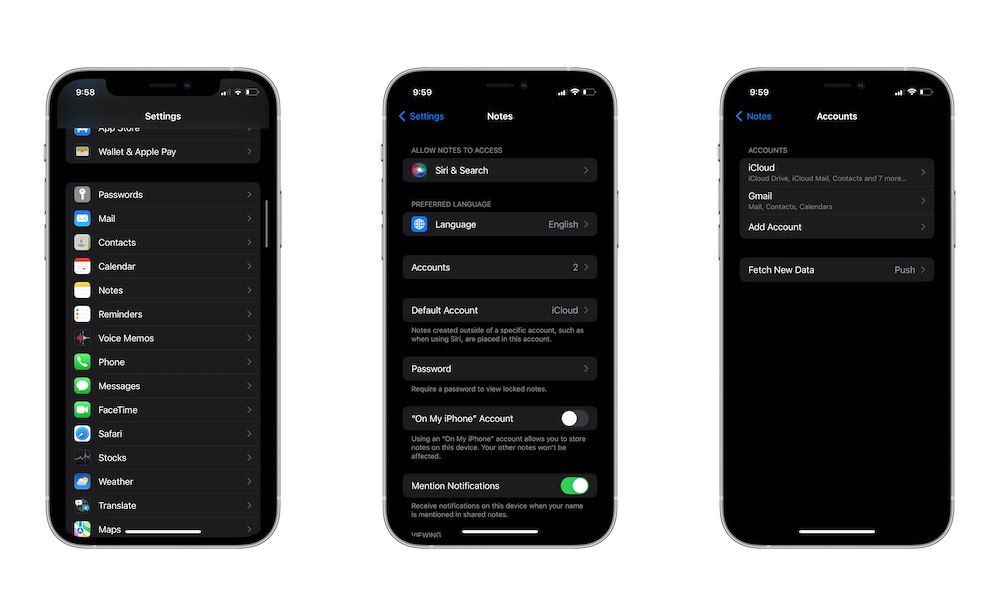
As we mentioned before, a cool feature about Notes is how easily it syncs across all your devices via iCloud. If you prefer, however you can also sync notes via other email accounts, like Gmail. This comes in handy if you're also using non-Apple devices like Windows PCs, or you simply prefer not to use iCloud.
- Open the Settings app.
- Scroll down and select Notes.
- Tap on Accounts.
- Select the account you want.
- In the account settings, scroll down and toggle Notes on or off, as appropriate.
If you have other email accounts available, you can also repeat the steps above to sync your notes to those accounts. Just about any IMAP account is supported; when using accounts other than iCloud, your notes will be stored in a standard email folder. Apple Mail will hide this folder, but it may show up in other email and webmail apps. Some webmail services like Fastmail will also recognize these and let you access and edit your notes from any browser.
Be aware that Notes offers considerably more limited features for notes stored in a non-iCloud account. Only simple formatting is supported in your notes, basically bold and italics, although the Mac version of Notes lets you do a bit more. However, you won't be able to add drawings, tables, or even checklists to your notes. Adding attachments from the iOS/iPadOS side is similarly limited to only photos. You also can't use tags or smart folders, or even create normal folders from the iPhone or iPad. Naturally, the built-in sharing options aren't available here either.
Each account will also appear in its own section in the Notes app, with its own set of notes and folders. You won't be able to sync the same set of notes to more than one account, but you can move them between accounts — with one important exception: although you can move notes between non-iCloud accounts, you can only move them to an iCloud account. Due to the formatting limitations, the Notes app won't let you move a note from an iCloud account to a non-iCloud account.
View Your Notes as a Gallery
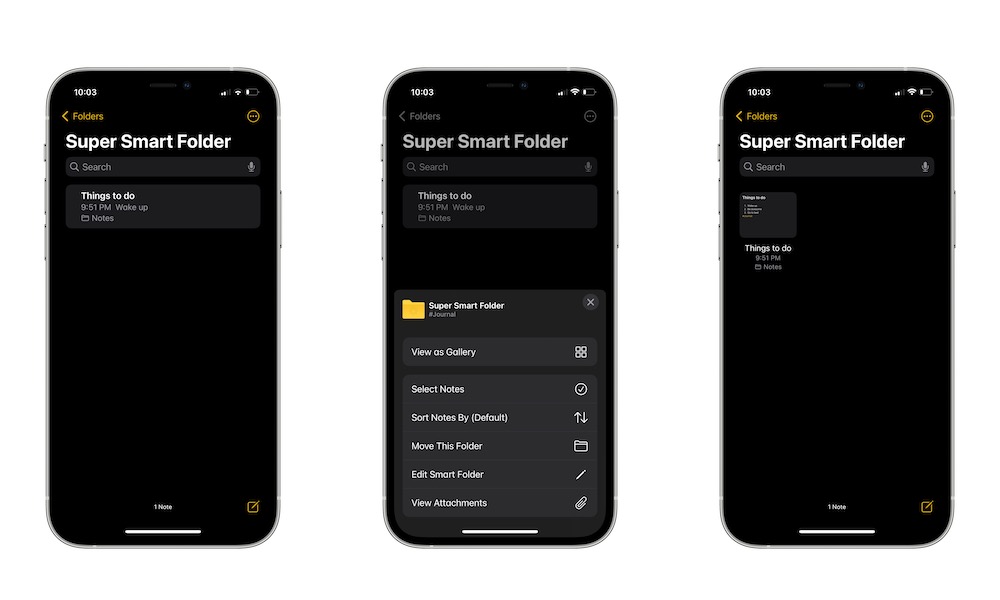
If you want to change the way you look at your notes, you can set it so they show up in a gallery view. This comes in handy if you want to see a small preview of what's inside each of your notes. Here's how:
- Open the Notes app.
- Go to any of your folders.
- Tap the menu icon. It's the three dots in the top right corner of your screen.
- Tap on View as Gallery.
If you want to go back to viewing your notes as a list, simply repeat the steps above, selecting View as List instead. Note that this view isn't available for notes that are synced with a third-party email account.
View Only Your Attachments
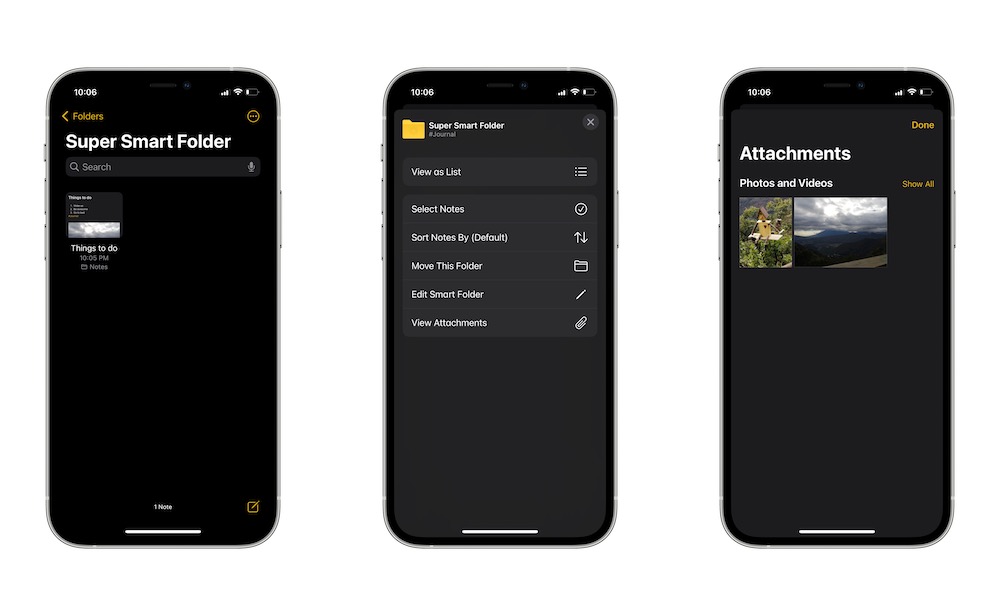
Another cool feature that will help you find the notes you're looking for is the ability to see a list of your attachments across all your notes. You'll see a list of every attachments in your library — even if the notes aren't in the same folder.
- Open the Notes app.
- Go to any folder you want.
- Tap on the menu icon. It's the three dots in the top right corner.
- Scroll to the bottom and select View Attachments.
This will show you a list of all the photos, videos, and links you have stored in your notes. Note that this view isn't available for notes that are synced with a third-party email account.
If you tap on one of these, only the attachment will open, but if you want to open the note, you can long-press the attachment and select Show in Note.
To exit this view, all you need to do is tap Done in the top right corner.