
8 iOS 17.5 Settings You Need to Change

Apple released iOS 17.5 today, and like every new update, it's brought a few new things to the table. Most notably, you'll now be alerted to unwanted third-party tracking tags and folks in the European Union can now download apps from the web. Apple News+ subscribers also get a new game and an offline reading mode.
But that's not all; there are also a few features that you probably didn't know you had. Whether it's camera settings that change the way you record videos or security features to make your iPhone safer, there have been several smaller updates in iOS 17.5 and other recent point releases that are worth checking out.
In short, adjusting these features can significantly improve your iPhone experience. The best part is that it'll only take you a few taps to do it. Whether you want your iPhone to be easier to use or you simply want to check everything that's there, read on for 8 settings you should take a closer look at.
Change Your Stolen Device Protection Settings
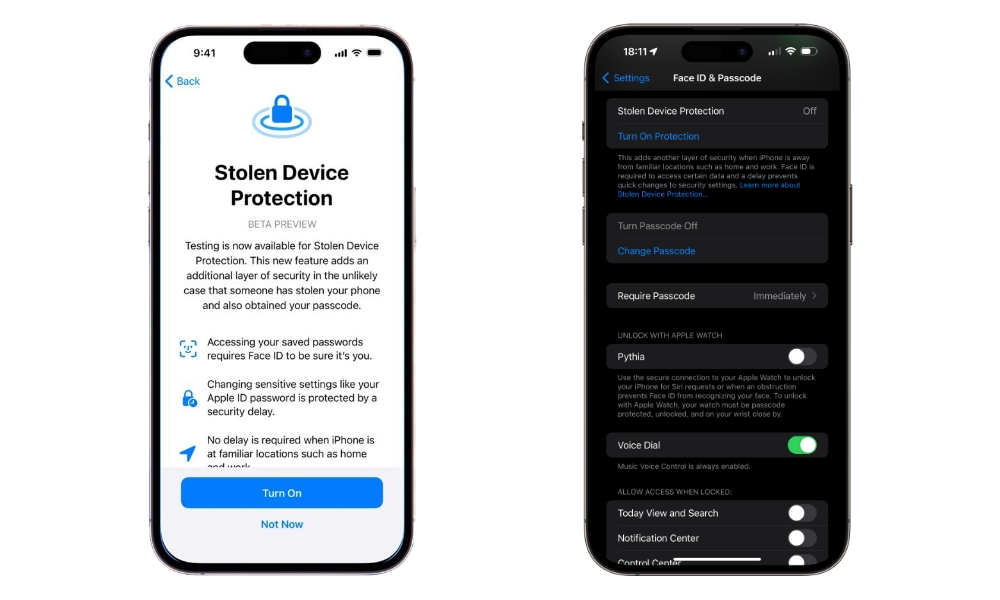
Stolen Device Protection is a fairly new feature that makes your iPhone more secure in case someone takes it from you. When this feature is turned on, you'll need to use Face ID or Touch ID instead of your passcode to access or change sensitive information.
Your iPhone will also add a security delay before you can change the most critical security information, such as resetting your Apple ID password, changing your device passcode, or disabling Find My.
By default, this feature is only active when your iPhone is away from familiar locations, but you can take it one step further and force the time delay to be active at all times. This is how:
- Open the Settings app.
- Scroll down and go to Face ID & Passcode.
- Enter your passcode.
- Scroll down and tap on Stolen Device Protection.
- If it isn't available, be sure to turn on Stolen Device Protection.
- Then, under Require Security Delay, tap on Always.
Now, your iPhone won't let anyone — even you — make any changes to critical security settings like your passcode or Find My without waiting at least one hour and then authenticating again with Face ID or Touch ID to confirm it's still you making the change.
With Stolen Device Protection on, you'll still need to use Face ID or Touch ID to change important security settings, but you won't be able to change them right away; instead, you'll get a screen saying that a security delay is required before you can make the change. This delay will last an hour, and you'll get a reminder once the timer is up.
Keep in mind that if you change it to Always right now and want to change it back to Away from Familiar Locations, you'll have to wait for the time delay like anyone else. So be sure this is what you want before actually doing it.
Make Siri Read in a Different Language
If your iPhone's primary language isn't the language you use the most when texting, you've probably already heard how Siri butchers the message in the second language, trying to read it as if it were in English.
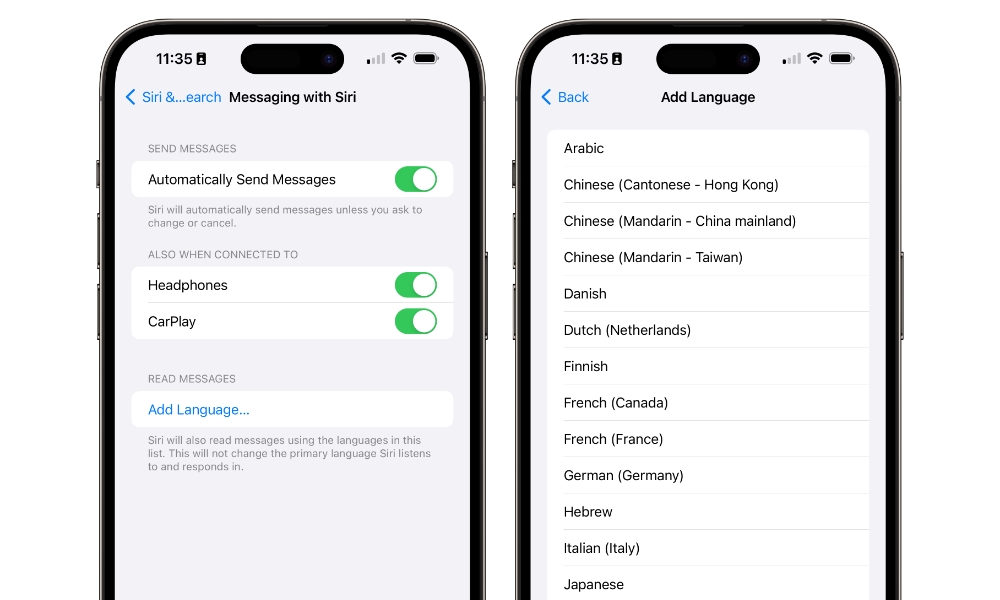
Luckily, iOS 17.4 brought a cool feature that lets you add new languages for Siri to use when reading your messages. You can add multiple languages, and this won't change the primary language in your iPhone.
To add a new language for Siri to read in, you need to do the following:
- Open the Settings app.
- Scroll down and tap on Siri & Search.
- Go to Messaging with Siri.
- Under Read Messages, select Add Language.
- Choose the language you want.
Give your iPhone a few moments to download the language, and you'll be good to go. But, if you want, you can go one step further and tap on the new language to change the voice you want to use. If available, you can also choose the accent you want.
Last but not least, if you choose the wrong language, you can always delete it by sliding the language to the left and tapping on Delete.
Change the Settings in the Journal App
Apple Journal is a new app that lets you keep a digital journal of all your private thoughts.
The app is still a bit bare-bones, but it's got some cool features that make it at least worth trying. So, if you want, you can download the Journal app from the App Store and give it a go.
And once you download it, there are plenty of settings you should change to get started. To change the Journal app settings, you need to:
- Open the Settings app.
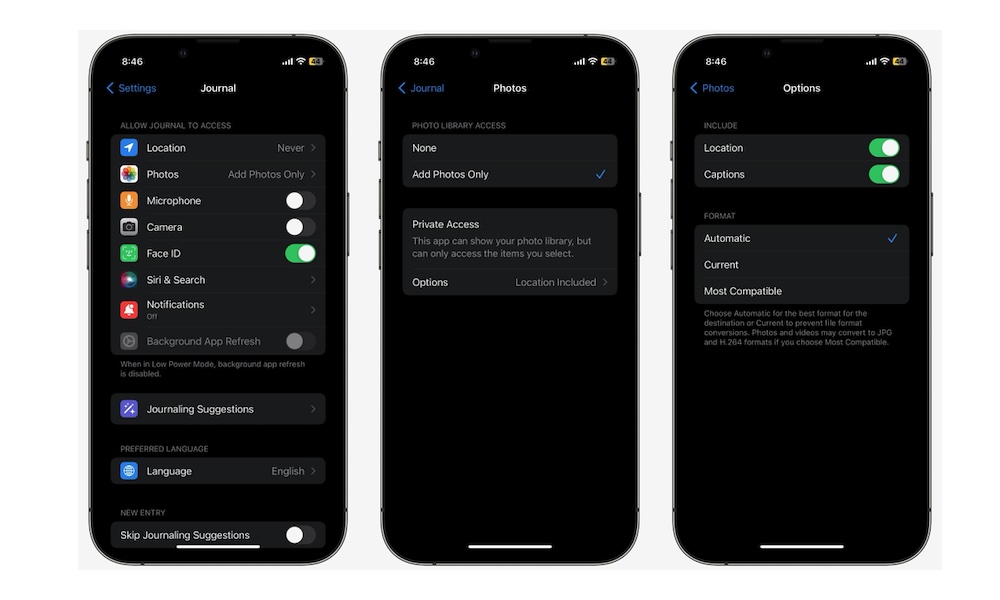
- Scroll down and go to Journal.
- Now select all the settings you want to change.
You can play around with the settings to find what suits you best, but if you don't know how to get started, we recommend you start by enabling Journaling Suggestions so you get new ideas for what you might want to write about.
Likewise, you should enable the Journal's Lock feature. As you can guess, this will let you lock your journal entries behind Face ID, Touch ID, or a passcode, so you're the only one with access.
Lastly, we recommend that you change some security features, such as Location and the Privacy Settings, that you'll find inside Journaling Suggestions.
Turn Off Spatial Video
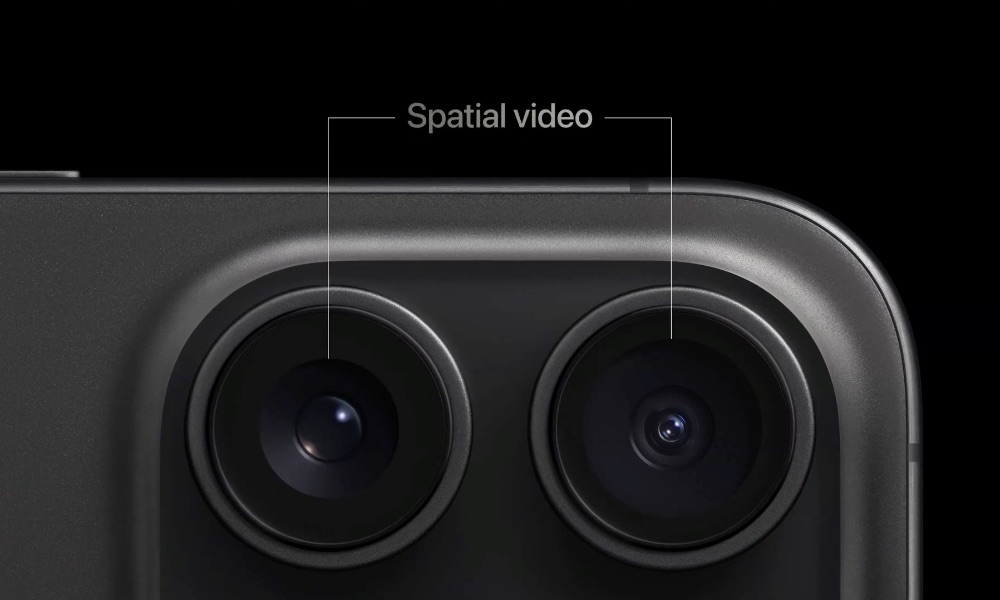
Spatial Video recording was added in iOS 17.2, and it's a feature that you probably haven't used — and don't need.
Spatial Video is exclusive to the iPhone 15 Pro and lets you shoot videos in 3D. These videos are meant to be played on the Apple Vision Pro, which you probably either don't have or don't need to watch your videos. If you want to get rid of Spatial Video, here's what you need to do:
- Open the Settings app.
- Scroll down and go to Camera.
- Scroll down again and tap on Formats.
- Go to the bottom of the page and be sure to turn off Spatial Video for Apple Vision Pro.
Likewise, if you actually want to use this feature, simply follow the steps above and turn Spatial Video on again.
Get Rid of Automatic Airplay
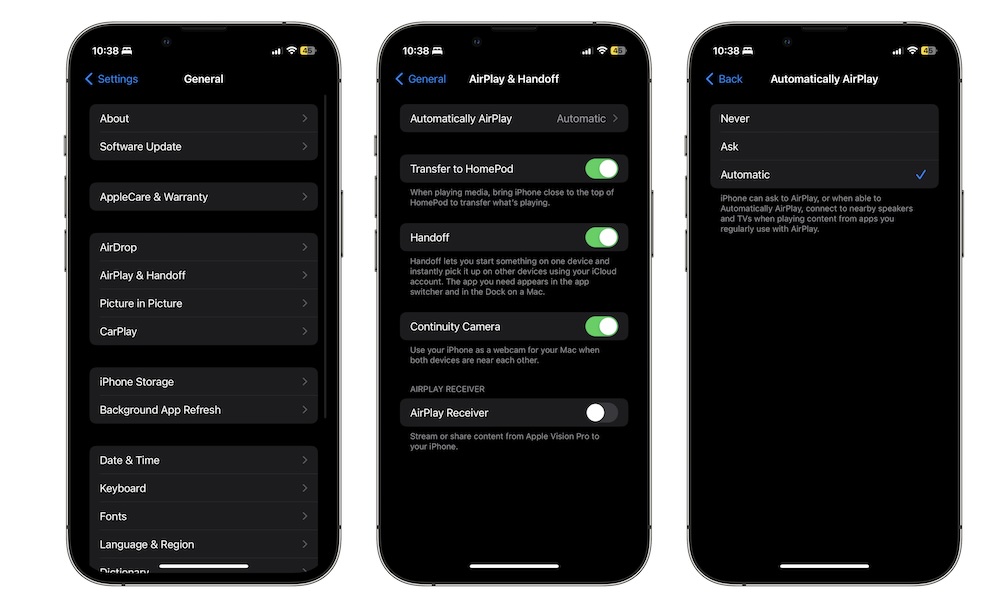
Airplay is a useful feature that lets you play music or any content through your TV or speakers. Moreover, there's also an iPhone feature that automatically connects your iPhone and starts playing anything without even asking you about it.
While this can be useful in some situations, it's also a bit annoying to deal with. Fortunately, you can disable Automatic AirPlay by following these steps:
- Open the Settings app.
- Scroll down and go to General.
- Select Airplay & Handoff.
- Tap on Automatically Airplay.
- Select Never, or if you still want to use this feature, tap on Ask.
Stop Sharing Your Data With Apple

After most big updates, Apple will often ask if you want to share your data to help it improve your experience on Apple. Apple will only gather usage data and daily diagnostics, which might also include other data like your location.
Needless to say, it isn't your job to help a trillion-dollar company improve its products with your data, especially not for free. With that said, you probably turned this feature on by mistake, so you need to make sure you disable it by doing the following:
- Open the Settings app.
- Scroll down and go to Privacy & Security.
- Go down to the bottom and tap on Analytics & Improvements.
- If you don't want to share anything, simply disable everything that might be turned on on this page. If not, you can read all the options available and choose which data you'd like to share.
Make Your iPhone Update Your Apps Automatically
With every new software update, third-party developers will also update their own apps so they work better with the new iOS version.
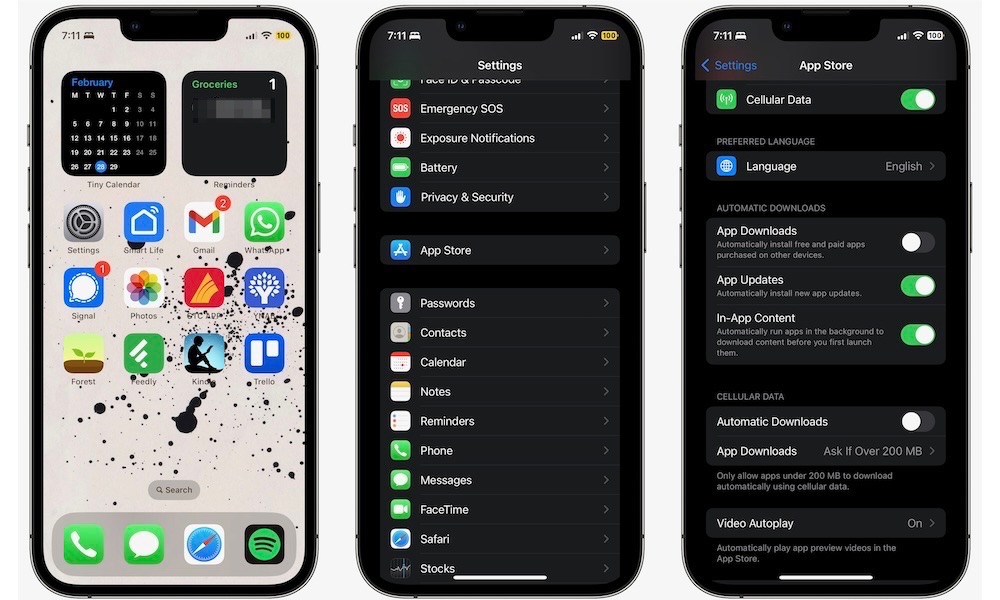
Sure, you can choose to manually install all updates yourself, but if you want it to be quicker, you can make your iPhone automatically install any updates for you. This is how:
- Open the Settings app.
- Scroll down and tap on App Store.
- Under Automatic Downloads, enable App Updates.
If you have a sufficiently generous data plan, you can also enable Automatic Downloads under Cellular Data. Keep in mind that keeping these settings turned on might consume your data and your battery life. So, if you notice a change in either of them, you can follow the steps above and disable all these settings.
Set Automatic Updates
iOS 17.5 is undoubtedly a great update that you should install right away, but you can be 100% sure that there will be more updates in the near future.
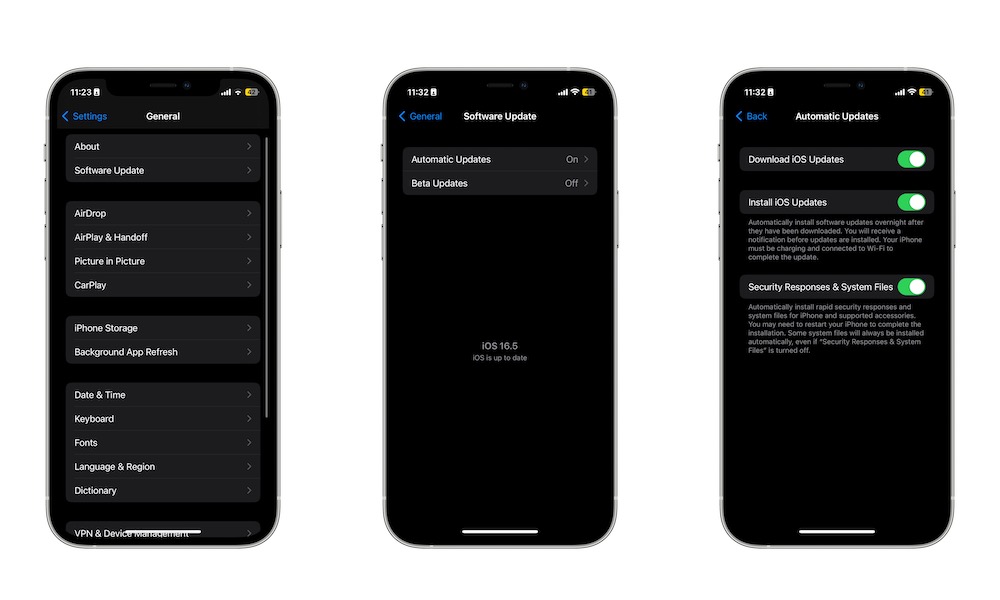
If you want your iPhone to stay up to date with Apple's latest updates, you should consider enabling automatic updates so your iPhone can install any future iOS update as soon as it's connected to its charger. To enable automatic updates, you need to:
- Open the Settings app.
- Scroll down and tap on General.
- Go to Software Updates.
- Select Automatic Updates.
- Under Automatically Install and Automatically Download, enable iOS Updates.
And that's it. The next time an update is available, your iPhone will download and install it whenever it's locked, connected to the internet, and charging.
Likewise, you can also enable Security Responses & System Files so your iPhone can install any emergency security update that Apple releases.