
7 Tips for Recording the Best iPhone Video Possible

One of the features that makes the iPhone stand out is its cameras. Granted, there are already a bunch of good cameras in the smartphone world, but many users prefer taking pictures on an iPhone.
That's because Apple has spent a lot of time upgrading both the software and hardware so you can take the best photos and videos possible.
With that said, your iPhone can't do everything by itself. If you want to shoot amazing videos with your iPhone, even if it's an older model, you can. You just need the right settings and the right environment.
Read on for seven tips to up your video game on your iPhone.
Use the Highest Quality Available on Your iPhone
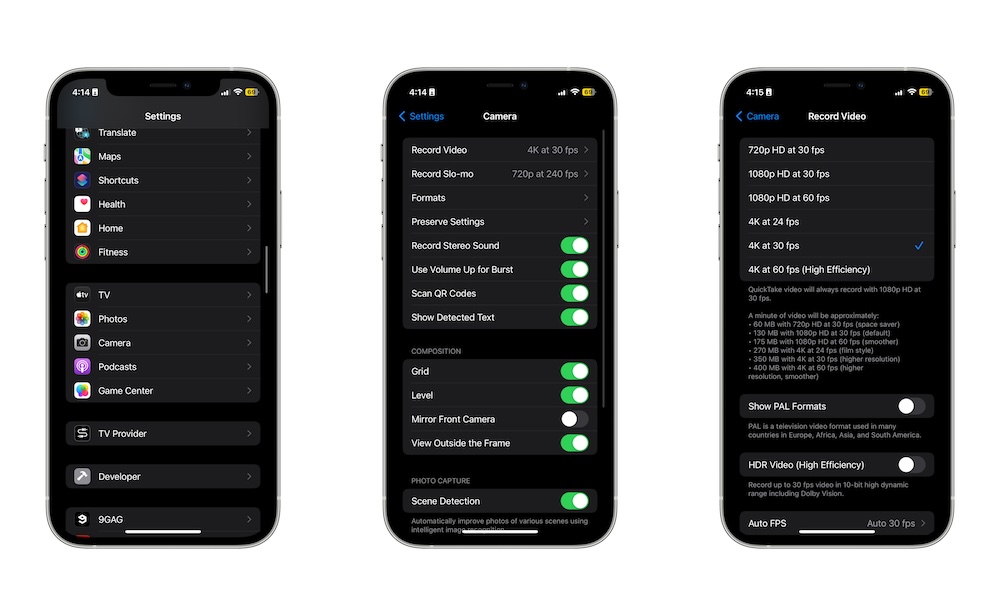
Most modern iPhones can take amazing video at resolutions up to 4K at 60 frames per second (fps). While that might be too much for some folks, if you want to take amazing videos, you're better off using the highest settings your iPhone can support.
To change the resolution on your iPhone, you need to do the following:
- Open the Settings app.
- Scroll down and go to Camera.
- Tap on Record Video.
- Choose the highest resolution possible. For instance, 4K at 60 fps (High Efficiency).
Keep in mind, though, the greater the resolution, the more space each video will need, so be sure you have enough storage.
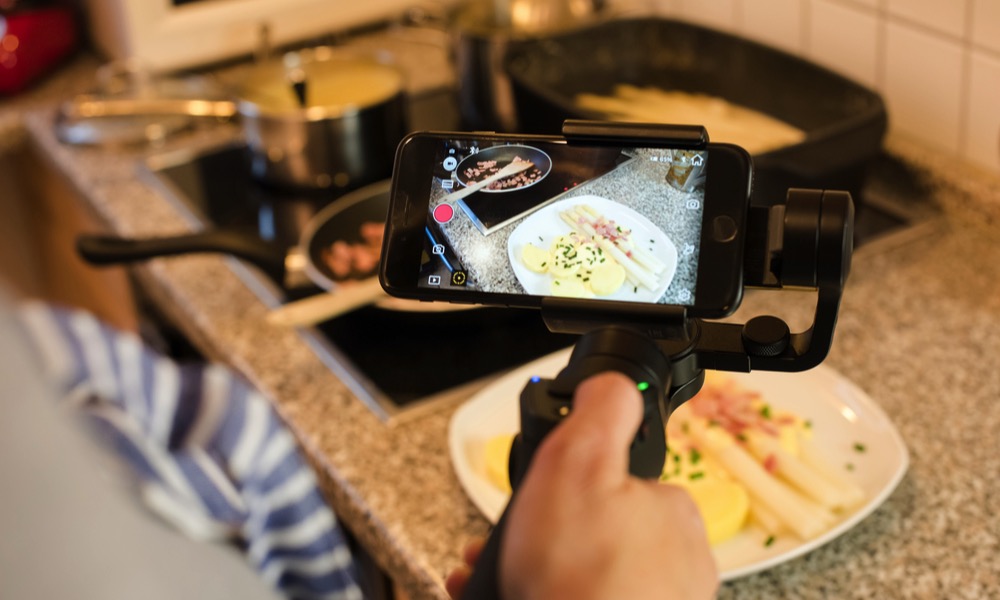
Use the Right Equipment
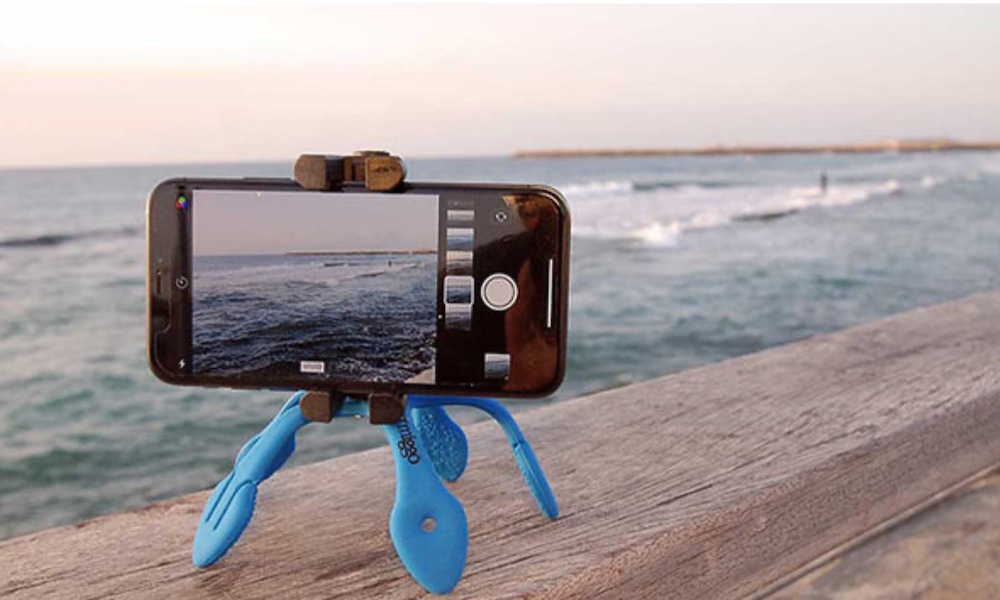
Using natural light or your own flashlight is good enough for certain situations, but if you want to take a high-quality, professional video, you should consider using the right lightning.
Fortunately, if you want to invest in your equipment, using something like this Ring Light you can get from Amazon will only cost you $30 bucks, which isn't much if you're just starting out. Plus, it can also work as a tripod, so you'll be killing two birds with one stone.
Once you have the right lighting, also be sure to stabilize your videos. Our hands are shaky and make videos look like they were taken by amateurs.
But if you want to make better videos, getting an iPhone tripod is a must. There are many options available, but this tripod from Elitehood is one of the most versatile and budget-friendly options.
Last but not least, storage. If you plan to take a lot of videos at the highest resolution possible, be sure to have your computer or an external hard drive so you can easily transfer your files. If you have an iPhone 15 Pro, then you can immediately record videos into an external drive — as long as you have a USB 3 cable.
Use the Camera's Grid
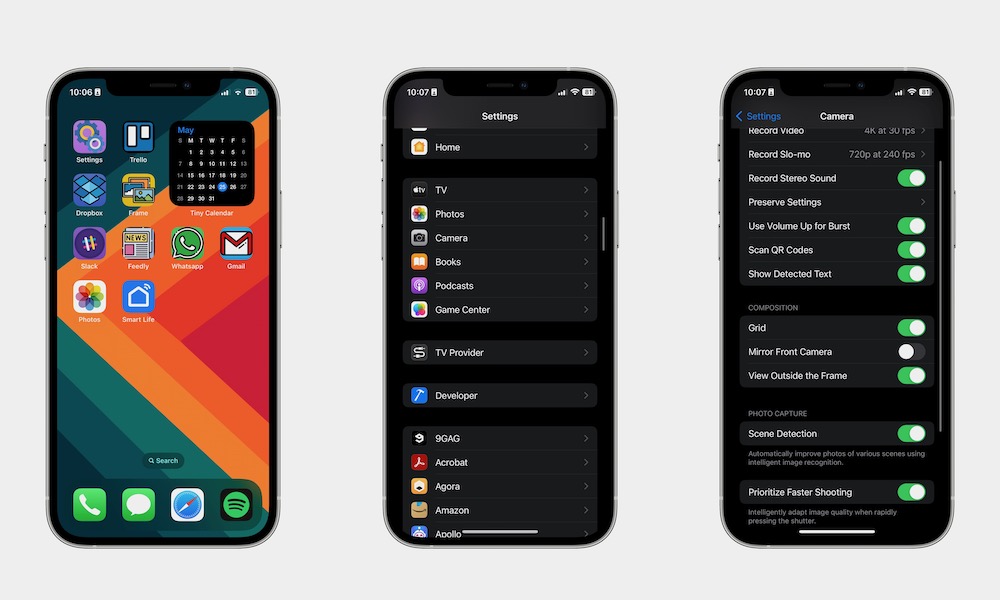
Following the rule of thirds to frame the subject of your video in the center of the display is a must if you want to record professional-looking high-quality videos.
Fortunately, you don't have to figure that out by yourself; your iPhone already comes with a grid layout that you can take advantage of. To use it, you need to:
- Open the Settings app.
- Scroll down and go to Camera.
- Under Composition, enable Grid.
Now, when you go to take a picture or shoot a video, you'll notice a grid layout to help you put your subjects in the right place.
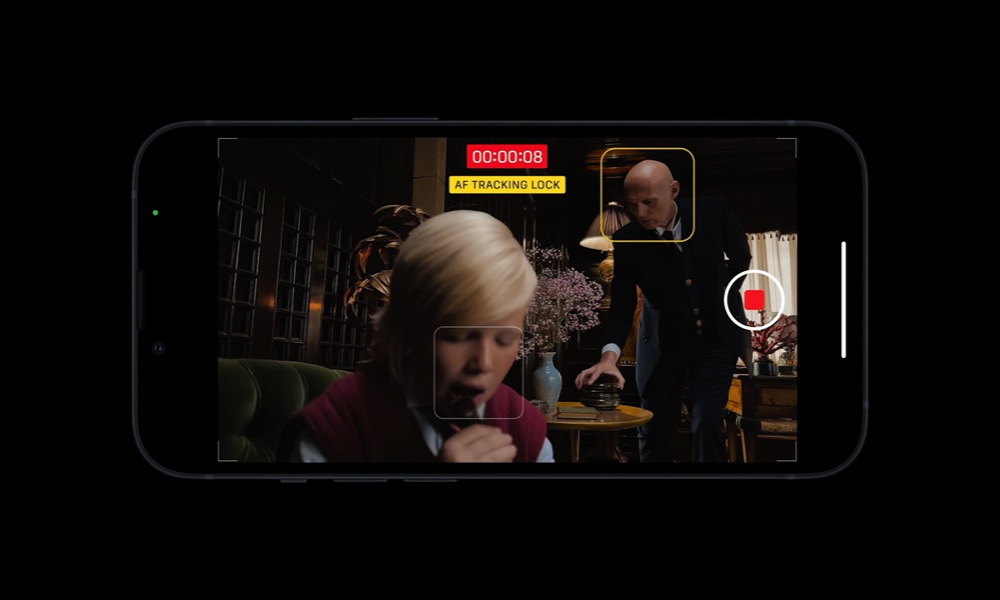
Use Action Mode
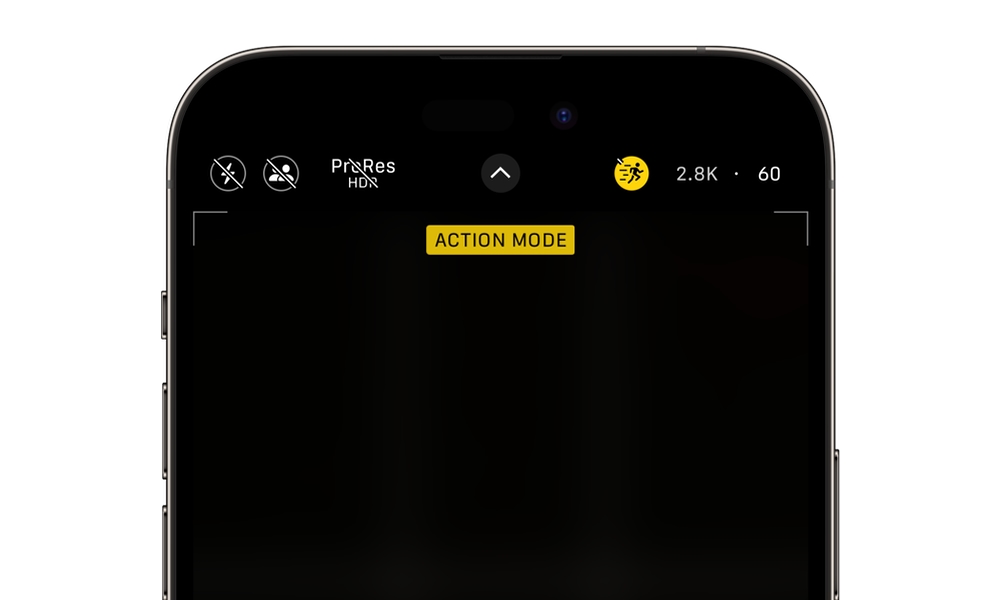
Action Mode is a fairly new feature that only the iPhone 14 and iPhone 14 Pro and later models support. This is perfect if you have to move while recording a good shot. That way, even if you're holding your iPhone with your hand, you'll get a pretty decent and steady shot.
Here's how to enable Action mode on your iPhone:
- Open the Camera app and select Video.
- Tap the Action mode button in the top right corner of your screen. It's the icon of a person running.
- Start recording your video.
By default, Action mode requires a lot of light to work perfectly. However, there is a way to use it in low-light situations. All you need to do is go to Settings > Camera > Record Video and turn on Action Mode Lower Light. This will decrease the stabilization slightly, but it may be worth the tradeoff if you're shooting a rapidly moving subject.
Take Great Videos With Cinematic Mode
Cinematic mode is another great feature to take amazing videos, but you'll also need a recent iPhone model — an iPhone 13 or newer — to make use of this feature. If you meet that requirement, here's how to enable Cinematic mode:
- Open the Camera app.
- Put your iPhone in landscape mode.
- Tap the arrow button on the left side.
- Adjust the Depth Control button (the one that kind of looks like an f), the 1x button, the flash button, and the exposure button (the circle with the plus and minus icons) however you want.
- Start recording your video.
And that's it. As you can see, Cinematic mode mostly lets you record videos with a shallow depth of field, which adds a bit of style to your videos.
The other advantage is that your video can support Dolby Vision HDR. And if you have an iPhone 14 or a later model, you can switch between HD and 4K and change the frame rate to 24, 25, and 30 fps.
Bonus: Make Sure You Prepare Everything to Take the Perfect Shot
Before you start recording amazing videos, you need to make sure you check a few things before recording. While there are a bunch of things you can do before you start recording, some of the basics you need to cover are:
- Test the lighting and audio levels to make sure everything is working properly.
- Clean your lenses and other equipment.
- Be sure to check your iPhone's battery and storage.
- Put all your subjects in the frame or make marks so they know where they need to be.
- Avoid wearing stuff that would get in the frame or would make sounds when you're recording (e.g., jewelry).
Record the Perfect Video With Your iPhone
As you can see, with just a few adjustments, you can actually record amazing videos with nothing but your iPhone.
While you may need some extra equipment to take professional-looking videos, you can start just by adjusting a few settings and making the most of the already powerful cameras on your iPhone.