
5 Different Ways to Take a Screenshot on Your Mac

Toggle Dark Mode
Taking a screenshot, or screengrab, on your Mac is quite easy and can be done within a few seconds. All you need to know is the right combination keys for taking the type of screenshot that you want.
You can take four different types of screenshots on your Mac. It can either be a screenshot of your entire screen, a portion of the screen, a particular window, or a drop-down menu. Each of these have different combination keys but once you learn them, it should be easy to take screenshots quickly on the fly. On the new MacBook models, you can even take a screenshot of the Touch Bar.
In this tutorial, we’ll walk you through the different types of screenshots that you can take on your Mac.
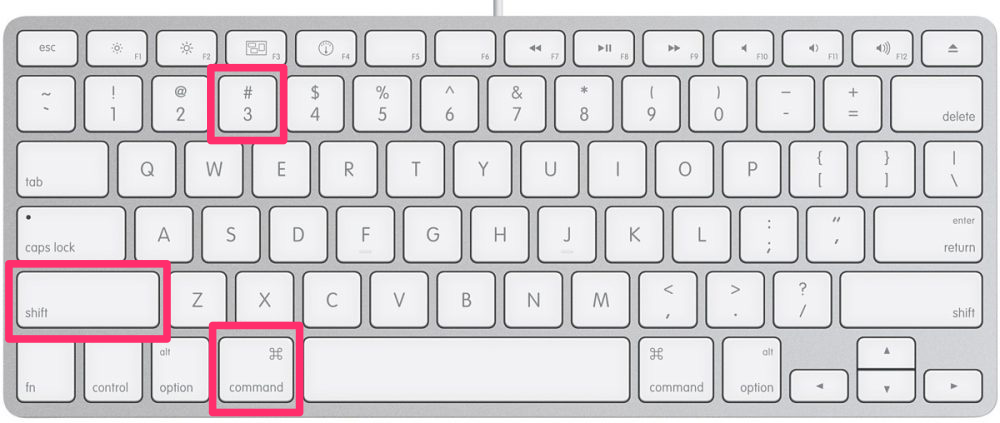
Screenshot Your Entire Screen
-
Press Cmd+Shift+3 to screenshot your entire screen.
-
The screenshot will be saved as a .png image file on your desktop.
Screenshot a Selected Portion of the Screen
-
Press Cmd+Shift+4.
-
The mouse pointer changes to a crosshair. Click and drag on the screen to select the area that you want to screenshot.
-
Once you’ve highlighted the area you want, let go of the mouse or trackpad button to capture it as a screenshot.
Note:Â To cancel, press the Esc button before you release the mouse button.
-
The screenshot will be saved as a .png image on your desktop.
Screenshot a Particular Window
-
Press Cmd+Shift+4.
-
Now press the Spacebar key. The mouse pointer changes to a camera icon.
-
Move the pointer onto the window that you want to screenshot.
-
Now press the left mouse button or trackpad button to capture the screenshot of that particular window. To cancel, press the Esc button before you click the mouse button.
-
The screenshot will be saved as a .png image on your desktop.
Screenshot a Dropdown Menu
-
Press Cmd+Shift+4.
-
Now press the Spacebar key. The mouse pointer changes to a camera icon.
-
Move the pointer over the dropdown menu that you want to capture.
-
Now press the left mouse button or trackpad button to capture its screenshot. To cancel, press the Esc button before you click the mouse button.
-
The screenshot will be saved as a .png image on your desktop.
Screenshot the Touch Bar
-
If you have a MacBook that comes with Touch Bar, then you can take a screenshot of the Touch Bar as well. All you have to do is to press Cmd+Shift+6 and a screenshot of the Touch Bar will be taken. The image will be saved to your Mac’s desktop.
How to Copy Screenshots Instead of Saving Them to Desktop
-
If you don’t want your screenshots to be saved to your desktop, then you can copy them to clipboard instead. All you have to do is to press the Control key in addition to the combination keys mentioned above. For example, press Cmd+Ctrl+Shift+3 to copy the screenshot of your entire screen.
These are the different methods of taking screenshots on your Mac. The combinations keys are easy to learn so once you know them, you should be able to capture screenshots without any difficulties. All your screenshots will be saved automatically to the desktop as a .png file. They are named as “Screen Shot date at time.png”.


