
30+ Best Tips and Tricks for Your Mac and MacBook
 Credit: iDrop News
Your Macintosh holds more secrets than you might think. You can tweak animations, snap windows together, keep your MacBook from sleeping, and so much more.
Best of all, you can do it all right out of the box. That’s right, none of these tips require any third-party software, but there are dozens of apps on the Mac App Store that can add even more functionality or improve the user experience. (e.g., menu bar applets, utilities, advanced continuity, and more).
macOS is a savage OS that can do it all. Productivity, entertainment, creativity, and more are right at your fingertips, these 30 tips will have you feeling like a pro in no time.
Enable Right-Click and Use Gestures
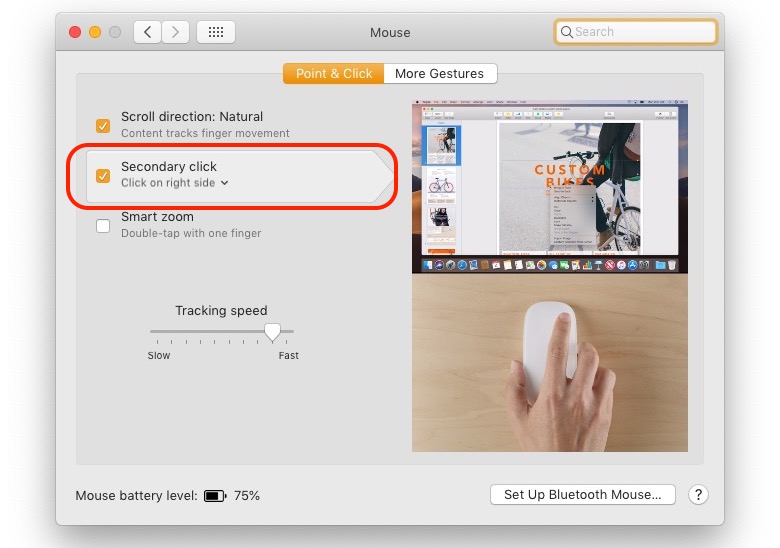
By default, users must Control + click to bring up contextual content. While this might be fine for longtime Mac users, those of us coming from Windows (or just prefer right-clicks) can enable the feature in the System Preferences.
You’ll find the option titled “Secondary Click" under the mouse and trackpad settings. Here you can also enable and customize different gestures; including the ability to show your desktop, tap to click, and access Launchpad.
Sloooooooow Motion

So, this is a fun one. It involves making some changes in Terminal, so proceed at your own risk. You know when you minimize a window how it does that cool animation? Did you know you can slow it down?
- To utilize this trick, open a new Terminal window
- Copy and Paste > defaults write com.apple.dock slow-motion-allowed -bool true && killall Dock
- Now hold down Shift and click the minimize button. Yeah, it’s pretty cool.
Wait, There’s More. This tweak works with both the Genie and Scale effects found in the dock preferences. But, there is another effect that must be enabled through the terminal called “Suck.” To activate it, open a new Terminal window and type: defaults write com.apple.dock mineffect -string suck
Use Your Favorite iOS Apps on Your Computer
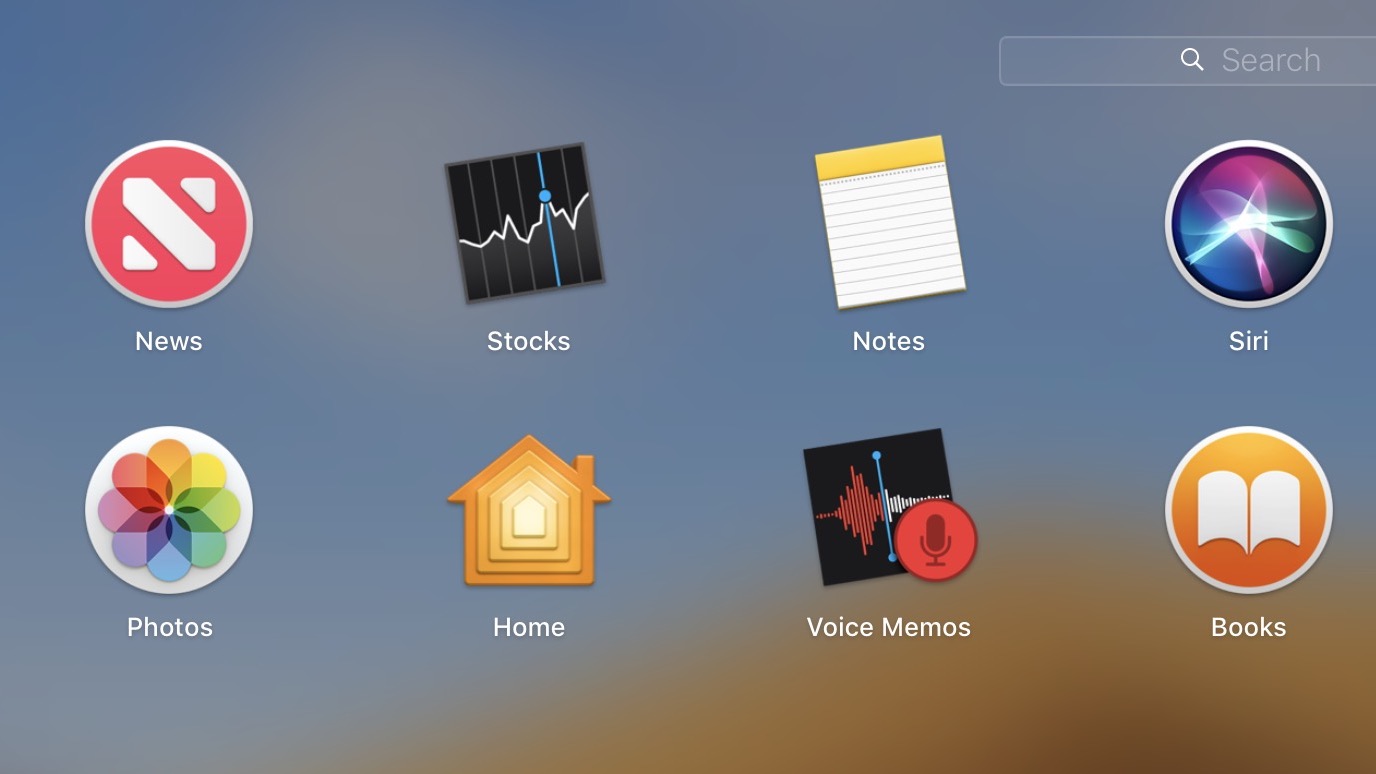
As iOS and macOS continue to merge their unique user experiences, Apple has added apps like News, Stocks, and Notes to the operating system.
Even Siri and Home are now available on macOS. Letting you control your smart home, make calls, send text messages, listen to your voice memos, and more.
Many third-party apps are available on both iOS and macOS; and, usually they can sync their data in iCloud.
Spotlight Has All of the Answers
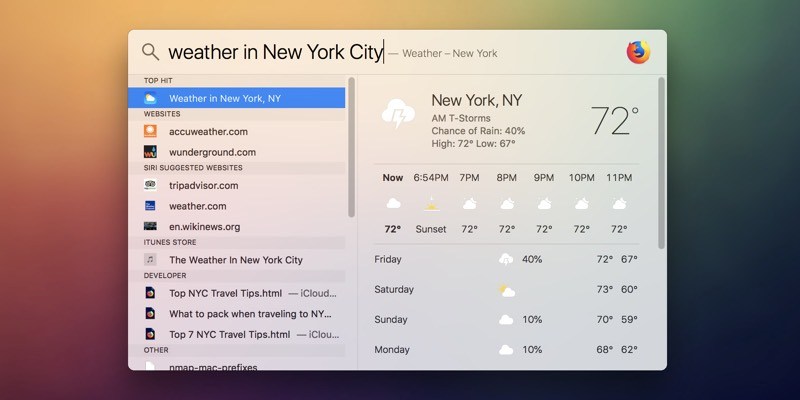
Clicking the magnifying glass in the menu bar, or using the Command + Space shortcut, will bring up Spotlight search. Spotlight is very handy for locating files and folders, but it can do so much more.
- While searching your computer, Spotlight checks for in-app data, searches the App Store, and the Web.
- It can display definitions for words, search maps, and display stock information.
- You can even type “Weather” and see the forecast for your location.
- Need a quick calculation, simply type something like 5940 x 326 in the search bar and Spotlight will calculate it for you.
- Want to know how fast light travels? Try typing “how fast is the speed of light.”
Sign Your Name
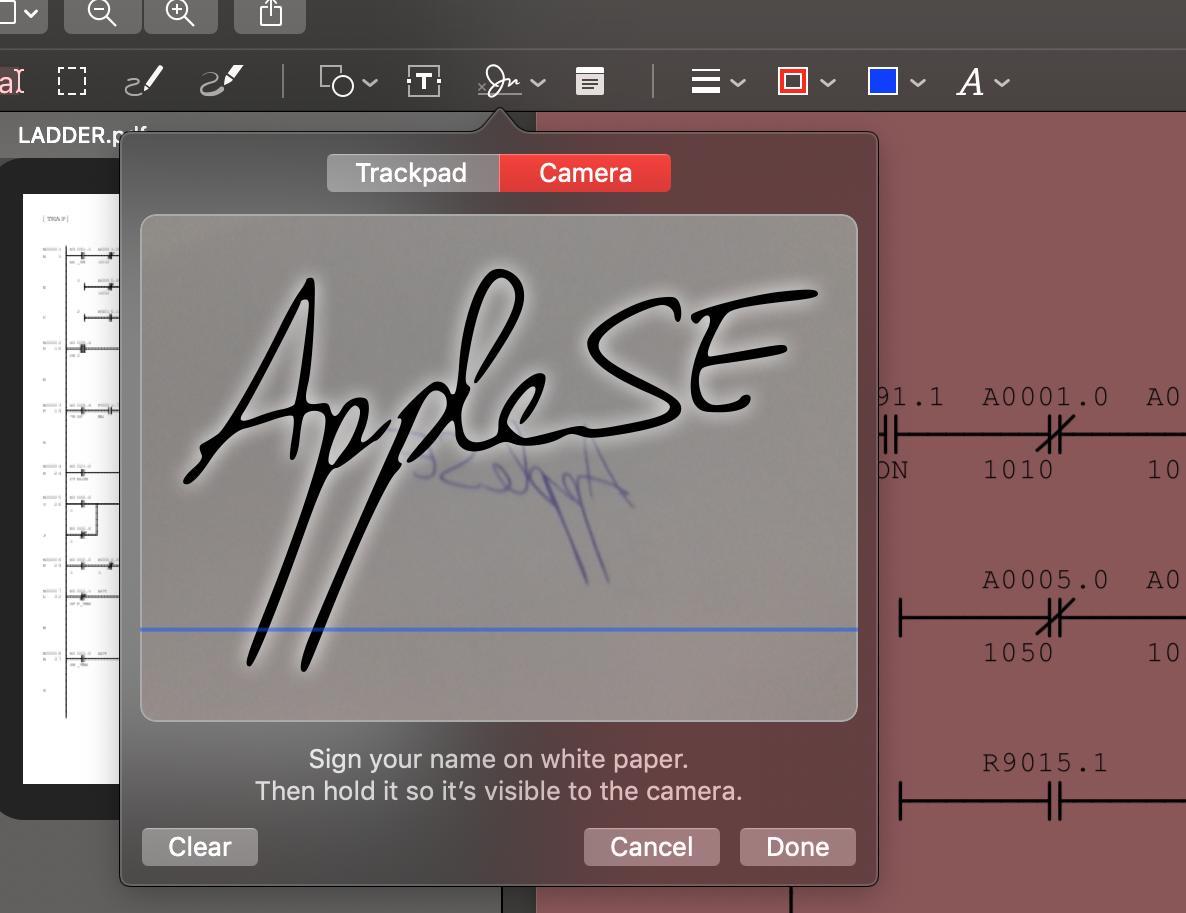
If you sign a lot of documents you may be interested to know it’s quick and easy on a Mac with a trackpad.
- Open a file—such as a PDF—in Preview, then open the annotate toolbar.
- Select the signature button from the toolbar.
- Here you’ll see your existing signatures (which you can click to add to your document) or you can click Create Signature.
- You have two options, use the trackpad or take a picture of an existing signature.
That’s it, now you can easily add a signature whenever you need to.
Take Full Advantage of the Menu Bar
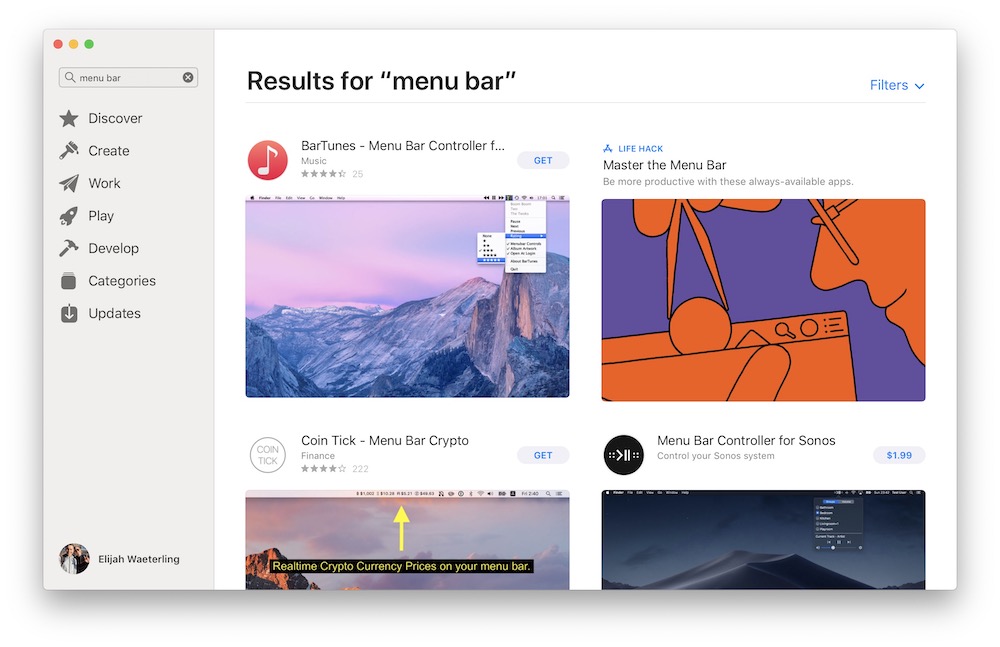
Out of the box, Apple has menu bar items for Wi-Fi, Bluetooth, Spotlight, VPN, Volume, and more. You can rearrange the icons by holding the Command key and dragging the icons where you want them!
Using third-party apps you can add functionality such as timers, full date and time, delivery notifications, and more. Explore the App Store to find the apps that are right for you.
Screenshots Made Quick and Easy
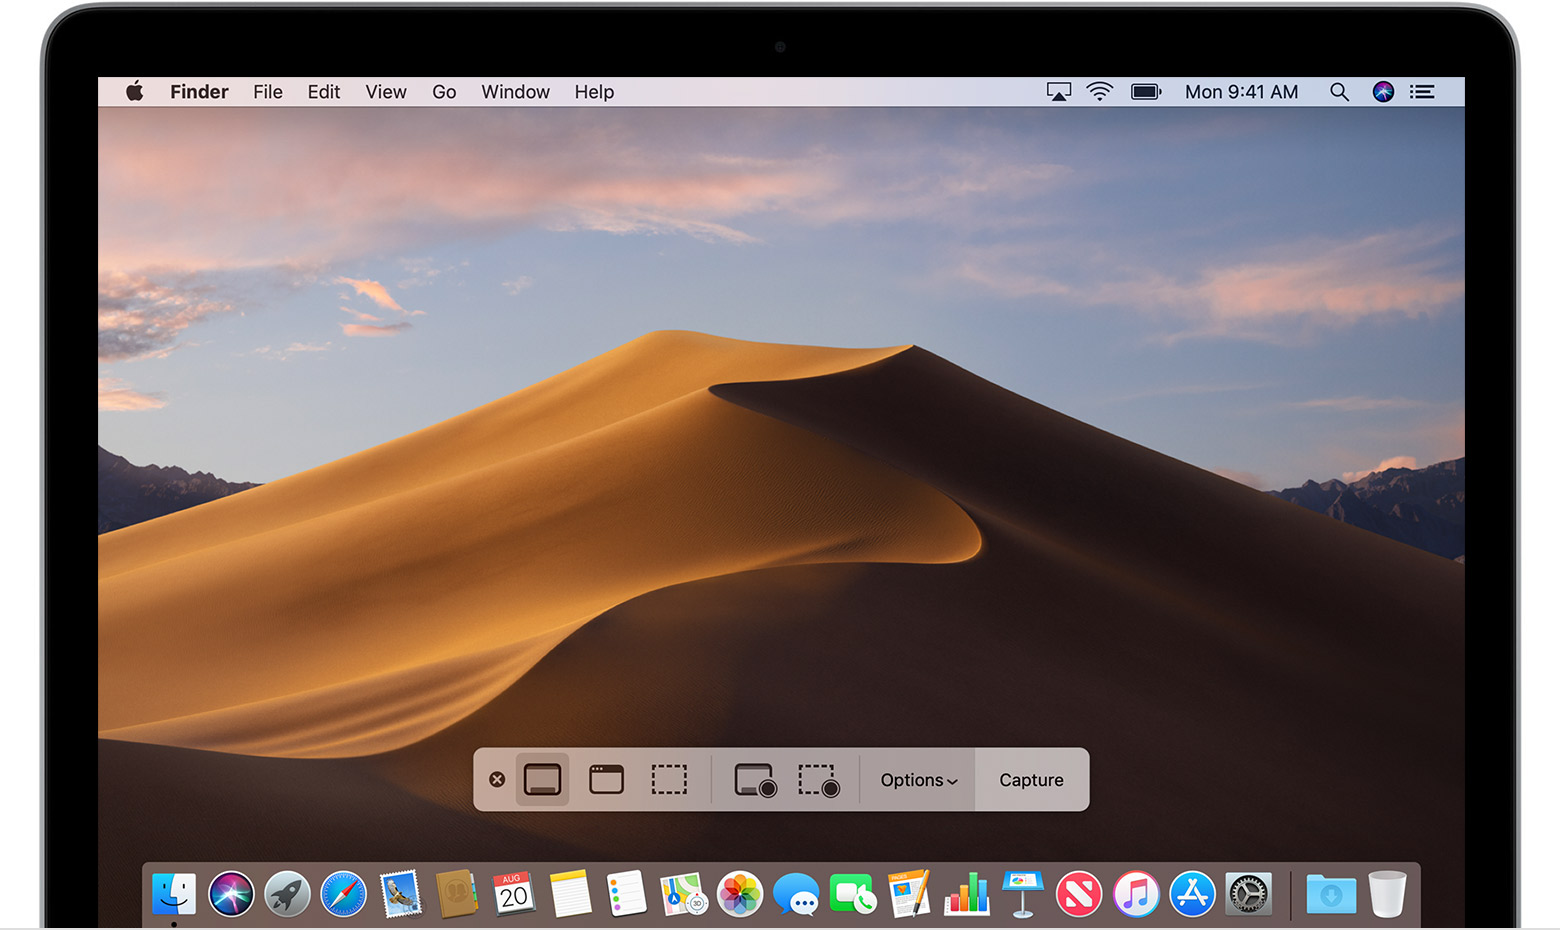
We’ve covered screenshots before, but sometimes it can be hard to remember all the commands. If you have trouble remembering them all, then just settle for this one: Command + Shift + 5. Why this one? Because this one lets you choose which type of screenshot you want to use. A menu at the bottom of the screen lets you choose what to screenshot and even lets you setup screen recording. Pretty cool, right?
Line up Your Windows Just Right
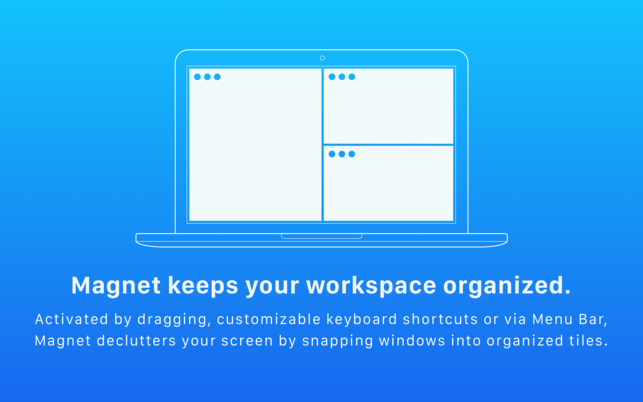
Apps like Magnet and Better Snap Tool can help you organize your app windows perfectly. But, did you know macOS automatically aligns apps with each other, the dock, the menu bar, the edge of the display, and more? To line up your windows, simply drag them toward each other and slowly move them toward an edge. They will automatically snap into place.
Multitask Like a Pro
I’ve heard it said multiple times that Macs are great for content and creativity, but lack what’s necessary to be productive in a business environment. I’ll say it: that’s total BS. I use a Mac daily and have found it far more productive than my Windows PC. One of the most helpful features is its ability to multitask so smoothly.
When I’m at my desk, I have three screens – and in the past when taking my laptop away from my office, I felt limited by just one screen. Thanks to my MacBook Pro’s incredible Retina display, I already feel like I have more room to work. Add Mac's ability to create multiple desktops, and it’s like I never left my desk. Combine this with my additional monitors, and it actually seems like I have more screens than I need.
Try Multitasking for Yourself
- Swipe up with three – or four – fingers on your trackpad or Magic Mouse.
- You’ll see your various desktops and fullscreen apps at the top of your display, as well as the individual apps you have open on your active display.
- You can select a desktop (at the top of the screen) or an app to switch to it; or, you can easily swap between these spaces by swiping left or right with three or four fingers.
- Drag and drop apps/windows to different desktops to move them, click and drag desktops to rearrange them, or click the “+” icon to add more desktops.
- To close a desktop, hover over it in the tray and select the “x.”
You can even change the background of each individual desktop. You can also drag apps on top of fullscreen apps to create a split view.
Use Continuity, AirDrop, AirPlay, and More
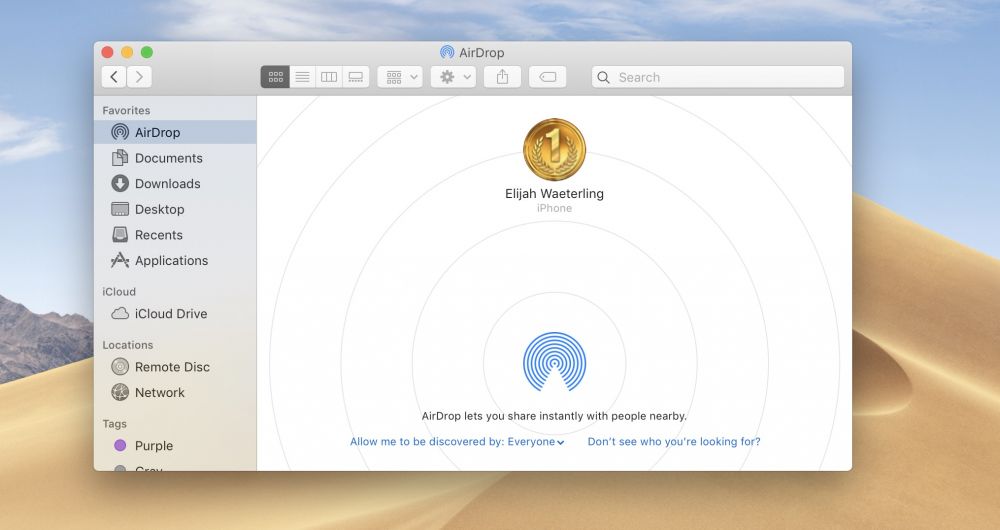
If you’re invested in Apple’s ecosystem, it makes sense to use these features. Continuity and Handoff let you easily switch between devices. Start composing a message on your iPhone and finish on your Mac. Even copy and paste can be used between all of your devices.
With everything being wireless or stored in the cloud, moving files to a flash drive is a thing of the past. You can store files in iCloud, or easily move them using AirDrop. For listening to content on external speakers or viewing movies—or your display—on the big screen, AirPlay is your best friend. Play around and explore new ways to use your Mac like it’s never been used before.
Check out the Network Utility
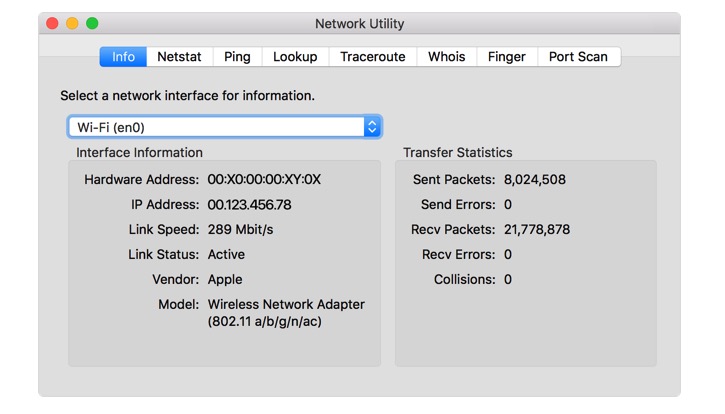
As a UCaaS network engineer, I use Terminal and other tools quite often. macOS has a pretty cool tool built-in called Network Utility. I won’t bore you with all of the technical details, but it’s worth a look if you’re interested in networking. You can easily view your network speed information, run basic tests, and more.
- Open Finder
- Click Applications.
- Search for Network Utility.
Play Hidden Games with Emacs
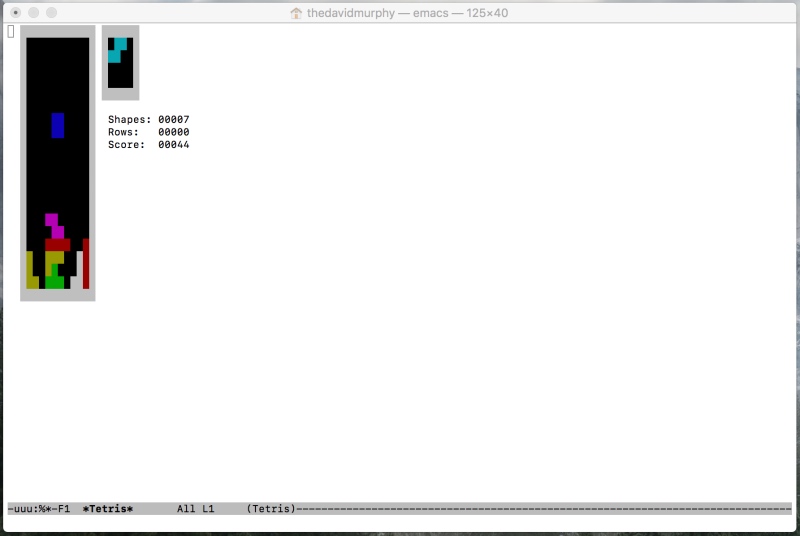
Playing a hidden game is always fun, right? Try it with emacs.
- Open up a Terminal window and type emacs.
- Press the Esc key, then “x”.
- Type one of the following and then hit Enter:
- doctor
- dunnet
- gomoku
- landmark
- pong
- snake
- solitaire
- tetris
- 5x5
Use iWork Instead of Office
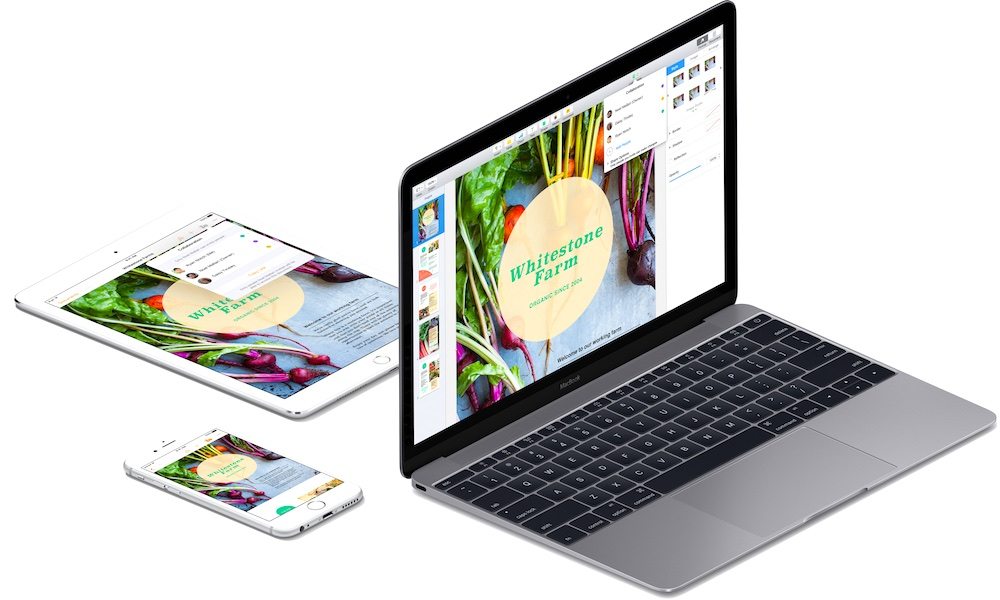
Yeah I say this a lot, so I’ll just kind of leave this here. But really, try Pages, Numbers, and Keynote. They really are a great alternative to Microsoft Office (and they’re free).
Use the Delete Key as a… Delete Key

This one’s especially for Windows users, where the Delete (or Del) key is used to erase text after the cursor and a backspace key is used like the Mac’s delete key. Simply hold the Function key and press the Delete key to use the Windows way.
Type the Apple Logo ?
?Music, ?tv+, ?Watch, ?Arcade, ?News+, ???. Apple keeps tagging their logo to the front of everything, and now so can you. Just hold Option + Shift + K to type the well-known symbol.
Other Symbols (and Emoji)
To find your favorite Emoji and additional symbols, simply press Control + Command + Space and make your selection.
Adjust the Volume in Tiny Increments and Make It Pop
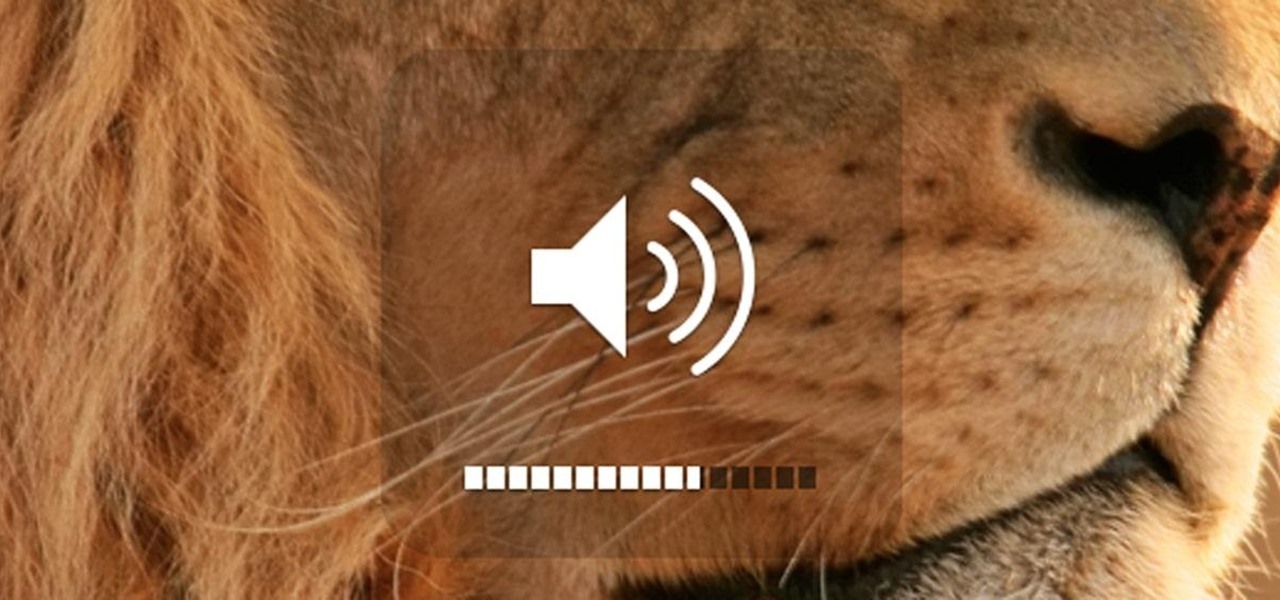
If the traditional “pops” are disabled, you can still hear the volume level by holding the Control key while changing the volume. But you can also increase or decrease the volume in quarter increments. Hold Option + Shift while adjusting the volume to get it just right.
Customize Your Terminal and Look Like a Hacker
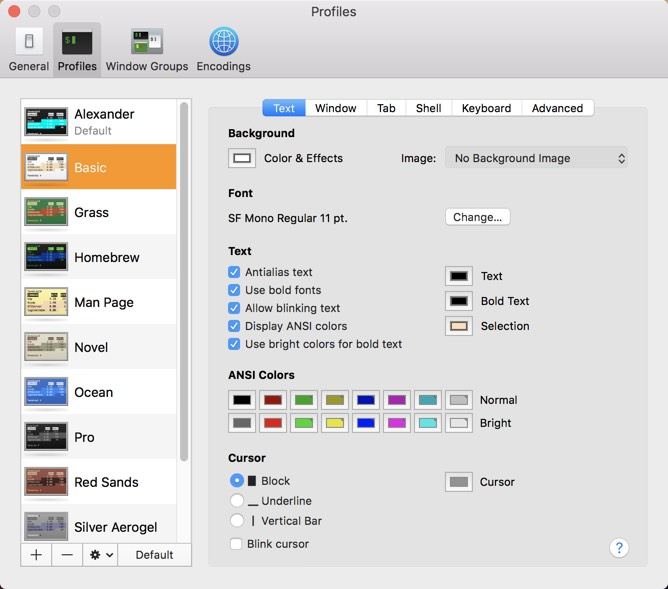
If you use the Terminal app a lot, why not spiff it up a bit. On the menu bar, click Terminal and select Preferences. Click on the Profiles tab to see the presets, change them, or completely create your own. You can even add a background image to make it look just the way you want it. Select the profile you want to use as default and click “Default” at the bottom of the profile-selection pane.
It’s fun to play around with profiles and there’s a lot of different things you can customize. Explore a little and make some changes. You can have multiple profiles, you can open a new Terminal window by clicking Shell in the menu bar, then select new window or tab and select the profile you want to use.
Make a PDF out of Anything
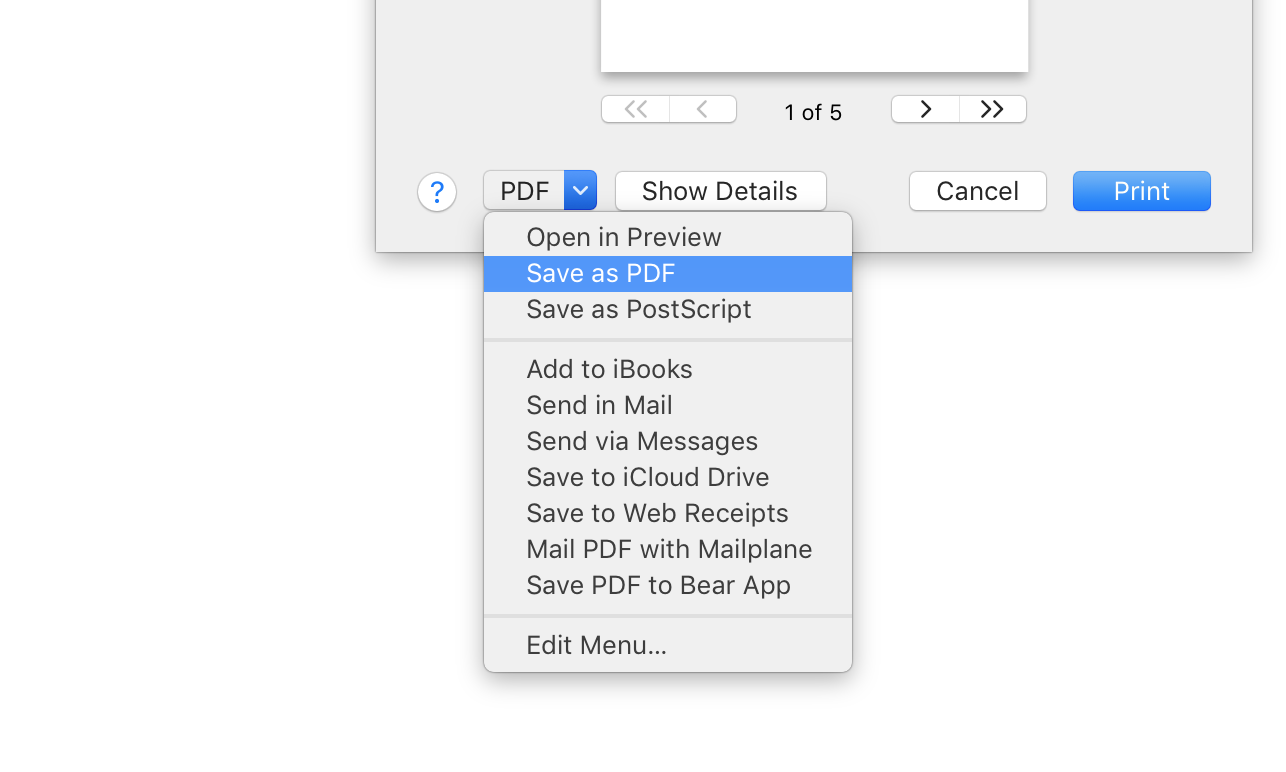
PDFs are the best. They retain the look of a document across platforms, including fonts. Additionally they can preserve all kinds of different data ranging from text to vector images. As such, they’re the perfect file format for sharing documents.
macOS makes it easy to turn just about anything into a PDF. While there’s more than one way to skin a cat (my apologies to the cat), a popular way is to use the print function.
Act like you’re going to print a document, then in the print window select the PDF dropdown in the bottom left. Here you’ll be presented with a variety of PDF options, click “Save as PDF” to export a PDF to your computer.
Record Your Mac's Screen Using QuickTime
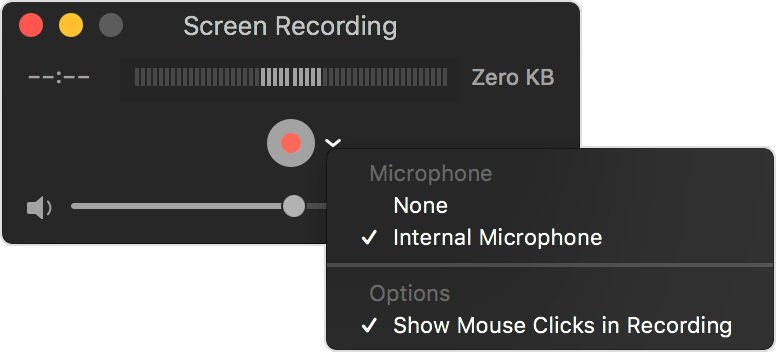
This one’s handy and easy. Open QuickTime Player, click File in the menu bar, choose New Screen Recording, and hit the record button. You can click the arrow next to the record button to select whether or not you want to record audio.
Caffeinate Your Mac to Keep it From Sleeping
There are some apps that keep your Mac from sleeping, but you don’t need them.
- Open a new Terminal window
- Type caffeinate, and press enter. It’s seriously that easy.
- Keep the Terminal window open, and press Control + C when you’re ready to close caffeinate.
There are a couple of things to consider before using this command. First, remember Apple makes your laptop sleep when the lid is closed for a reason and that's to protect the screen. Same goes for all other hardware, this can be potentially unsafe if you don’t use it wisely, so use good judgement.
You can also add a sleep timer with the “-t” modifier. For example, “caffeinate -t 600” will keep your Mac from sleeping for 600 seconds (10 minutes). You can also use Hot Corners to do this, will talk about those in a bit.
Don’t Be Afraid to Ask for Help
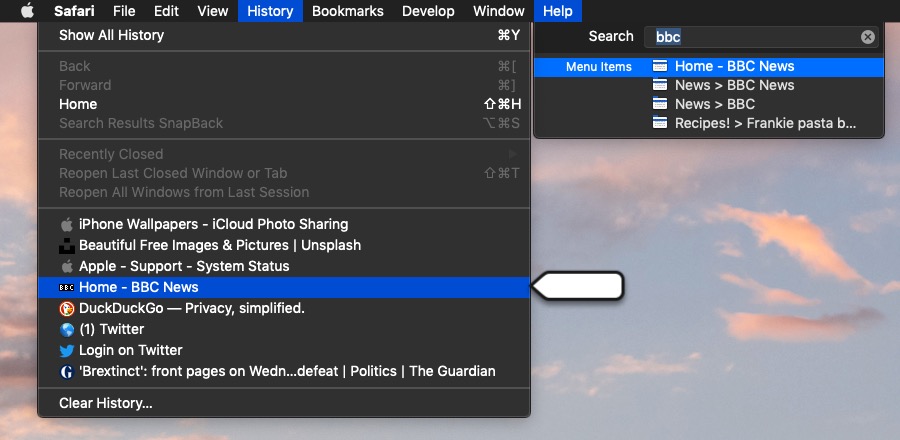
Help is just a click a way whenever you need it. Just click Help in the menu bar. What’s great about macOS is you can use the help menu to instantly search all of the menus! So just type what you need to do and you’ll find the tool or option you're looking for much quicker.
Get Colorful
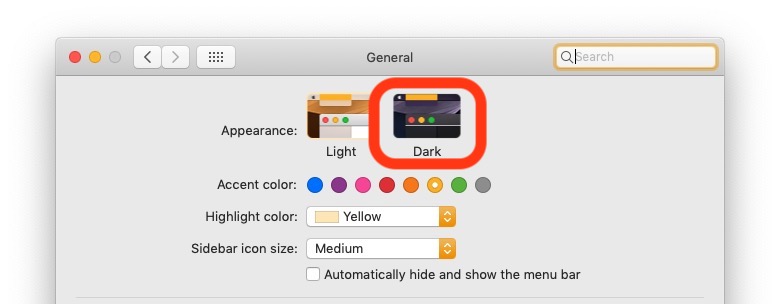
macOS doesn’t have various themes like Windows, but it still lets you customize quite a few aspects of the system. One of those are the system colors. Open System Preferences and click General. Here you can choose a dark or light theme, an accent color, and a highlight color. There are also a few other options here you might find useful.
Use Dashboard

Dashboard is a home for older Apple widgets and is no longer used; but, it’s still available.
In System Preferences under Mission Control you’ll find a Dashboard dropdown. By default it’s turned off, but you can choose to display it as a space (desktop) or as an overlay (traditional). If you set it as a space it will show up as a desktop to the far left. Activate the overlay by pressing the Function + F12 keys.
As the Dashboard is virtually obsolete, some widgets will no longer work and you can only choose from the included options. You may be able to find and install others from the Web.
Use Hot Corners
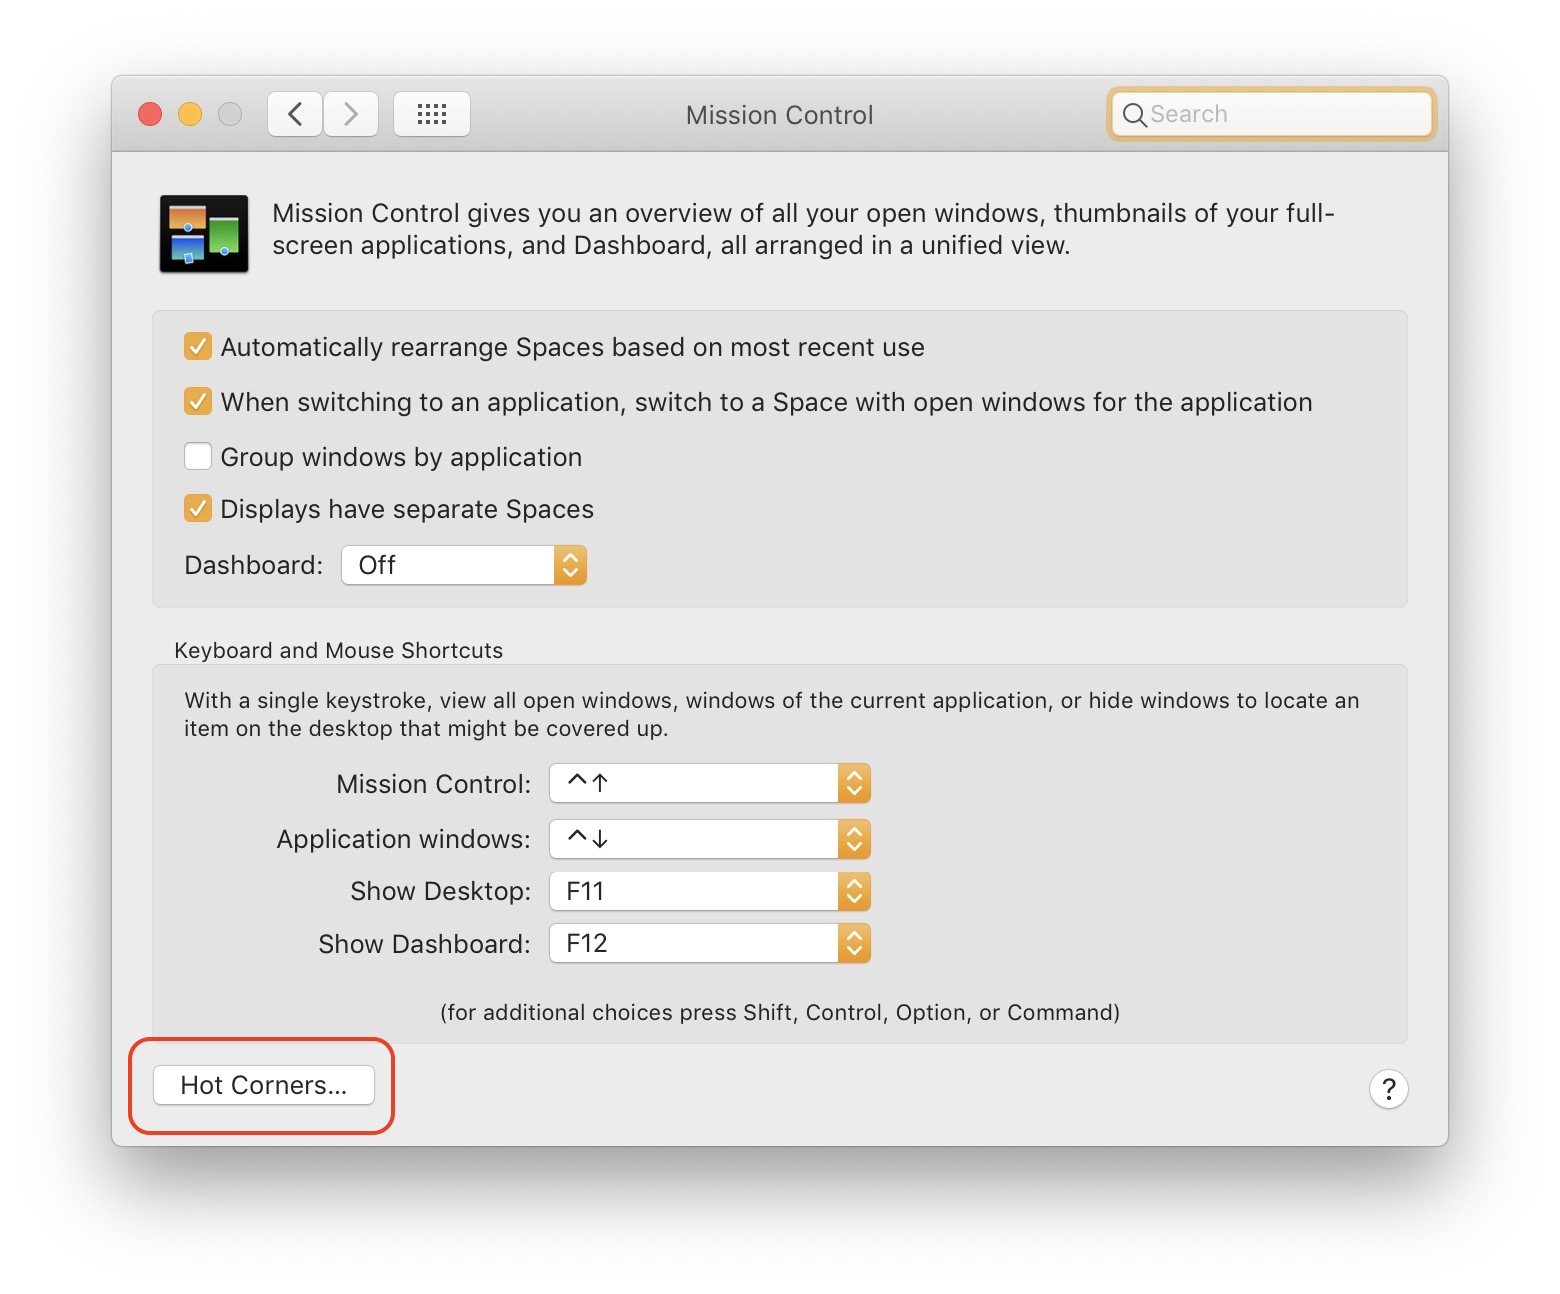
While you’re in the Mission Control settings, check out Hot Corners (the bottom-left button). Hot Corners let you use the corners of your display to trigger different actions, such as starting the screensaver, locking your computer, or viewing the Notification Center.
Customize Closed Captioning
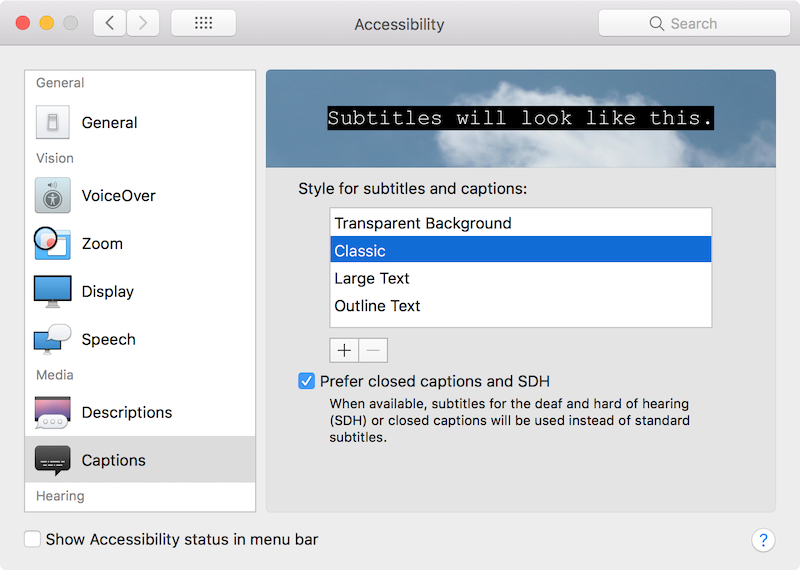
Also in System Preferences is an option to customize subtitles. It’s under the Accessibility section. Choose “Captions” from the left-hand selection menu. You can choose an existing style or create your own with the “+” button. You can customize the background, font, highlight, position, and more.
Flash the Screen
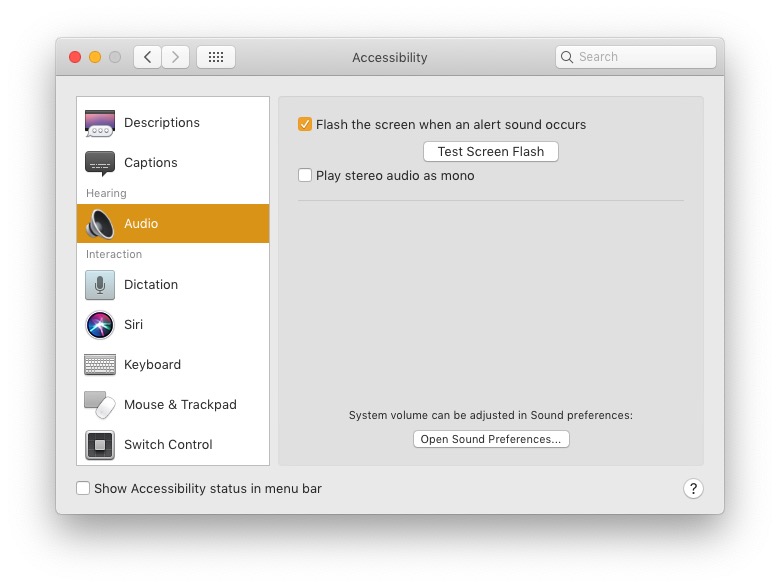
Since you’re already in the Accessibility settings, select Audio from the left-hand selection menu. You can check “Flash the screen when an alert sound occurs” and when you receive a notification the display will lighten briefly to help notify you with or without audio.
Make a (Sticky) Note of It
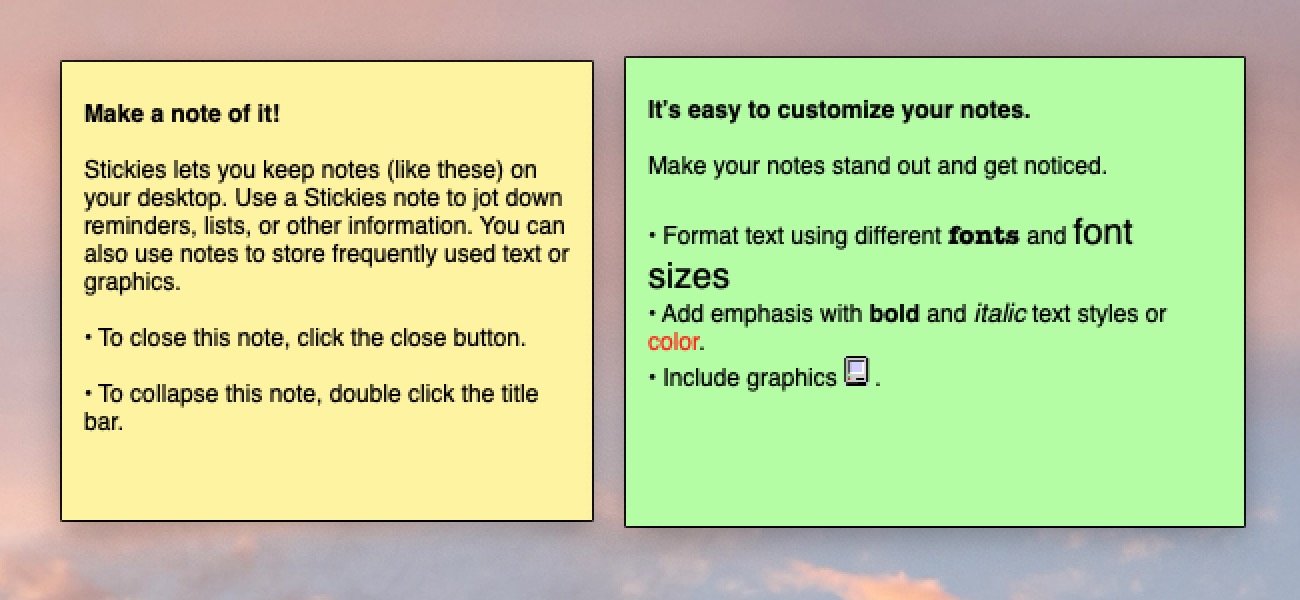
"Stickies" is probably the most obscure app on macOS, especially now that Notes is put front and center. But if you’re looking for a good sticky note app, just search for Stickies using Spotlight and give it a try.
Shake It
Having a hard time finding your cursor? Quickly move the cursor back and forth and it will temporarily increase in size. This can be useful if you have a hard time seeing, or if you have multiple monitors.
Customize Folders and Files
I mentioned earlier that you can change some colors and choose a light or dark theme in macOS; but, you can also customize individual folders.
- On a folder, right-click and choose “Show View Options.”
- Here you can make various changes such as how the icons are sorted, the text size, and more.
But, you can also change the background to a solid color or a picture. Here's what to do if you want to change a folder's icon.
- Right-click the folder you wish to change and select “Get Info.”
- Find the new icon you want to use.
- Drag the new icon file to the old icon in the top left-corner of the Info window. If allowed, this will change the icon.
Tag It
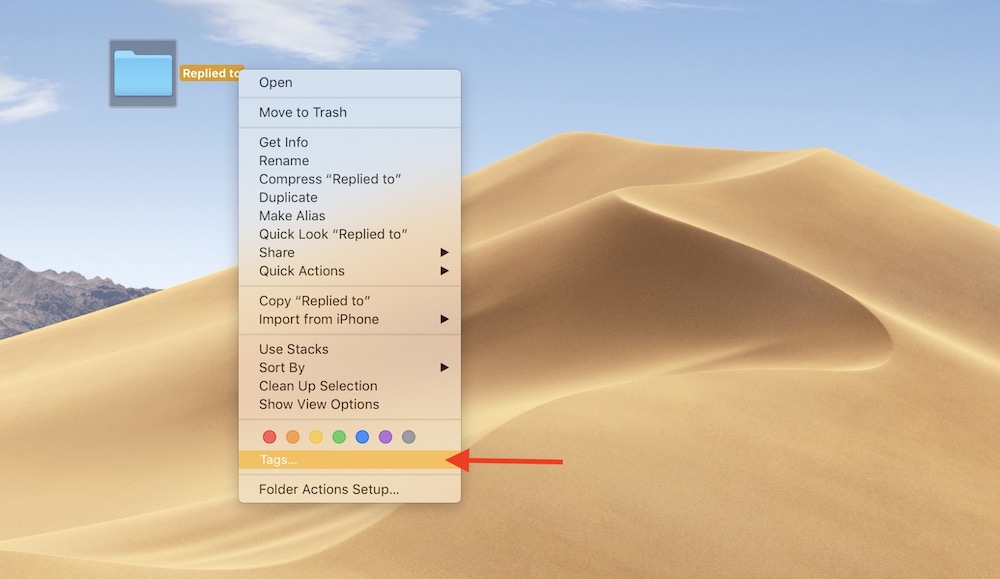
Last—but not least—are tags. Spotlight already does a great job searching your Mac, but tags can make it even easier.
You can have tags for personal and work files, tags to differentiate between courses at school, or anything else that might be useful to you.
Just right-click a file or folder and select one of the colored circles or choose “Tags…”
Now You're a Pro
Your Mac is full of possibilities, and it’s this versatility that separates it from mobile devices. macOS is extremely powerful right out of the box. But, you have to be willing to learn a little about it, especially if you’re coming from Windows.
What are your favorite tips and tricks? Did you learn anything new from this article? Let us know if you have any questions or if we missed any great tips in the comments below, or on social media.