20 New Features You Need to Try in macOS Sonoma
This year's macOS Sonoma release is one of the best Mac software updates we've seen in a while. With it, Apple also brought a bunch of new features and updates that are changing the way that we use our Macs.
From better autocorrect to the ability to find messages in a flash, Sonoma has everything you need and then some.
However, if you've just installed the software update, you probably don't yet know everything you're dealing with.
That's where we come in; read on for 20 of the best Sonoma features you should check out right away.
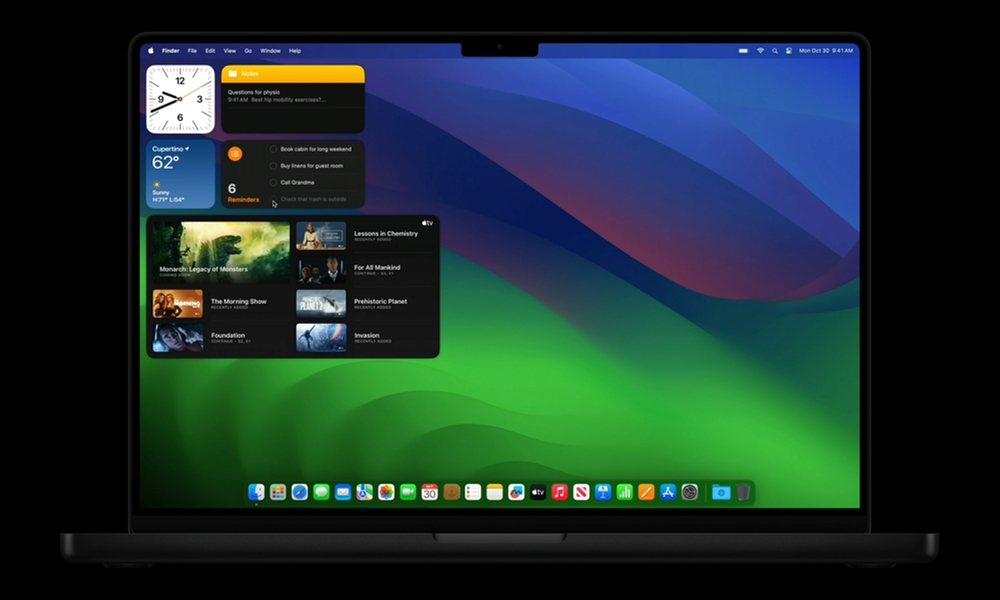
You Can Add Widgets to Your Desktop (Finally)
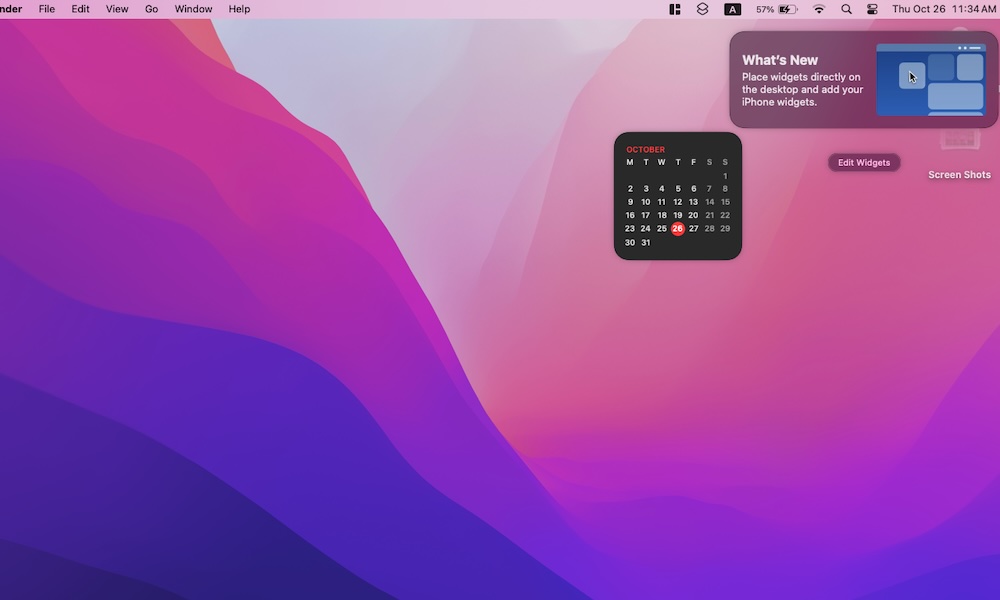
It's been a really long time coming, but Apple finally did it. You can finally add widgets to your desktop without the use of any third-party apps.
That's right, you can just drop your widgets on your desktop, and you'll have access to any widget without having to open up the Notification Center.
To add widgets to your Mac's desktop, slide out the Notification Center by clicking the clock in the top left corner of your screen, and then drag a widget from your Notification Center onto your desktop. Release the widget, and it'll stay right where you left it.
If you want to find more widgets, simply click Edit Widgets in the Notification Center, find the one you want to add to your desktop, and drag it to where you want it.
Use Your Favorite iPhone Widgets on Mac
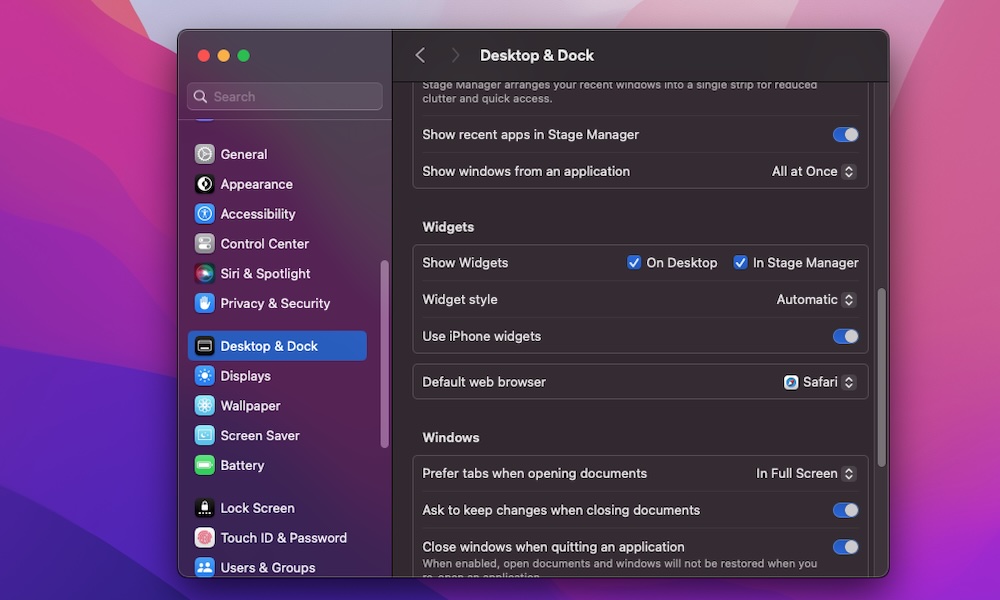
Besides being able to use regular Mac widgets, you can now also add the widgets you use on your iPhone. To use this, you'll need to use Apple's Continuity feature with the same Apple ID on your Mac and your iPhone.
If all that's covered, you can select the iPhone you want to get your widgets from by doing the following:
- Click the Apple menu in the top left corner of your screen.
- Go to System Settings.
- Scroll down on the left sidebar and click on Desktop & Dock.
- Scroll down on the right side and, under Widgets, enable Use iPhone widgets. Also, next to iPhone, click the drop-down menu to select the iPhone you want to use (this option is only available if you have more than one iPhone associated with the same Apple ID).
Now, go to the Notification Center in the top right corner and select Edit Widgets. Use the search bar to find your iPhone widgets and add them to your Notification Center or desktop.
Create Custom Safari Profiles
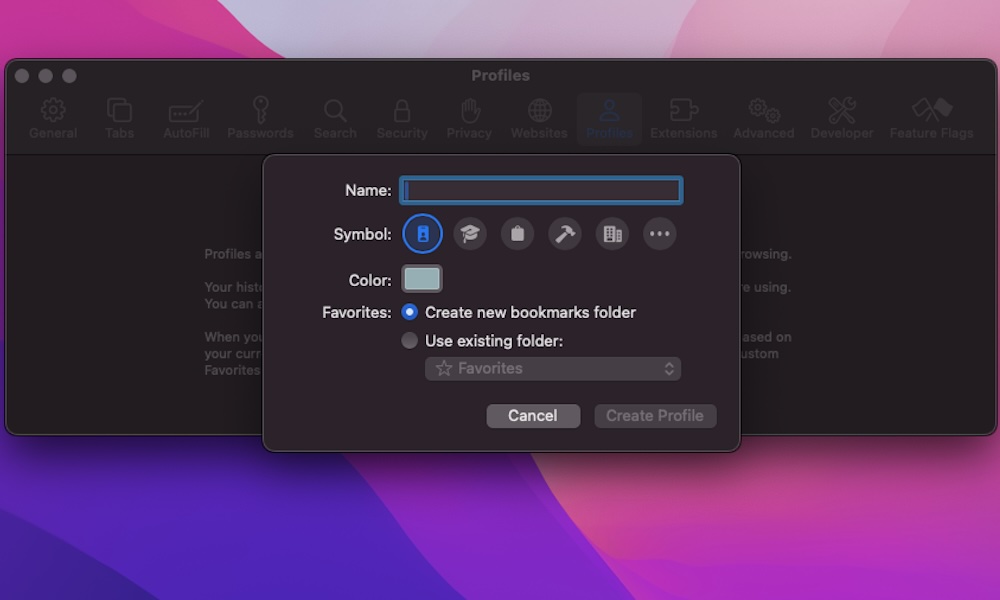
Another big change is the ability to create individual profiles in Safari. These profiles are the perfect way to keep your life organized. For example, you can create profiles for work or school with separate tabs, groups, favorites, and browsing history for each one.
Here's how to create a new Safari profile:
- Open Safari.
- Click Safari in the top left side of your screen.
- Go to Settings.
- Click the Profiles tab at the top of the window.
- Click on Start Using Profiles.
- Add a name, symbol, and color to your profile.
- When you're done, select Create Profile in the bottom right corner of the window.
And that's it! Your Mac will automatically open a new tab with your profile. You can start browsing and create tab groups without any issues.
If you decide you don't want to use this profile anymore, you can go back to the Profile settings, select the profile's name, and click the minus button to delete it.
Allow Extensions for Specific Websites
Another new change in Sonoma is the ability to customize your Safari Extensions with just a few clicks.
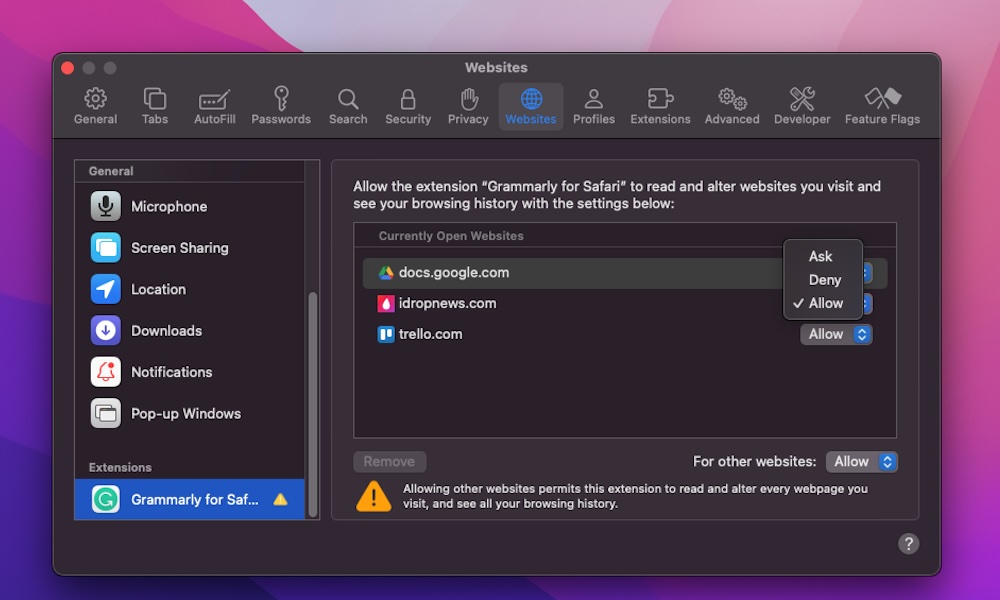
Specifically, you can now choose to use extensions only on specific websites in case you don't want that extension to have access to other websites you use.
Here's how to select specific websites for your extensions:
- Open Safari.
- Click on Safari in the top left corner of your screen.
- Go to Settings.
- Click on the Extensions tab at the top of the window.
- Click the extension you want from the left side menu and then select Edit Websites.
- Click the drop-down menu next to the website and select Allow, Deny, or Ask.
Add Web Apps to Your Dock
With Sonoma, you now have the ability to save specific websites as web apps and add them to your Dock so you can go to any website quicker than before.
To add web apps to your Mac's Dock, you need to:
- Open Safari.
- Go to the website you want to add to your Dock.
- Click File at the top of your screen.
- Click Add to Dock.
- Choose the name you want for your web app and click on Add.
The website will be added to your Dock immediately. It'll work like a regular shortcut, and you can remove it by right-clicking (control-clicking) it and going to Options > Remove From Dock.
However, these are technically apps now, so if you want to get rid of them, you'll need to "uninstall" them. To do this, open Finder and click the Applications folder. Search for the web apps and delete them like you would a regular app.
Locked Your Private Tabs on Mac
Thanks to Sonoma, you also have the ability to make private browsing really private.
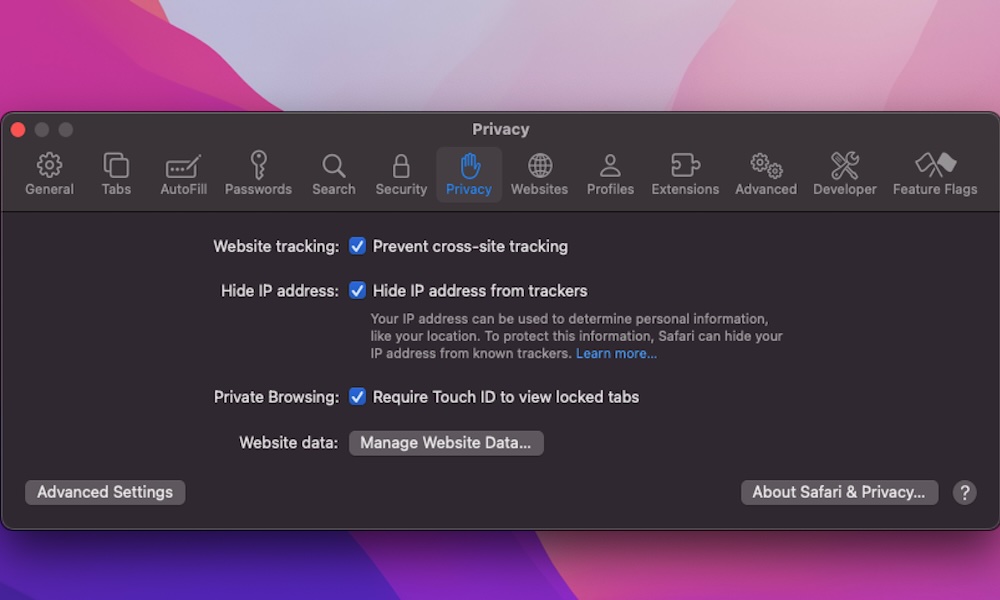
If you're browsing the web privately and suddenly need to leave your Mac, your Mac will automatically lock all the private tabs, and you'll only be able to unlock them with Touch ID or your password.
This is turned on by default, but you can confirm it by doing the following:
- Open Safari.
- Click the Safari option in the top left corner of the screen.
- Head over to System Settings.
- Click the Privacy tab at the top of the window.
- Next to Private Browsing, click Require Touch ID to view locked tabs.
Use a Specific Search Engine While Browsing Privately
We all know that Google keeps track of our activity on the web. While that might be useful if you want to get personalized ads, it might not be the best option when you're browsing the web privately.
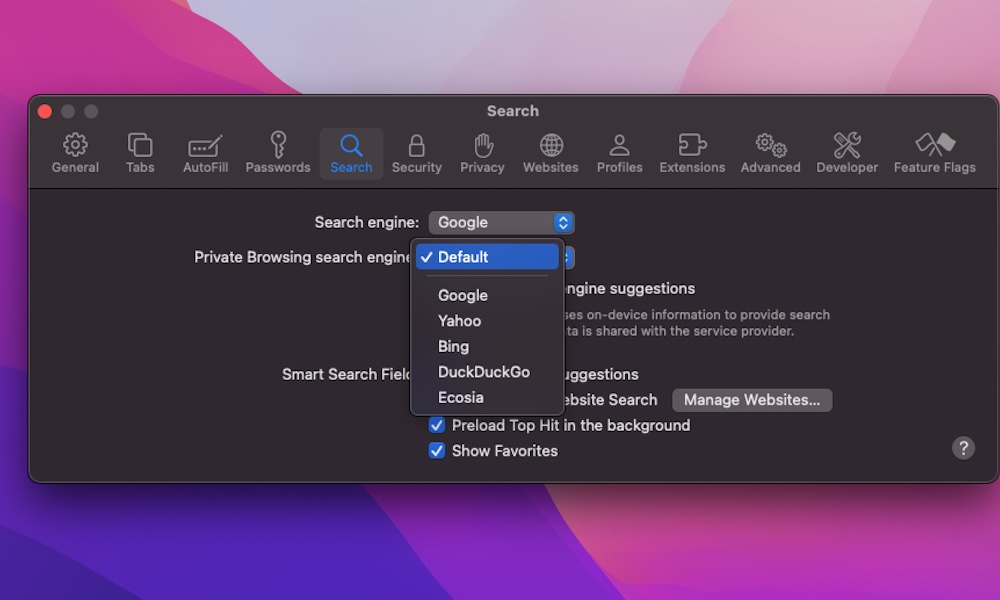
Fortunately, Apple thought about this, which is why you can select a different search engine when you're in a private browsing session. To change this, you need to:
- Open Safari.
- Click Safari in the top right corner of your screen.
- Select Settings.
- Click on the Search tab at the top of the window.
- Click the drop-down menu next to Private Browsing search engine.
- Select the search engine you want to use.
Automatically Close Your Safari Tabs
Another new change in Sonoma is the ability to automatically close tabs in Safari. If you keep a tab open in one of your profiles or groups for long enough without revisiting it, your Mac can automatically close it for you to save system resources and protect your privacy.
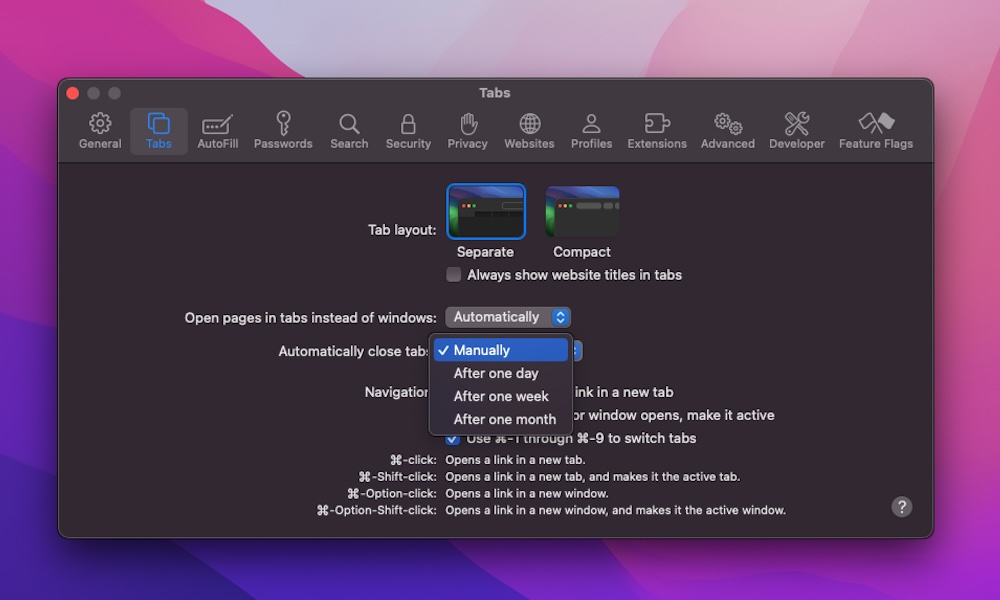
You can choose to have Safari close unused tabs after one day, one week, or one month. Here's how to enable this feature:
- Open Safari.
- Click Safari in the top left corner of your screen.
- Select Settings.
- Go to the Tabs tab at the top of the window.
- Next to Automatically close tabs, select the option you want.
Note that this timer is based on the last time you actually accessed a tab, not from the time you first opened it.
Use Spotlight to Manage Your Settings
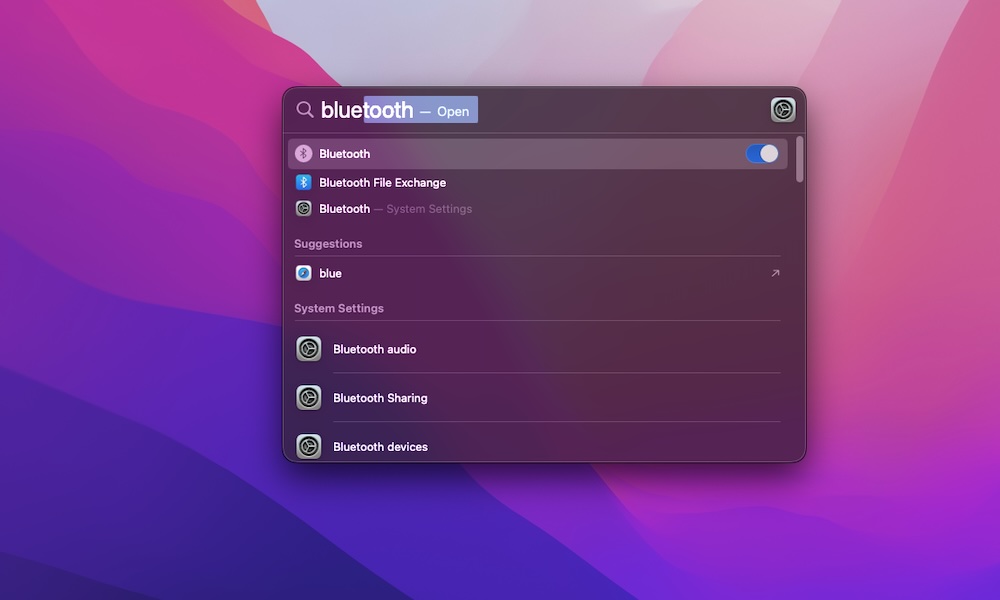
Apple also made Spotlight Search even better. While before, you could only use it to search for apps and files and even do basic calculations, you can now use it to turn on or off specific settings on your Mac.
For instance, you can use it to turn on your Bluetooth or to start using a Focus mode.
Granted, it still doesn't work perfectly. For instance, in theory, you could use it to turn your Wi-Fi on and off, but we couldn't get it to work.
With that said, you can still try it for yourself. Simply press the Command key and the spacebar to launch Spotlight Search. Next, search for something like Bluetooth. You should see a toggle you can click to turn on or off your Mac's Bluetooth.
This also works for things like Wi-Fi, Dark Mode, and Focus modes. Again, it might not work perfectly right now, but Apple will probably improve this feature in the near future.
Autocorrect and Predictive Text Just Got Better
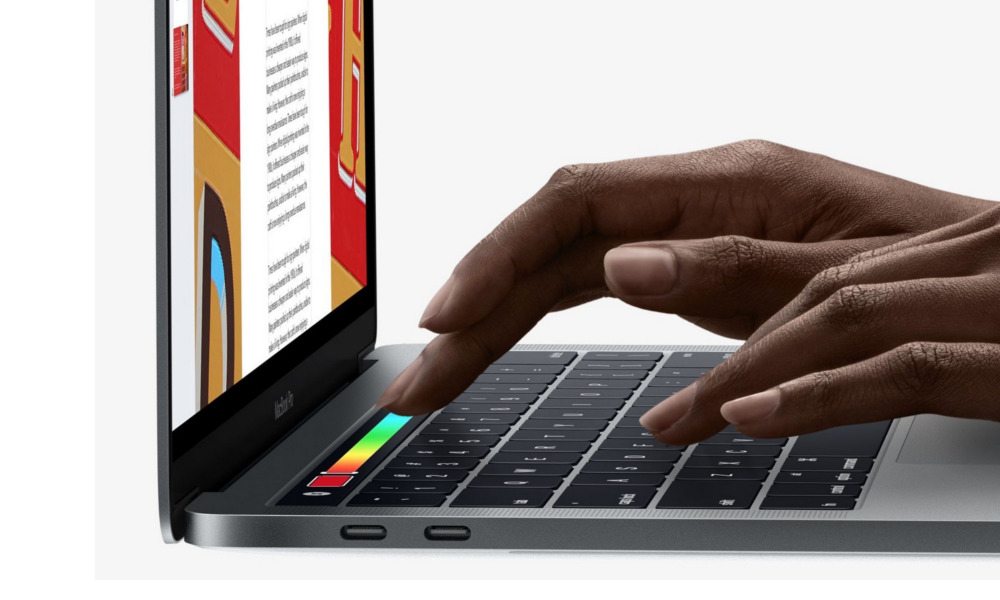
Autocorrect has always been a useful feature, but there's also always been room for improvement.
Apple knows this, which is why the company made Autocorrect even better in Sonoma. Now, you can start writing, and Autocorrect will underline the word it thinks it's wrong. You can control-click it to see the suggestion and use it if you want to.
Additionally, predictive text is also getting an improvement. It can now detect and predict what you want to say. You can then just use the spacebar to let your Mac finish whole phrases and sentences for you.
Both of these features will learn more from you and your writing style the more you use them. This will help them improve in a way that works specifically for you.
Use Your Mac for Gaming With Game Mode
Historically, Macs have never been ideal for gaming. Sure, you can play games on them, but PCs have always been the go-to option for gamers.
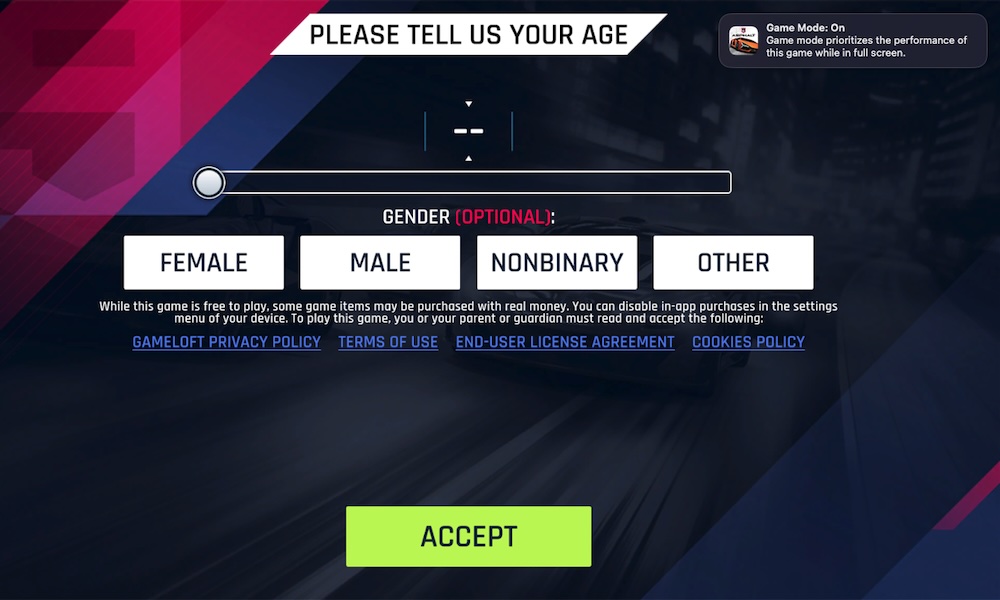
Apple wants to change that, which is why it is introducing Game Mode in macOS Sonoma, a new feature to help games perform better on your Mac by prioritizing them when they're in full screen.
Game Mode is meant to give the game you're playing top priority access to your Mac's CPU and GPU while reducing utilization by any other apps running in the background. It also ramps up the Bluetooth hardware to ensure a lag-free response from wireless gaming accessories like controllers and headsets.
Game Mode should turn on automatically as soon as you put a game into full-screen mode, but you can toggle it off by clicking the Game Mode icon in your menu bar and disabling this feature.
You Can Now Use FaceTime Reactions

You can now send a bunch of animated reactions while you're on a FaceTime or other video call without even saying a word. For example, you can signal to the other person that you like, love, or dislike something or send balloons or fireworks for some celebration.
You can find these reactions in a button in the menu bar that should appear as soon as the FaceTime Camera on your Mac kicks in. These don't just work with FaceTime — they're supported in any video app that uses the front camera and even many third-party USB webcams.
The best part is that if you're using a Mac with Apple silicon, you can also trigger all these reactions with hand gestures, just like you can with your iPhone. For instance, you can use thumbs up or thumbs down to send a like or dislike on a FaceTime or Zoom call, or give two thumbs-up for a fireworks display.
Never Write in All Caps Ever Again
A subtle but useful change in Sonoma has to do with the Caps Lock key.
Now, when you press this key, you'll see a small Caps Lock icon on your screen, letting you know you're going to type in all caps if you aren't careful.
This isn't just for the Caps Lock, though. If you use your Mac in different languages, you'll see a small icon on your screen when you change language to let you know if you're writing in English or a different language.
You Can Now Link All Your Notes
The Notes app has become an incredibly powerful tool for most of us. You can easily create Quick Notes, add photos or PDF files, and organize them with tags.
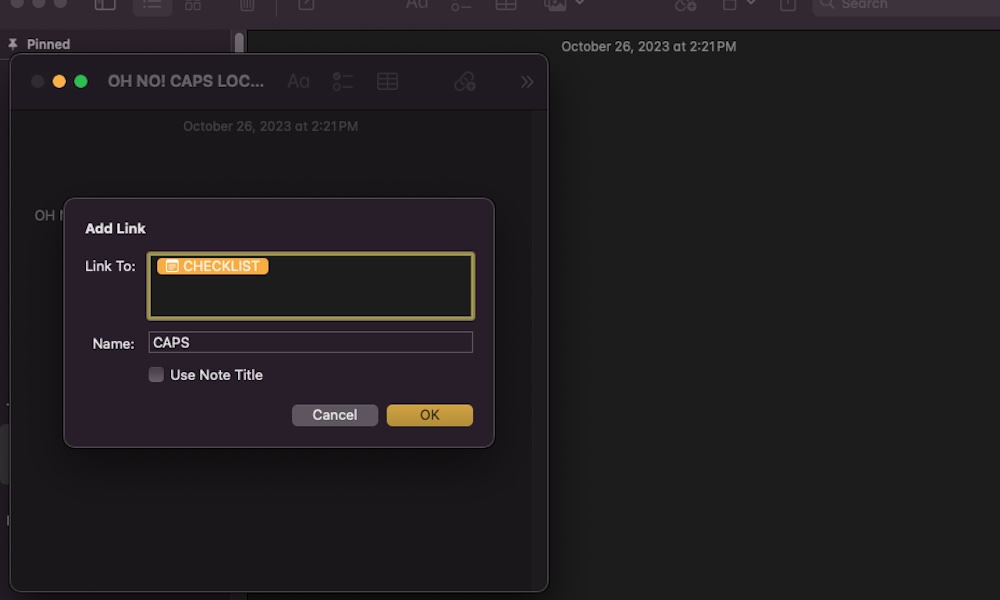
Now, thanks to Sonoma, you can also link your notes to each other in just a few steps.
Here's how to use this feature:
- Create a new note or open an existing one.
- Right-click (control-click) somewhere inside the note. You can also right-click a word or phrase if you want.
- Click Add Link. A new window will pop up in which you can enter the link to a website or enter the title of the note you want to link.
- Enter the name of the link you want to use or click on Use Note Title.
- Finally, click on OK.
Get Rid of Verification Codes Automatically
If you use two-factor authentication — which you totally should — then you know how annoying those verification messages can be.
Not only do they fill up your inboxes, but they are annoying to get rid of. Fortunately, Sonoma can now do the heavy lifting for you.
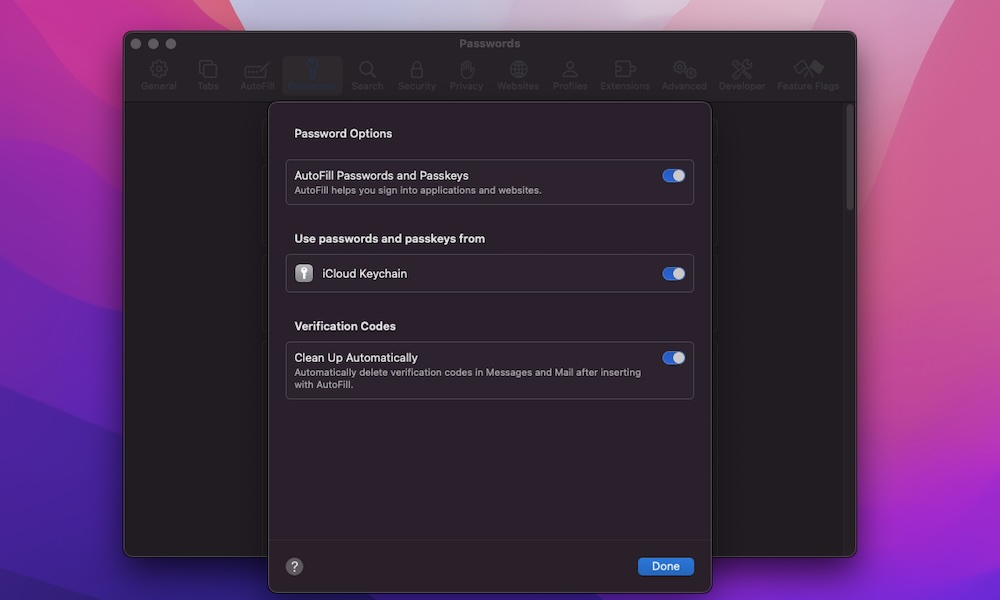
After you get a verification code and use it, your Mac can automatically delete the message for you. To use this feature, you need to:
- Open Safari.
- Click on the Safari button in the top left corner of your screen.
- Go to Settings.
- Click the Passwords tab.
- Select Password Options.
- Enable Clean Up Automatically.
As an added bonus, macOS Sonoma can also now automatically pull verification codes that you receive in the Mail app, and clean those up, too.
Protect Your Children With Communication Safety
Another really useful feature that Sonoma brings to the table is Communication Safety.
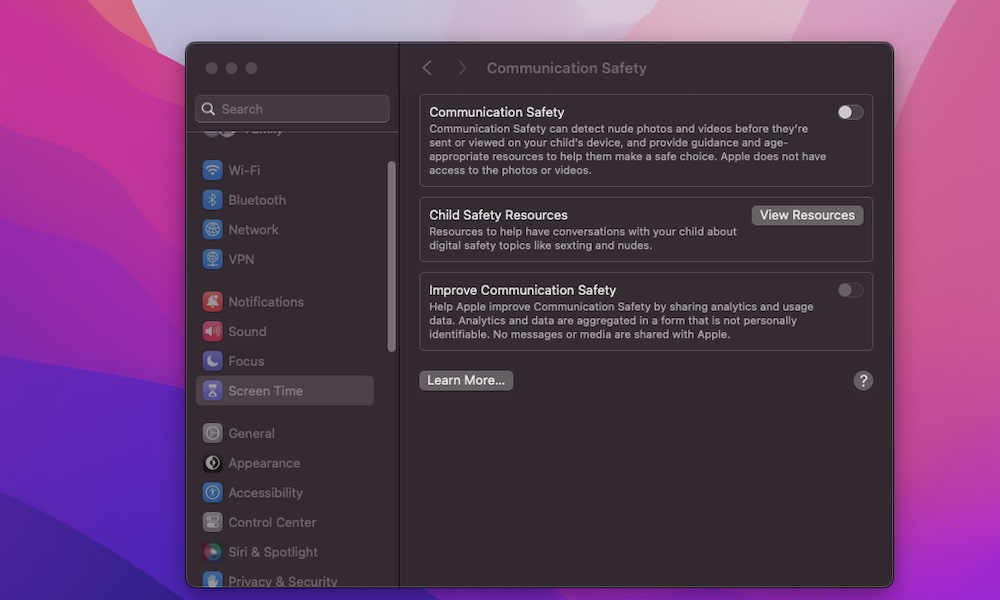
When Communication Safety is on, your Mac can detect nude photos or videos before your child receives or sends them. Additionally, it'll explain the situation to your kids and give them proper guidance.
This feature is perfect if you want to protect your children from unwanted content online, and it only takes a few clicks to set up. This is all you need to do:
- Click the Apple menu in the top left corner of your screen.
- Click on System Settings.
- Scroll down on the left sidebar and select Screen Time.
- Click on Communication Safety.
- Turn on Communication Safety.
And that's all you need to do. For privacy purposes, all the processing occurs on your Mac; by default, no data is ever sent to Apple. If you do want to help Apple improve this feature, you can share some analytical data with the company by enabling Improve Communication Safety. Apple notes that the data is anonymized and no messages or media are ever shared even when this is enabled. Still, privacy-conscious users will likely want to keep this switched off, and the feature will work just as well either way.
Blur Sensitive Content
While Communication Safety is an older iOS feature that's only come to macOS this year, Apple is expanding the photo recognition technology to all users on both iOS 17 and macOS Sonoma with Sensitive Content Warnings.
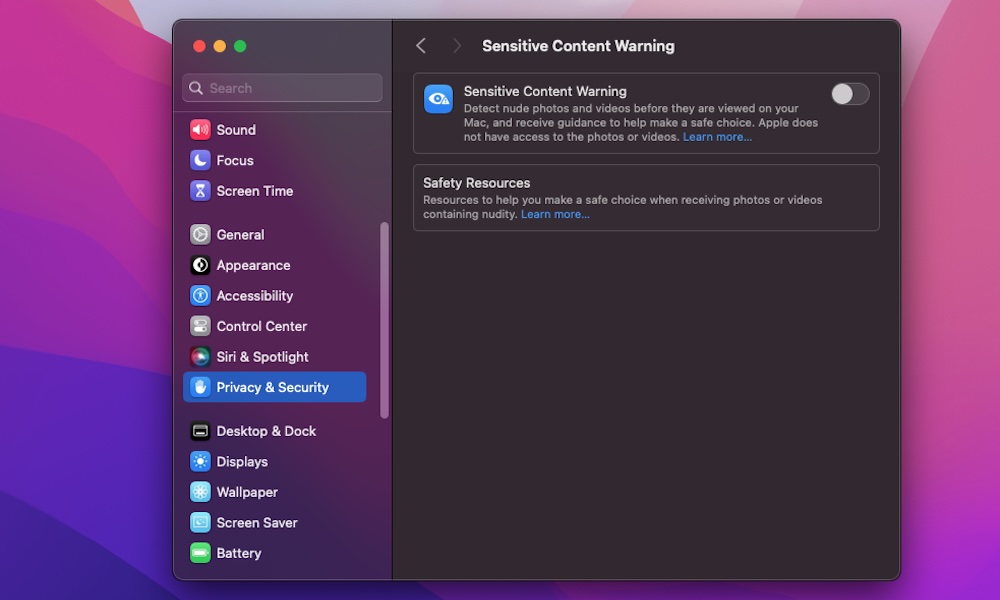
When enabled, this feature will detect and blur nude photos or videos for any user, not just kids. Here's how to toggle this on if you want to use it for yourself by doing the following:
- Click the Apple menu in the top left corner of your screen.
- Select System Settings.
- Scroll down on the left sidebar and select Privacy & Security.
- Scroll down on the right and click on Sensitive Content Warning.
- Turn on Sensitive Content Warning.
Stop Saying "Hey Siri"
Granted, it's a small change, but if you have an Apple silicon Mac, you no longer need to say "Hey, Siri" to call up your Mac's voice assistant.
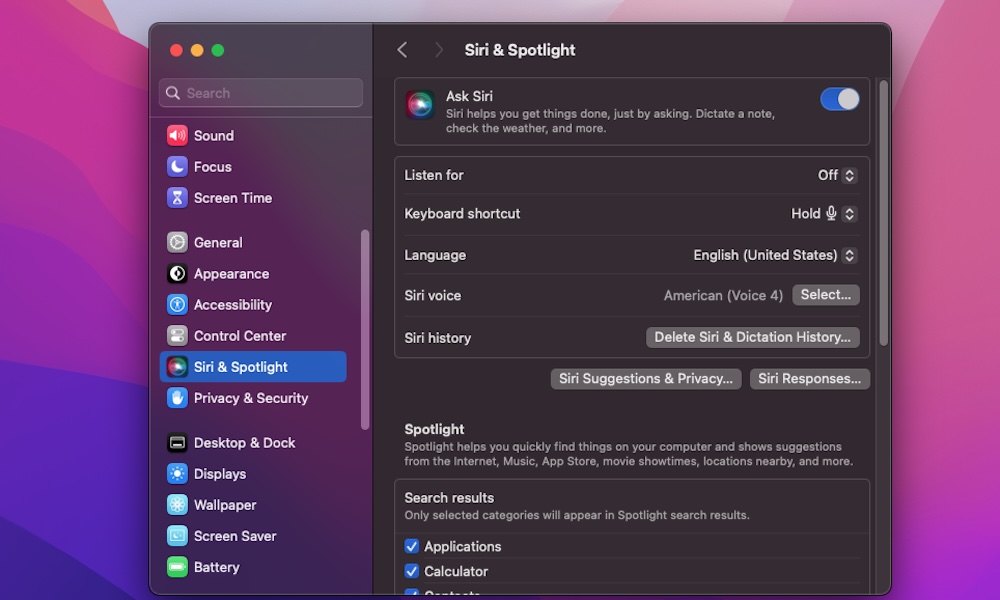
Instead, you can now say just "Siri," and your Mac will understand you want Siri to come up. This alternative call phrase should be enabled by default, but here's how you can check it (and change it if you'd prefer to keep the "Hey" on front):
- Open the Apple menu in the top left corner of your screen.
- Go to System Settings.
- Scroll down on the left sidebar and select Siri & Spotlight.
- Click the drop-down menu next to Listen for.
- Select "Siri" or "Hey Siri."
It's Easier to Find Messages on Mac Now
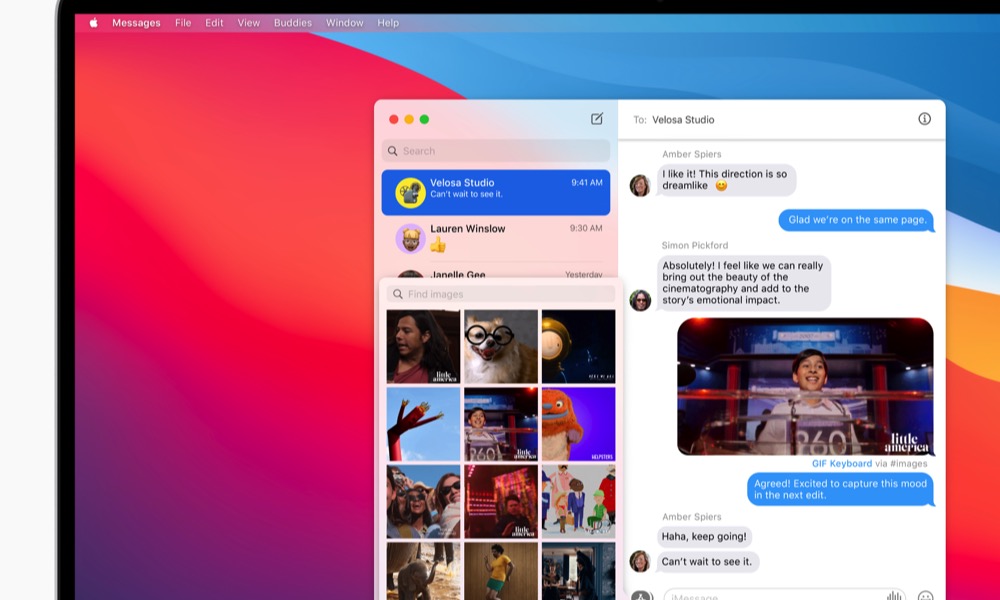
Sonoma has made it so much easier to locate any message you've sent or received.
Before, you could only write some words in the search bar, hoping to find what you were looking for. Now, however, there are more filters you can use and combine to find your messages faster.
For instance, you can write a word like "photo" or the name of the contact or mix both filters together to find the right result. There are a handful of filters you can use, but you can start with "Photo," "Location," "Document," and "Link."
Change the Text Size of Specific Apps
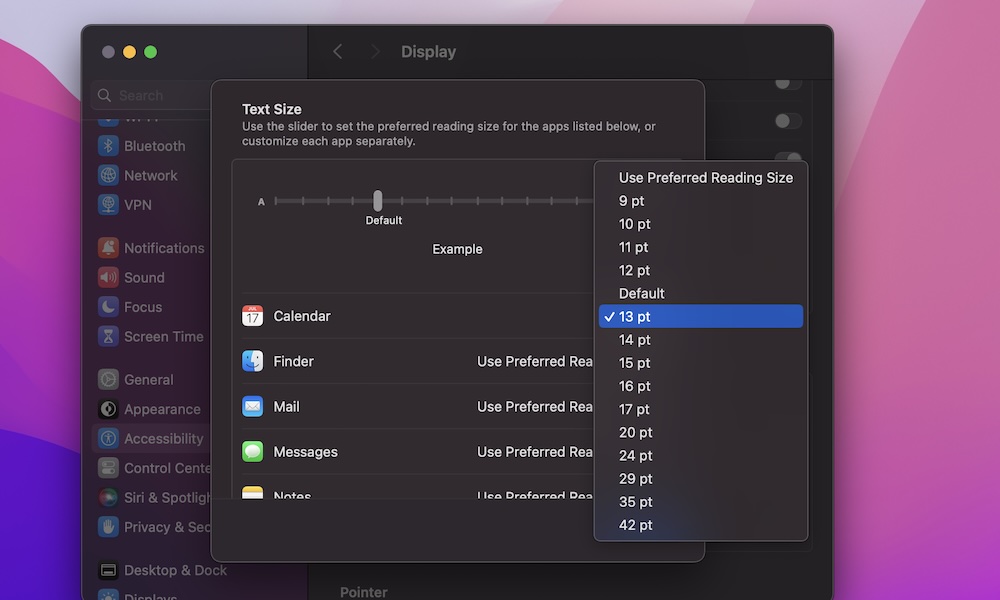
Another huge change for some of us in Sonoma is the ability to change the text size for individual apps.
That's right; you can increase the text size for the Mail app without changing the size for the Messages app. The sky's the limit, and this is how you can do it:
- Click the Apple menu in the top left corner.
- Go to System Settings.
- Scroll down in the left sidebar and select Accessibility.
- Click on Display.
- Scroll down and go to Text Size.
Change the text size to whatever you like, or click the drop-down menu next to the app you want to change the text size for that specific app.
Unfortunately, not every app is available at the time of writing, but it's still a great feature for those of us who don't like wearing glasses all the time.

