
15 Masterful Safari Tips and Tricks to Use on Your iPhone
 Credit: Apple
By far, the best browser for your iPhone is Safari. It's easy to use and works perfectly with the complete Apple ecosystem.
By default, most of us use it to browse the web or read our favorite articles online. But the truth is that Safari has much more to offer than that.
Safari is like a Swiss army knife. You can find many different tools and features that will take your browsing experience to the next level.
While there are too many for us to cover in one article, read on for 15 tips to help you become a pro user with the Safari app on your iPhone.
Create Your Own Profiles in Safari
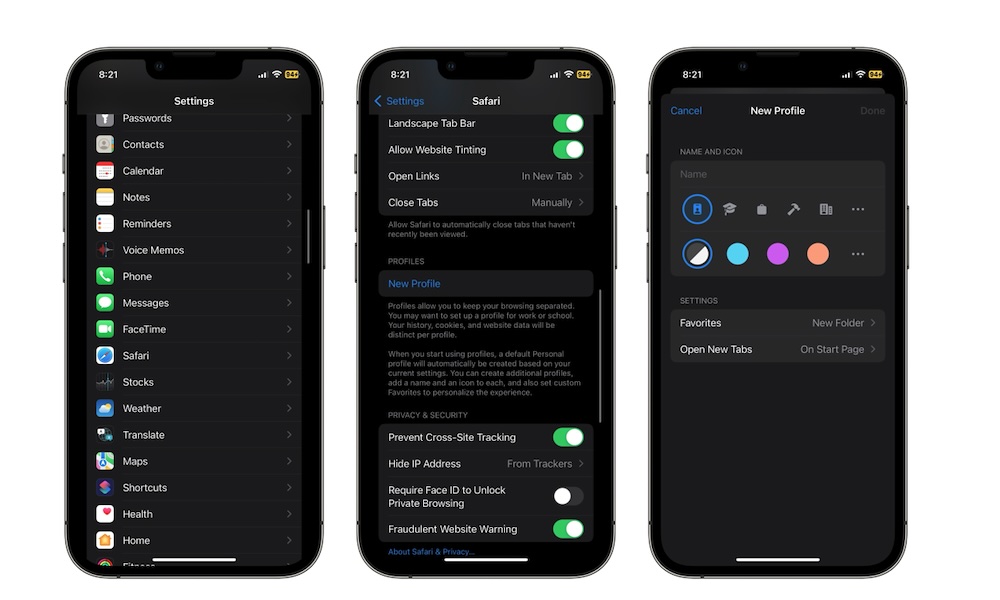
In iOS 17, Apple added a new feature to Safari that lets you create profiles. You can use different profiles for different aspects of your life. For instance, you can create one profile for work and another one for school, so you can keep all your tabs open for different things without mixing them.
Here's how to create a Safari profile on your iPhone:
- Open the Settings app.
- Scroll down and go to Safari.
- Scroll down again, and under Profiles, tap on New Profile.
- Add a name and icon, and change the color to your new profile.
- You can also change the Settings of your profile.
- When you finish, tap on Done in the top right corner.
Search for Something in All Your Open Tabs
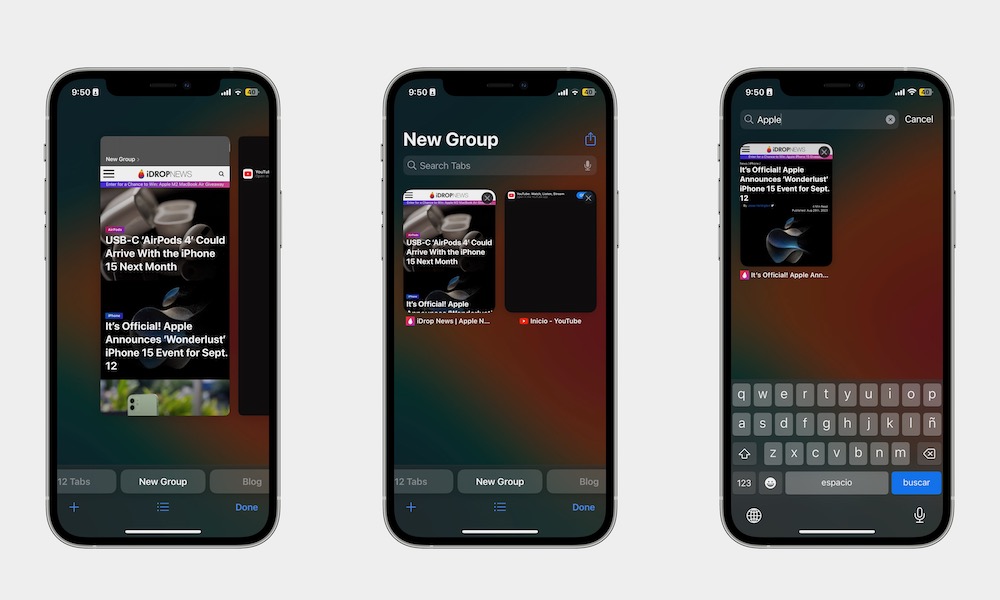
By now, you probably know that you can go to an individual page and search for a specific word or phrase. But what happens when you want to find something but don't remember which tab had it?
Well, Apple thought of that, which is why you can perform a search across all your open tabs. This way, you can enter a simple keyword and search through the names of all the websites you have open.
To search for something on all your open tabs in Safari, you need to:
- Open Safari.
- Swipe up from the address bar to go to all your open tabs.
- Scroll up until you reach a search bar.
- Enter the word or phrase you want to search for.
And that's it. The tabs that match the words you searched for will be the only ones available. Just keep in mind that this won't search the content of the pages, just the titles, but it can still help you track down what you're looking for if you have a lot of tabs open.
Block All Cookies Automatically
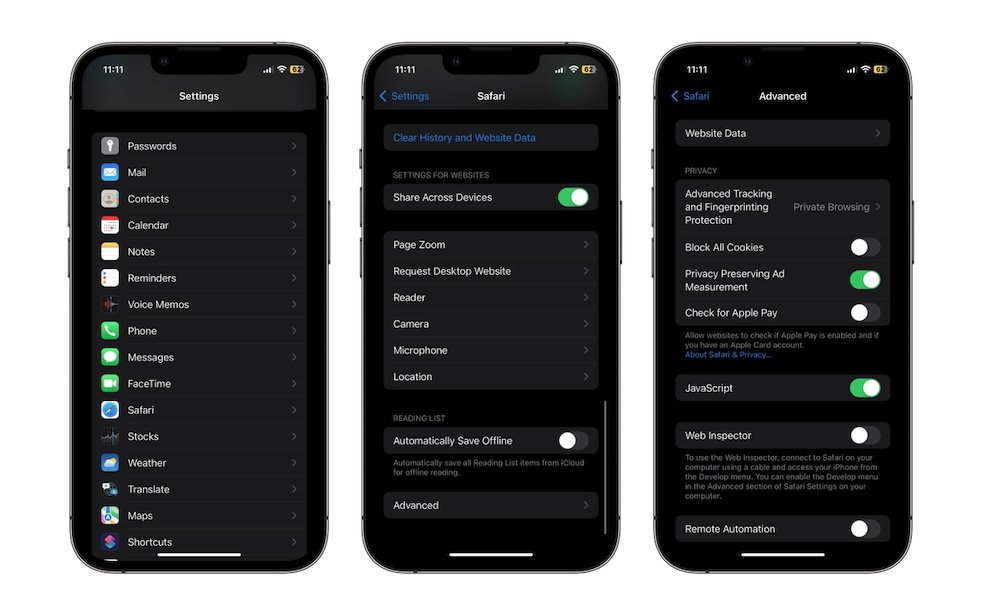
Safari is all about security, and that includes avoiding being tracked by cookies.
By default, you'll be tracked any time you visit a website, but you can change that on your iPhone by doing the following:
- Open the Settings app.
- Scroll down and tap on Safari.
- Scroll down to the bottom and tap on Advanced.
- Enable Block All Cookies.
While this offers strong privacy protection, it does come with a downside. For example, you won't be able to stay signed in to the websites you visit since most use cookies to store persistent login information.
Lock Your Private Tabs Behind Face ID or Touch ID
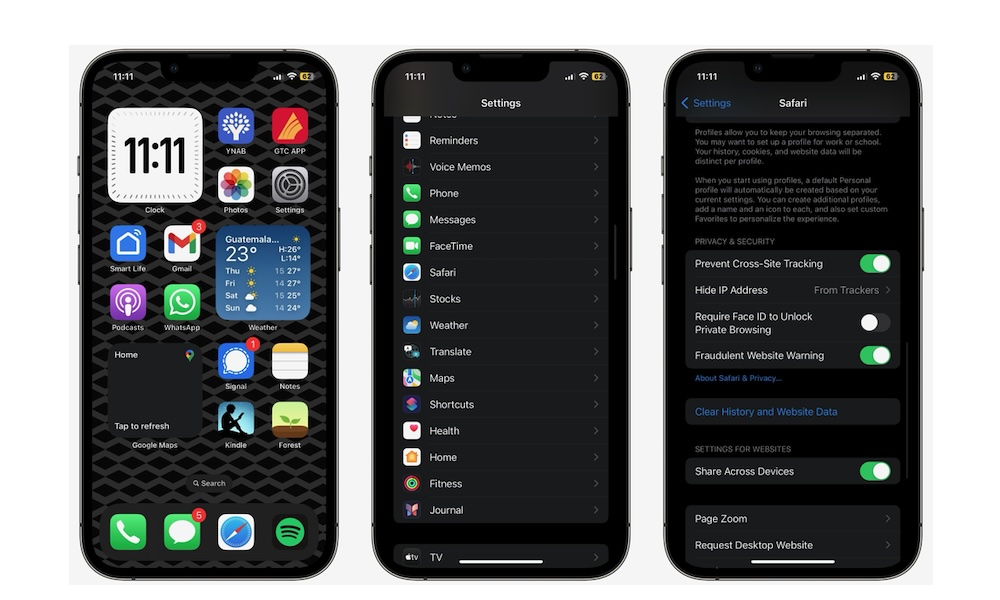
A new feature in iOS 17 is the ability to lock your private tabs. That way, even if you leave incognito mode open in Safari, no one will be able to access the tabs you were checking without authenticating with Face ID, Touch ID, or your passcode.
To lock your private tabs in Safari, do the following:
- Open the Settings app.
- Scroll down and go to Safari.
- Scroll down again, and under Privacy & Security, tap on Require Face ID to Unlock Private Browsing.
Listen to Pages in Safari
Another recently new feature is the ability to listen to web pages instead of reading them. This will make "reading" your favorite articles while doing other stuff easier than ever.
To listen to web pages in Safari, you'll have to do the following:
- Open the Safari app.
- Go to any website you want.
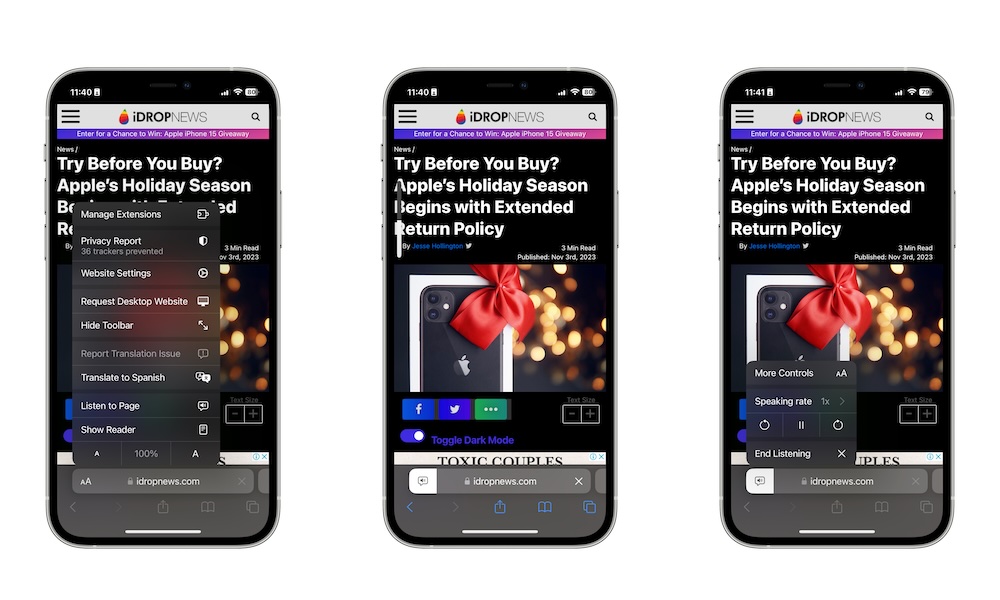
- Tap the aA button in the top left corner of your screen.
- Tap on Listen to Page.
And that's it. Your iPhone will start to read the page for you. It's similar to the Spoken Content feature, but the voice is slightly better. To finish listening to the page, you'll need to tap the listening button where the aA button was and then tap on End Listening.
Change the Zoom of Any Page

If the website's text is a bit too small for your liking, you can easily pinch with two fingers to zoom in, so it's easier to read.
However, doing this all the time can be time-consuming and pretty boring. The good news is that your iPhone can automatically change the zoom of any website as soon as you load it. This is how:
- Open the Settings app.
- Scroll down and go to Safari.
- Scroll down to the bottom and tap on Page Zoom.
- Choose the zoom percentage you want.
Change the Desktop Website
By default, you should get the mobile version of any website. This is usually more helpful for mobile users and even makes some pages load faster.
With that said, some of us like using the desktop version of at least some of the websites we visit.
If you want, you can change the request to the desktop website of any page you visit by tapping the aA button and then tapping Request Desktop Website.
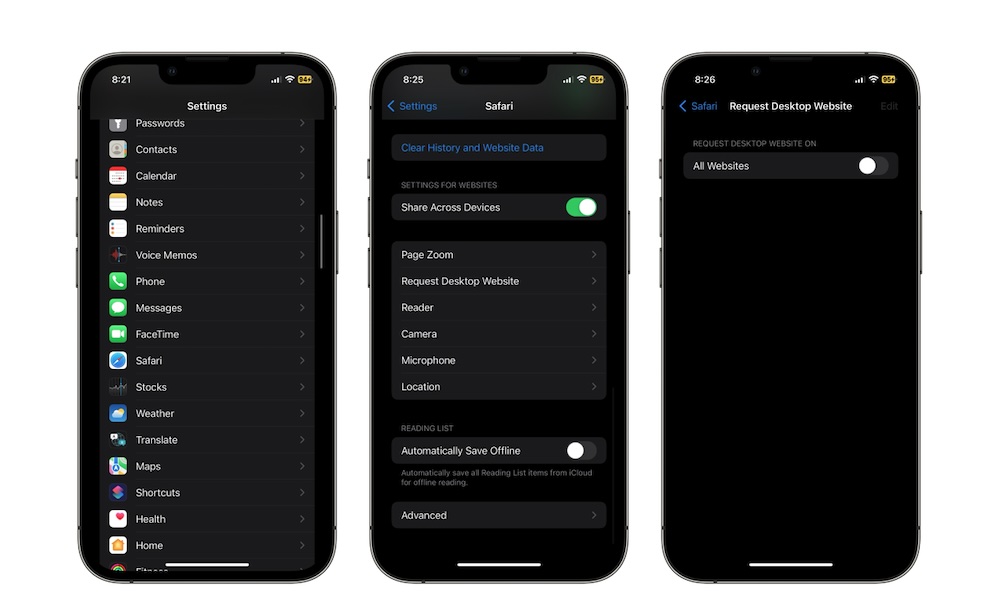
However, if you plan on using the desktop version all the time, you can make it so your iPhone always requests the desktop website when you visit it. This is how:
- Open the Settings app.
- Scroll down and tap on Safari.
- Scroll down to the bottom and then select Request Desktop Website.
- Enable All Websites.
Note that while this helps with many websites, it doesn't work with all of them; some will still detect you're using mobile Safari and serve you up the mobile version either way.
Sync Your Safari Extensions Across Your Devices

Apple now allows extensions in the Safari app for iPhone, letting you install as many useful extensions as you want.
With that said, you're probably only using these extensions on your iPhone but not using them on your iPad or Mac. Worry not; you don't have to manually install all your extensions on other Apple devices; you can just share them by doing the following:
- Open the Settings app.
- Scroll down and go to Safari.
- Scroll down, and under General, tap on Extensions.
- Enable Share Across Devices.
Extensions in Safari on the iPhone and iPad are only available in iOS/iPadOS 15 or later.
Stop Verifying Your Identity
Nowadays, it's common to have to verify your identity by using a CAPTCHA. While this is useful for websites, it can be annoying for us users.
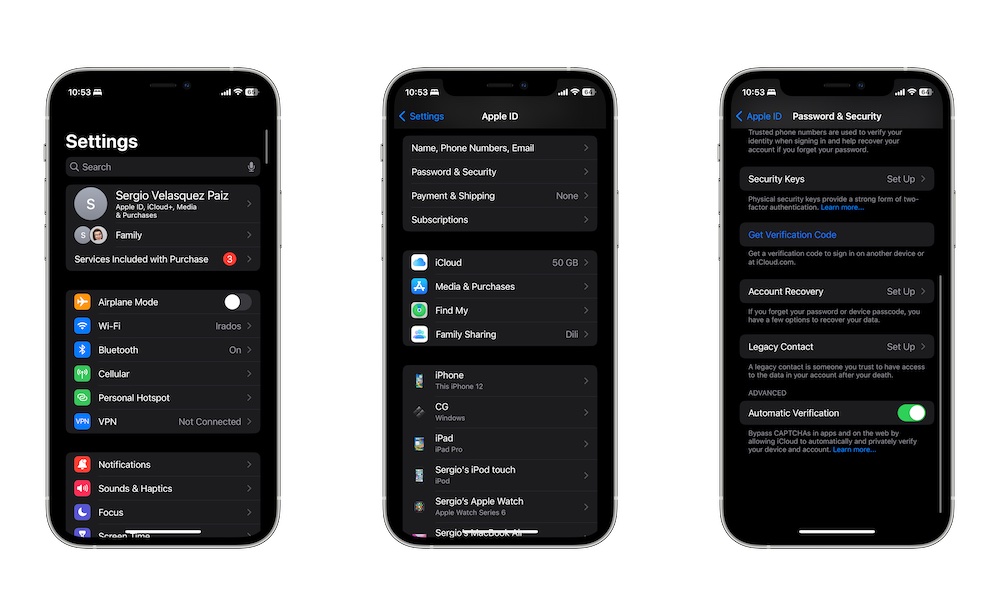
Luckily, Apple knows how annoying this can be, and it's made it easier to skip this verification with the Automatic Verification feature. Here's how you enable it:
- Open the Settings app.
- Tap on your Apple ID. That is, your account's name at the top of the Settings app.
- Go to Sign-In & Security.
- Scroll down to the bottom and enable Automatic Verification.
Note that the app or website has to support Automatic Verification for this to work, so this won't eliminate every CAPTCHA, but it should help to cut down on them. You also need to be using iOS 16 or later to take advantage of this feature.
Use the New Safari Widget
Apple has also added a new widget for Safari in iOS 17. Now, it's easier than ever to check your reading list so you never forget about that interesting article you wanted to read.
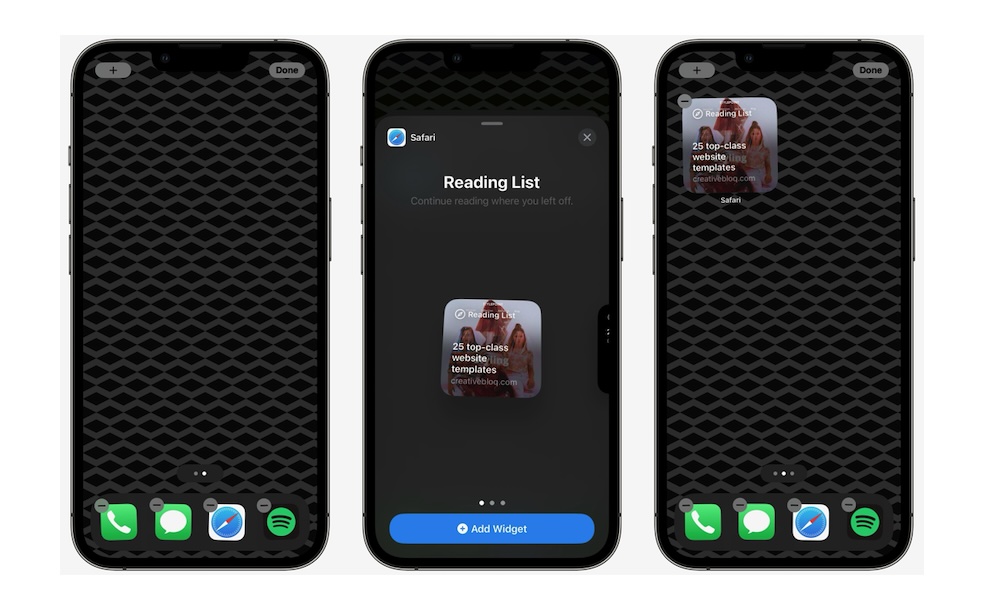
Here's how to start using the Safari widget on your iPhone:
- Go to the Home Screen and long-press it until the apps start to jiggle.
- Tap the plus icon in the top left corner of your screen.
- Scroll down and find Safari.
- Select the size of the Safari widget you want and then tap on Add Widget.
The widget will be automatically added to your Home Screen. Long-press it and drag it to wherever you want it.
Change the Search Engine You Use in Safari
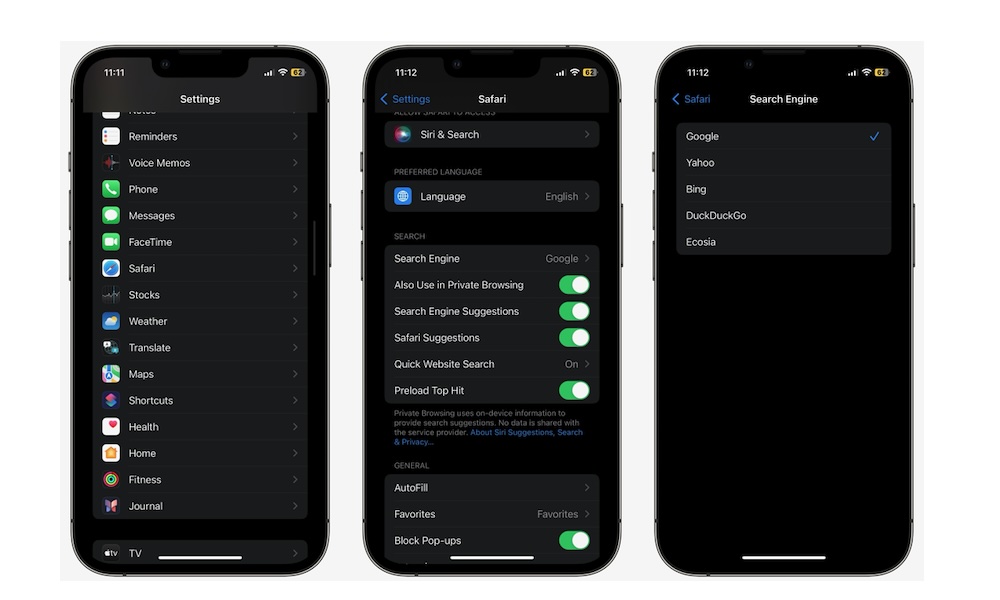
By default, you'll be searching the web with the help of Google. It's not surprising; Google is the most popular search engine in the world.
However, it's also not everyone's favorite search engine. If you prefer to use a different search engine on your iPhone, you can change it by doing the following:
- Open the Settings app.
- Scroll down and tap on Safari.
- Go to Search Engine.
- Choose the search engine you want to use.
Note that with iOS 17, you can also set a different default search engine when using Private Browsing mode, such as the more privacy-focused DuckDuckGo.
Close All Tabs at Once
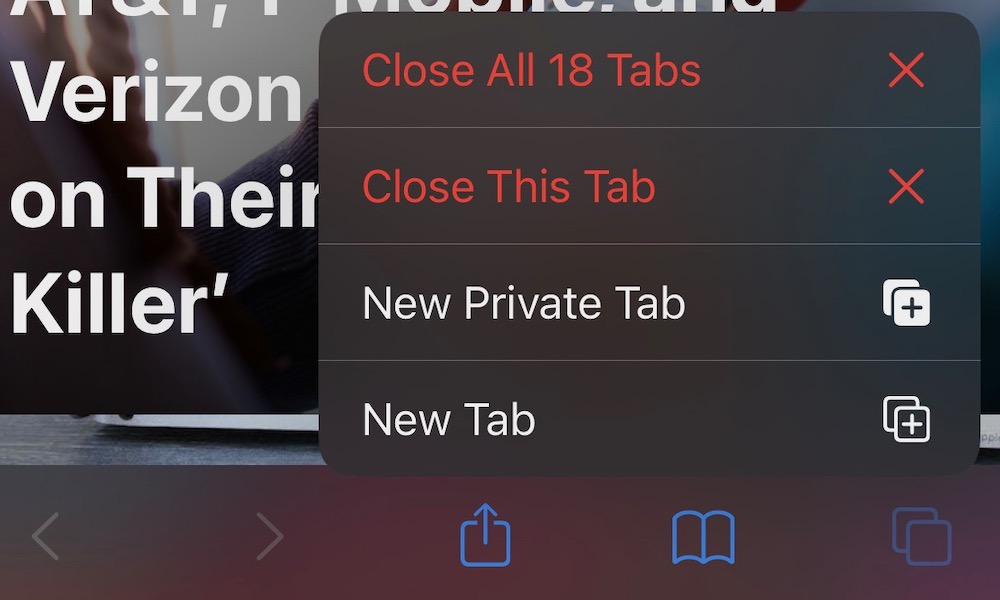
Many of us tend to keep a lot of tabs open just in case we need them someday. Well, more often than not, that day never comes, and we just end up hoarding tabs for no reason.
Fortunately, there is a way to close all your open tabs with just a few taps.
First, you'll need to open Safari and then swipe up from the address bar to go to all your open tabs. Now press and hold the Done option in the bottom right corner. Finally, tap on Close All Tabs.
On the other hand, if you want to close all tabs but one, you can press and hold the tab you want to leave open and then select Close Other Tabs.
Automatically Close Tabs After Some Time
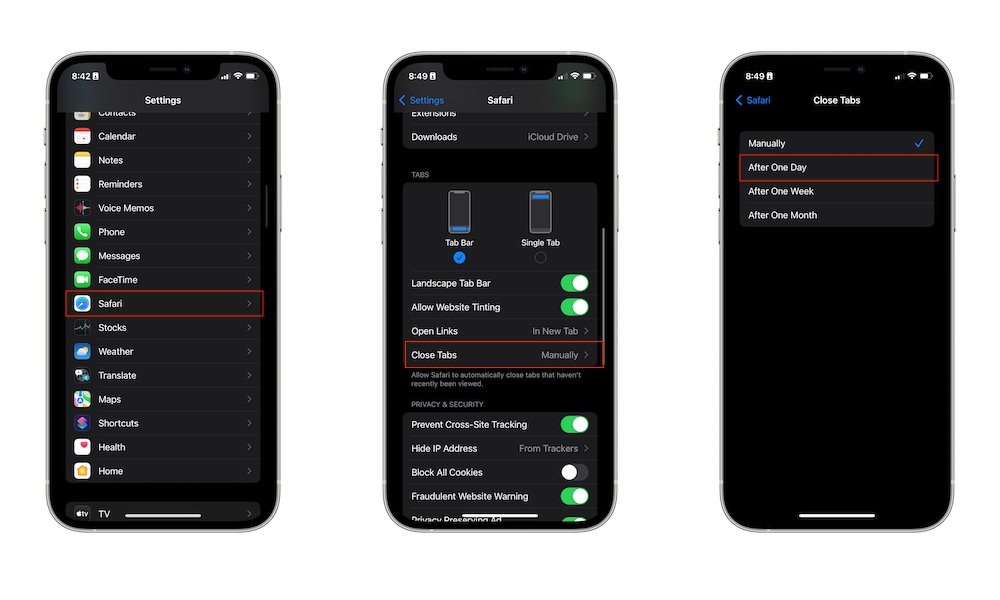
If you want to keep your Safari clean, you should close the tabs you use after you're done with them.
But if you forget to close them, you can also let your iPhone automatically close them for you after some time has passed. Here's how to use this feature:
- Open the Settings app.
- Scroll down and tap on Safari.
- Scroll down, and under Tabs, tap on Close Tabs.
- Select the timeframe you want.
Open Recently Closed Tabs
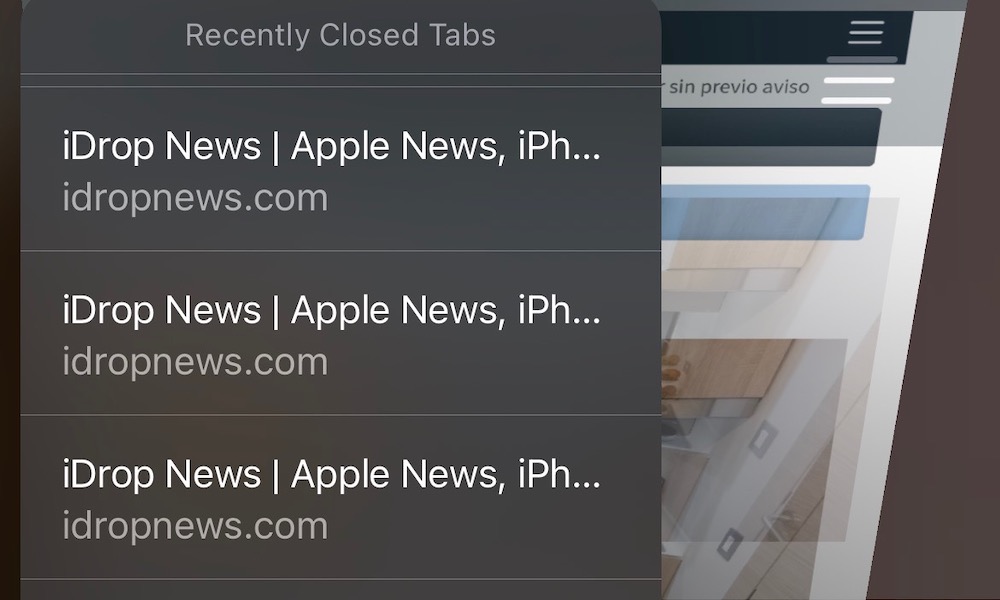
On the other hand, what happens if you accidentally close a really important tab?
Well, there is a solution for that, too. Safari lets you reopen recently closed tabs with ease.
After you open Safari, swipe up from the address bar to go to all your open apps.
Now, press and hold the plus icon in the bottom left corner of your screen. You'll see a list of tabs will pop up. These are all the tabs you recently closed. Find the tab you want to open and then tap it to reopen it.
Save Any Page as a PDF File
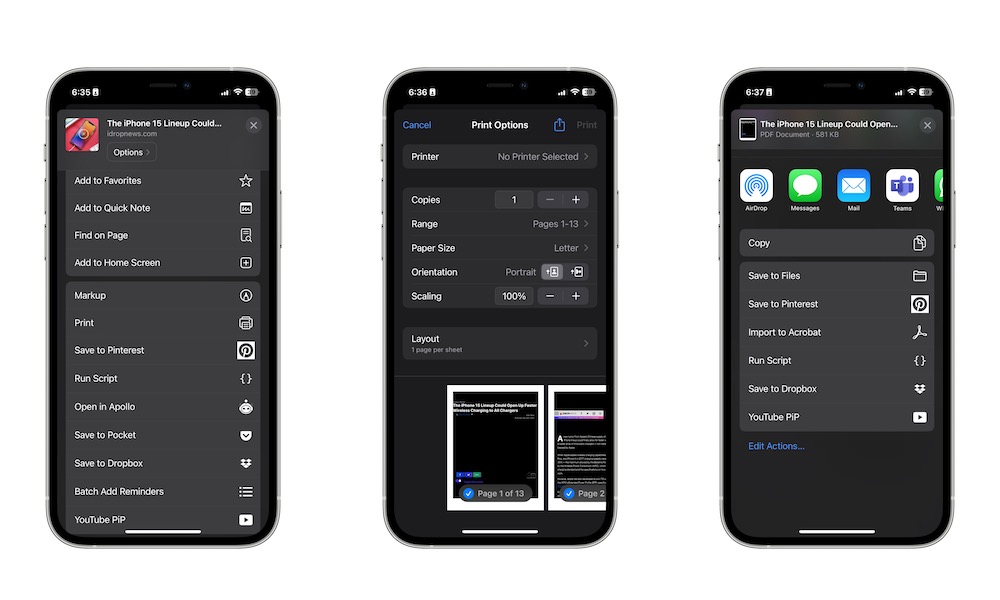
If you've found a really useful or interesting article, you can save it in your reading list so you can quickly find it.
But if you want to be able to access it or print it for later, your iPhone also lets you save that web page as a PDF file.
This feature is a bit hidden, but here's how to save web pages as PDF files:
- Open Safari.
- Go to the web page you want to save.
- Tap the Share button at the bottom of your screen.
- Scroll down and select Print.
- In the print window, pinch to zoom into the preview at the bottom of your screen.
- Tap the Share button in the bottom left corner of your screen.
- Scroll down and select Save as PDF.
And that's it. The page will be saved in the Files app as a PDF file. You can then share it or print it whenever you want.