
The Weather App Has These Incredible Features (Most of Us Don’t Know Exist)
 Credit: Jesse Hollington
Weather apps are a dime a dozen in the App Store. And while most of them are great, there’s one that truly stands out from the rest.
Of course, we’re talking about Apple’s native Weather app. Sure, there may be other weather apps that can give you a bit more data, but the Weather app has nearly everything you need.
Importantly, it also works great with the whole Apple ecosystem, as you should expect from any Apple product. For example, you can add the Weather widget to your Lock Screen or Home Screen in a neat way.
With that said, you might not be using the app to its full potential. Here are some tips and tricks to make the most out of the Weather app on your iPhone.
Add As Many Locations as You Want
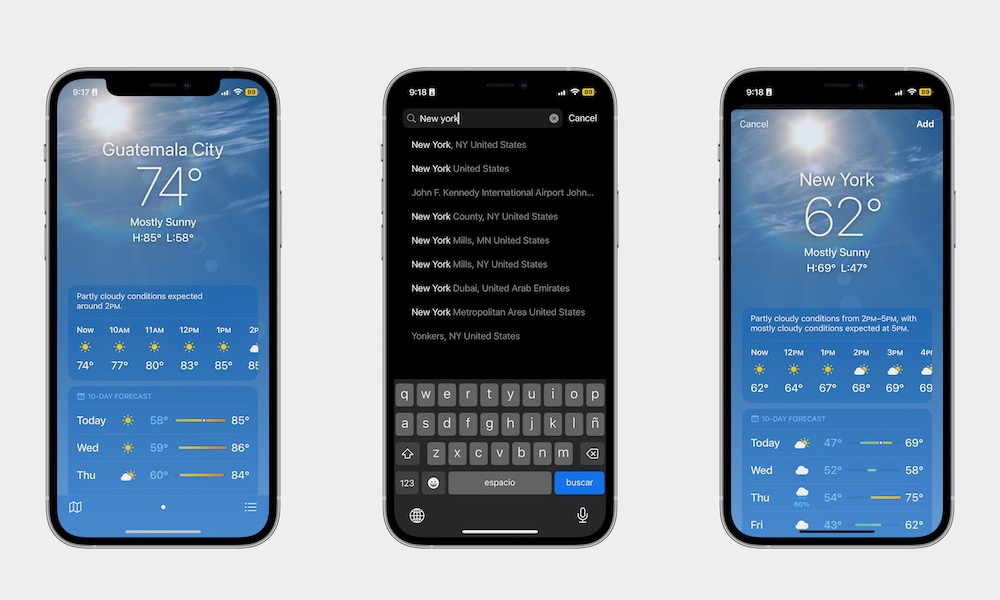
By default, the Weather app will show you the weather at your current location. But you can also keep track of other locations, which is perfect if you travel a lot or have family in a different region.
To add a new location, you need to:
- Open the Weather app.
- You should see the weather in your current location. Tap the three-line button in the bottom right corner of your screen.
- In the search bar at the top, enter the name of the city or place you want to add.
- Tap the place you want from the search results.
- It might take a few seconds, but you should see the current weather of the place you selected. To add it to your own list, tap the Add button in the top right corner of your screen.
You can add as many locations as you want and track all the weather in real time. If you want, you can also rearrange the locations by long-pressing them and then dragging them up or down in the list.
Start Getting Weather Notifications

If you don’t want your day to get suddenly ruined by bad weather, you can enable notifications for precipitation and severe weather.
- Go to the Weather app.
- Tap the three-line button in the bottom right corner of your screen.
- Now tap on the three-dot button in the top right corner of your screen.
- Select Notifications.
- If you need to, make sure first to enable notifications for the Weather app.
- Under Current Location, enable the notifications you want to get. You can choose Severe Weather and Next-Hour Precipitation.
And that’s it. If you’ve added more locations to your Weather app, you’ll see them right below the Your Locations section. You can tap the location you want and then enable the Severe Weather and Next-Hour Precipitation notifications.
Keep Track of the Next 10-Day Forecast
If you’re planning to travel to another place or just want to know what kind of clothes you should wear in the next few days, you can use the 10-day forecast to get all the data you need.
- Open the Weather app.
- Select the location you want. Tip: You can quickly switch between your current location or your added locations by swiping left or right.
- Below the hourly forecast, you should see the 10-day forecast.
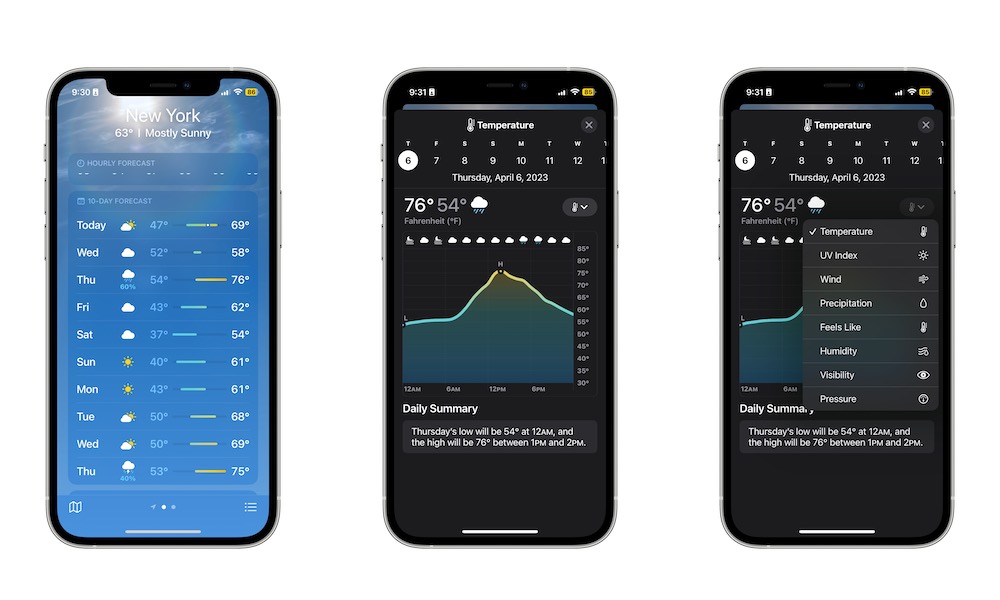
Learn More About What the Next Few Days Will Look Like
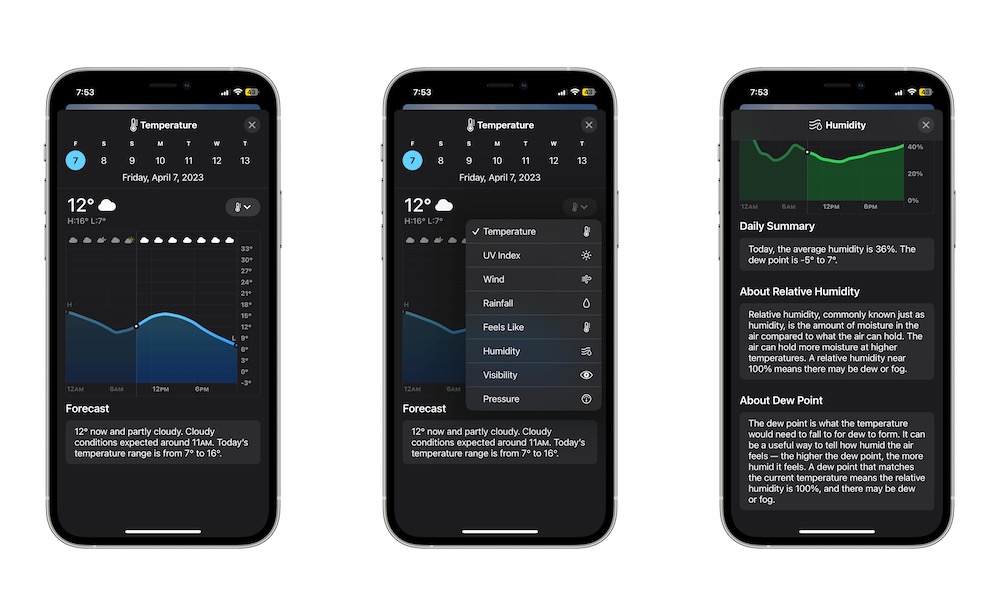
Besides checking the next 10-day forecast, you can actually get more precise information about each upcoming day, including what the UV index, precipitation, and wind will look like. This is what you need to do:
- Go to the location you want in the Weather app.
- Scroll down to the 10-day forecast and tap on any day to get more information about it.
- By default, you should see the basic temperature view, but if you want to get more data, tap on the Temperature button next to the temperature of that day and select the data you want to see.
As you can see, there is a lot of data you can cover. If you tap near the top of the screen, you can also choose any other day you want. And if you scroll down a bit, you’ll see more information about what these metrics mean and what you need to know about them.
Learn More About Your Current Weather
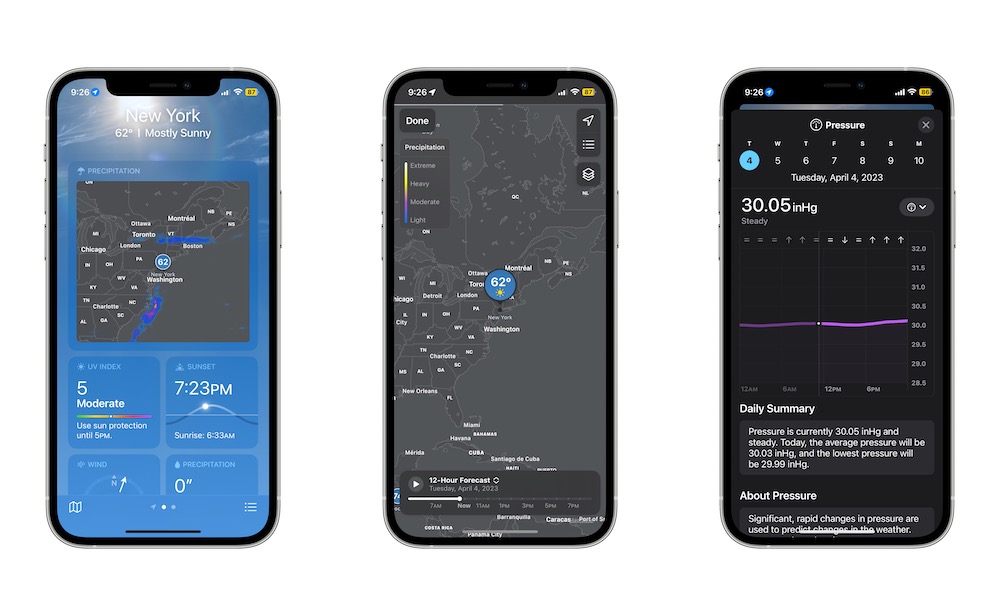
You can also get more data about the current weather in any location. For instance, you can check for pressure, precipitation, humidity, and even the UV index. Basically, you can see all the data you need right on the Weather app.
- First, open the Weather app.
- Go to the location you want to check.
- Scroll down, and right below the 10-day forecast, you’ll see a lot of additional data about your current weather.
- Tap on any of the boxes to get more information.
Use the Right Temperature Setting
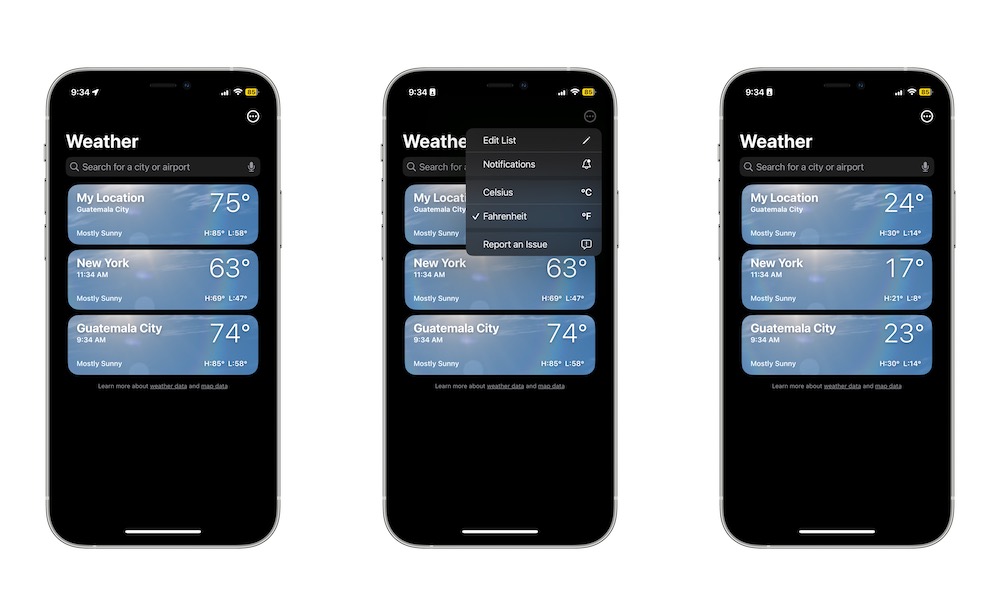
It doesn’t matter if you’re more of a Celsius or Fahrenheit type of person, the Weather app can show you the temperature in any way you want. All you need to do is:
- Open Weather.
- Tap the three-line button in the bottom right corner of your screen.
- Tap the three-dot button in the top right corner.
- Select Celsius or Fahrenheit.
Your temperature will automatically change to whatever you choose. Unfortunately, you can’t set specific temperature units for specific locations. But since it’s pretty easy to switch between them, you shouldn’t have any issues.
Check the Air Quality of (Almost) Any Location
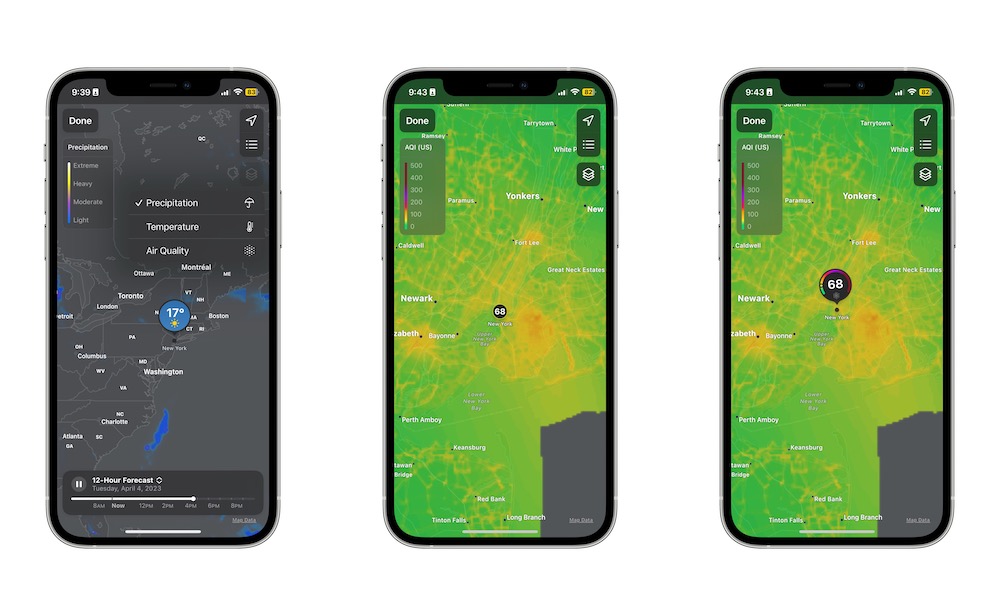
The Weather app shows you a real-time forecast of the whole world with the help of a map. Not only that, but you can use it to check for the forecast for the next 12 hours and even check the air quality in any place.
To access this map on the Weather app, you need to:
- Open the Weather app.
- Select the location you want.
- Tap the Map icon in the bottom left corner of your screen.
- To check the forecast of the day, tap the bottom forecast and select 12-Hour Forecast.
- Moreover, you can also check the air quality by tapping the three-square icon near the top right side of the screen.
- Next, select Air Quality.
You’ll see a number right in the location you chose. This number represented the Air Quality Index or AQI for short. Basically, the smaller the number, the better the air quality of a place.
If you’re looking for a place to go, anything below 50 should be your best choice. With that said, keep in mind that not every place has an Air Quality Index available.
Quickly Switch From Weather to Maps
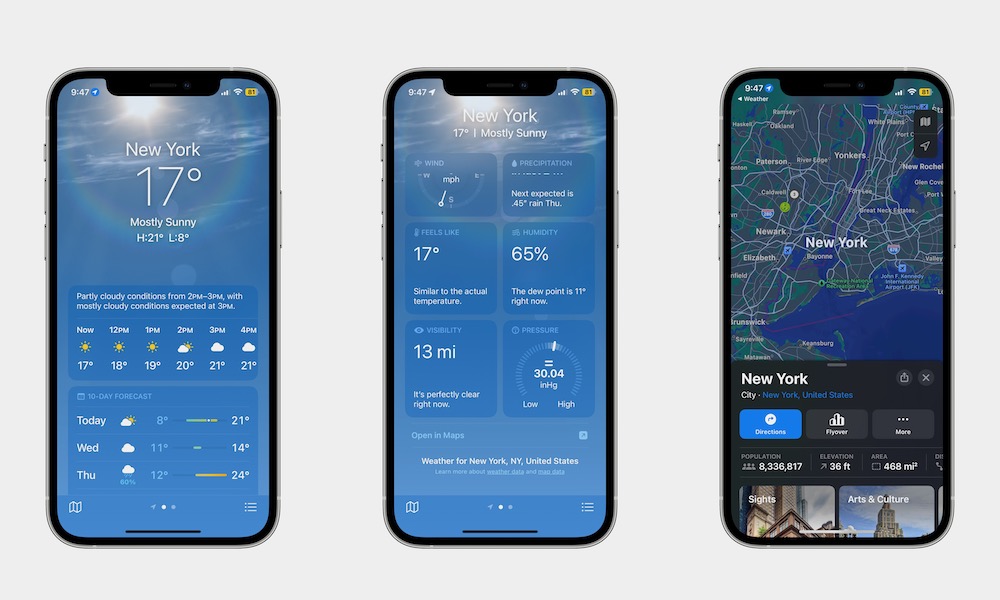
If you’re searching for the weather of a place you plan on going, you can quickly open the Maps app to set your destination or see how long it’ll take you to get there.
- Open the Weather app.
- Choose the location you want.
- Scroll down to the bottom of your screen and tap on Open in Maps.
You’ll automatically be redirected to the Maps app, which will show you the location you chose in Weather. You can then use the Maps app as you usually would and ask for directions.
Master The Weather App
The Weather app is one of the easiest, most straightforward apps Apple has to offer. However, that doesn’t mean it doesn’t have some neat tricks you can take advantage of.
If you never want your day to be ruined by rain or snow, make sure to master the Weather app and use it to its full potential.